
Nothing ruins a market day or outdoor event faster than a wobbly, half-assembled canopy tent. Whether you’re a seasoned vendor or setting up your first pop-up for a weekend fair, knowing how to set up a canopy tent quickly and securely is essential. The good news? With the right technique, you can have your 10×10 or 10×15 canopy fully assembled in under two minutes, even solo. This guide walks you through every step, from unpacking to locking the frame, adjusting height, and securing against wind. You’ll learn pro tips, avoid common mistakes, and gain the confidence to set up your canopy like a pro every time.
Unpack and Prepare Your Canopy
Before lifting a leg or unfolding a truss, proper preparation saves time and prevents damage. Start by unhooking the clasp at the base of the transport bag and pulling the strap out from underneath. Peel open the Velcro side closure and slide the bag off completely. For 10’x10′ instant pop-up models, unzip the polyester roller bag and remove the frame and canopy cover.
Lay all components flat in your chosen setup area. Ensure the ground is level and clear of debris, since this prevents uneven leg extension and instability later. First-time users should expect a longer setup as the roof may need initial alignment, but with practice, full assembly can take as little as 60 seconds. No tools are needed; everything clicks, fastens, and unfolds by hand.
Choose the Right Setup Location
Pick a site that’s flat, open, and sheltered from strong wind if possible. Ground type matters: grass allows for stakes, concrete requires base weights, and sand needs sandbags. Always consider wind direction and position the tent so the narrow side faces into the wind for less resistance. Avoid uneven or sloped ground unless your canopy has adjustable legs.
Gather All Components First
Before starting, verify you have:
– Frame (aluminum trusses and legs)
– Canopy roof or cover
– Transport bag
– Ground anchors or weights (if applicable)
Missing parts lead to mid-setup frustration. If your canopy uses a frame-attached roof, ensure the Velcro straps and elastic loops are intact. For separate covers, confirm the valance edges and tensioning straps are undamaged.
Attach the Roof to the Frame
Some canopies ship with the roof detached. If yours does, this step is critical.
Center the Canopy on the Frame
While the frame is still partially folded, place the fabric roof in the center. Match the middle of the canopy to the center peak of the frame. Make sure the valance edges align correctly. The top edge should sit at or just below the peak pole.
Secure the Center Peak First
Lift the central mast upward slightly. Take the elastic loops sewn into the center of the roof and hook them over the slots on the mast’s protective cover. Cross the loops for a snug fit. Once attached, gently push the peak back down. This anchors the roof’s core and prevents shifting during full extension.
Fasten Corners with Velcro Straps
At each corner, locate the circular fabric reinforcements. These protect high-contact points. Wrap the internal Velcro straps around the upper part of each tent leg. Pull tight to eliminate sagging. Do this before fully extending the frame so straps remain within easy reach.
Tighten Side Valances Under Trusses
On each side, find the interior Velcro tensioning strips. Wrap them under the connecting joints between trusses, then bring them back up and secure to the matching Velcro on the roof. This keeps valances taut and prevents flapping in wind. Pro Tip: Do this before locking the legs. Once extended, access becomes harder.
Fully Extend and Lock the Frame
Now it’s time to open the canopy completely. This is where most people make the mistake of pulling the legs. Don’t. Instead, lift from the trusses.
Lift from the Trusses, Not the Legs
Grip the central trusses on both sides. They form a ‘V’ shape when partially open. Lift upward and pull backward to extend the frame. For rectangular 10×15 tents, lift from the shorter 10-foot sides to use the accordion mechanism efficiently. This method reduces strain and ensures smooth, balanced opening.
Lock All Four Corner Brackets
Once the frame is nearly open, stabilize one foot on the footplate. Reach under the truss at the corner and lift upward until the spring-loaded pin clicks into the leg. For extra leverage, press down on the outer frame edge while lifting the truss. You’ll hear a distinct click when the lock engages. Repeat for all four corners. As you lock each side, the central peak will rise automatically.
Alternative Method for 10×10 Pop-Up Models
For instant canopies, gently lift the legs slightly off the ground and pull them apart to open the frame halfway. Drape the cover over if not pre-attached. Then, grab the lower V-section of the truss and step backward to fully extend. With one hand, press down on the top corner of the frame while pushing up the leg slider to lock. Repeat on all corners.
Adjust Height for Comfort and Clearance

After the frame is locked, set the ideal working height.
Extend Legs Using Spring-Loaded Pins
Press the button on the upper leg section to release the inner tube. Lower the leg until the spring pin snaps into the desired notch. Most frames have 3–5 height settings. Use your foot on the footplate to apply downward pressure for a secure lock. Repeat for all four legs.
Two-Person Height Adjustment
For 10×10 canopies, stand on the same side with a partner. Both place a foot on the footpad and lift the upper frame section with your hands. This simultaneously extends and locks both legs. Move to the opposite side and repeat. This cuts setup time and ensures even height.
Final Stability and Safety Check
A wobbly canopy is dangerous in wind. Do a quick inspection before use.
Verify All Locks Are Engaged
Check each corner:
– Are leg sliders fully locked?
– Do spring pins click firmly into notches?
– Are corner brackets securely fastened?
Shake the frame gently. If it wobbles, recheck locks. A solid canopy should feel rigid, not loose.
Ensure Roof Is Taut and Aligned
Walk around the tent. The canopy should be smooth, not sagging. If valances are creased or loose, re-tighten Velcro straps. Misaligned fabric flaps in wind and can tear over time. Graphics look best when the cover is evenly tensioned.
Secure Against Wind and Weather
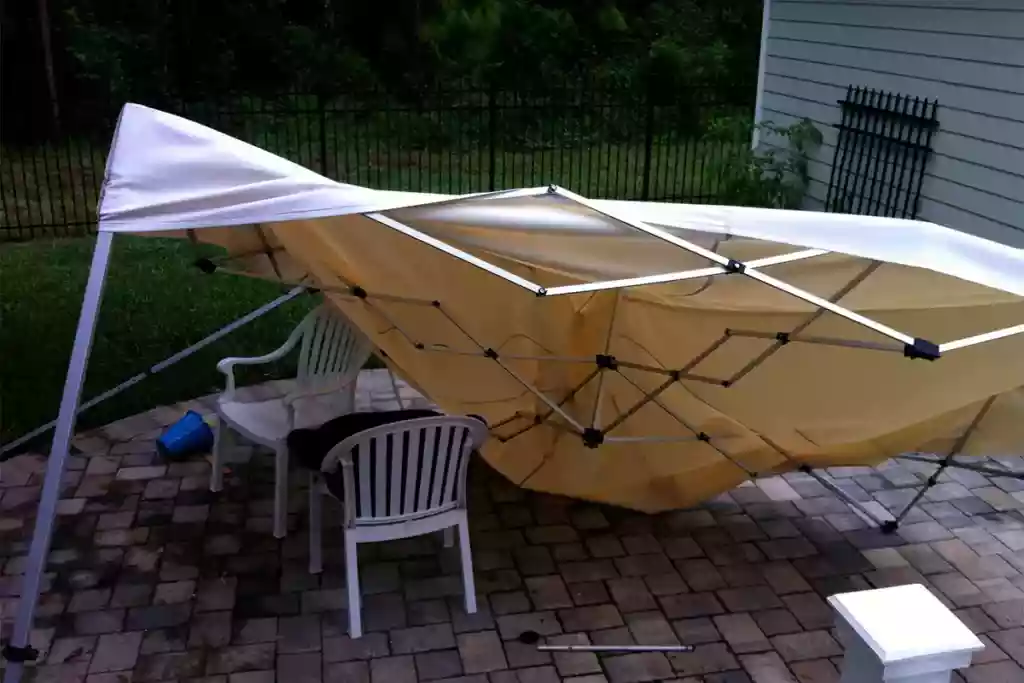
Even heavy-duty canopies can flip in gusts. Never skip anchoring.
Choose the Right Anchoring Method
- Grass or soil: Use steel ground stakes
- Concrete or pavement: Use cast iron base weights (typically 40+ lbs each)
- Sand or gravel: Use sandbags or specialized anchors
Attach tie-down straps from each leg to the anchor. Keep lines taut and angled at 45 degrees for maximum hold.
Wind Safety Tips
- Face the narrow side into the wind
- Never leave the canopy unattended in high winds
- Collapse during storms or sustained gusts over 20 mph
A secured canopy can handle moderate wind; an unsecured one becomes a projectile.
Take Down and Store Properly
When the event ends, proper takedown extends your canopy’s life.
Lower Legs Before Folding
One at a time, press the spring button and slide the lower leg into the upper tube. Lift the upper leg slightly to release tension. Use your foot to help push the leg up into the frame. Repeat on all four corners.
Unlock Corner Brackets
Lift slightly under each truss and press the red release button at the top of the leg. This disengages the upper frame. The tent will begin to collapse inward naturally.
Collapse and Bag the Tent
Lift from the center trusses and push inward from one or two sides. The frame folds accordion-style. Once closed, slide the transport bag over the roof first, then pull it down over the frame. Secure with Velcro strap and belt.
Never Store a Wet Canopy
Critical: Moisture causes mold, mildew, and fabric degradation. Always dry the canopy completely before packing. If damp, set it up at home and let it air dry. Never store in a sealed bag while wet.
Troubleshoot Common Setup Issues
Even experts hit snags. Here’s how to fix them fast.
Frame Won’t Extend?
You’re likely pulling the legs. Always lift from the central trusses. This uses the tent’s engineered folding mechanism. Pulling legs jams the joints and strains the frame.
Corner Won’t Lock?
Press down on the outer edge of the frame while lifting the truss. This gives extra leverage. If it still won’t click, check for debris in the pin slot or bent tubing.
Roof Is Misaligned or Sagging?
Re-center the canopy. Ensure the middle of the fabric matches the center peak. Re-secure elastic loops and Velcro straps, especially before extending legs.
Valances Are Loose or Creased?
Tighten Velcro tensioning straps before extending legs. Once the frame is tall, straps are harder to reach and less effective.
Pro Tips for Faster, Safer Setup
- Practice at home before your first event. Speed comes with repetition
- Watch video tutorials from KingCanopy or Ecotent for model-specific guidance
- Label your legs (front, back, left, right) for faster alignment
- Keep a setup checklist in your transport bag
- Use base weights even on calm days. Sudden gusts happen
Frequently Asked Questions About Setting Up a Canopy Tent
How long does it take to set up a canopy tent?
Experienced users can assemble a canopy tent in as little as 60 seconds with practice. First-time setup takes longer because the roof may need initial alignment. With the right technique, most canopies can be fully set up in under two minutes.
Can one person set up a canopy tent alone?
Yes, any canopy tent can be set up by one person. While two or more people make the process easier, solo setup is possible by lifting from the central trusses and using proper locking technique at each corner.
What is the best way to anchor a canopy tent on concrete?
On concrete or pavement, use cast iron base weights, typically 40+ lbs each. Attach tie-down straps from each leg to the weights and keep lines angled at 45 degrees for maximum hold.
Why won’t my canopy tent frame extend?
If your frame won’t extend, you’re likely pulling the legs instead of lifting from the central trusses. The tent uses an accordion folding design that only works when you lift upward and pull backward on the trusses, not the legs.
How do I keep my canopy tent from blowing away?
Secure your canopy with appropriate anchors based on ground conditions: steel stakes for grass, cast iron weights for concrete, and sandbags for sand. Always face the narrow side into the wind and never leave the tent unattended in high winds or gusts over 20 mph.
Can I store my canopy tent while it’s still damp?
No. Never store a wet canopy tent. Moisture causes mold, mildew, and fabric degradation. Always allow the canopy to dry completely before packing. If needed, set it up at home and let it air dry before storing.
Key Takeaways for Setting Up Your Canopy Tent Like a Pro
Mastering how to set up a canopy tent comes down to three essentials: lift from the trusses, never the legs; lock each corner bracket until you hear the click; and always anchor your tent to the ground regardless of weather. Practice at home before your first event, tighten all Velcro straps before extending the legs, and store your canopy completely dry to extend its lifespan. With these habits, you’ll set up faster and safer every time.