
Is your child dreaming of a backyard hideout or a cozy indoor fort? These DIY PVC pipe tent frame plans turn that dream into reality for a fraction of the cost of store-bought play tents. Lightweight, affordable, and surprisingly sturdy, a PVC tent frame can support countless imaginative adventures. Whether you’re planning a dome, A-frame, or pyramid-style structure, this guide covers every step. You’ll learn which materials to buy, how to cut and connect pipes, and how to add a custom cover that looks store-bought.
Choose Your Tent Design

Dome vs. A-Frame vs. Pyramid
Three main PVC tent designs dominate DIY builds: dome, A-frame, and pyramid. The dome uses connected pipes for a rounded shape and travels well. The A-frame features two angled sides meeting at a central peak, making it one of the easiest tents to assemble. The pyramid style rises from a square base to a single point, giving kids more headroom for sitting and standing. Each design uses standard PVC fittings but varies in complexity and visual appeal.
Pick the Right Base Shape
Base shape directly affects stability. A square base like a 3′ x 3′ layout resists tipping better than rectangular versions, which matters when kids are playing actively inside. A rectangular base such as 18″ x 12″ fits tighter indoor spaces but may need added weight to prevent sliding. Always assemble on a flat, level surface to keep the frame balanced during use.
Match Design to Use Case
Choose a dome or A-frame for portable outdoor shelters or camping trips. Pick a pyramid or ridge-roof design for permanent indoor play tents. For kids’ rooms, a square-base pyramid offers the best mix of play space and safety. If portability matters most, build a friction-fit frame that comes apart quickly. For long-term use, glue the joints permanently with PVC cement.
Gather Materials and Tools

Select the Correct PVC Pipe Size
Use 1-inch diameter PVC pipes for sturdy, long-lasting frames that resist bending under fabric tension. For lighter child-sized tents, 1/2-inch PVC paired with Sch 40 fittings also works well. Avoid thin or flexible tubing since it can warp over time and won’t hold the tent’s shape.
List of Essential Fittings
You’ll need these PVC connectors to complete your build:
– 90° elbows for square corners
– T-joints for roof supports
– 45° elbows for angled roof joins
– Side outlet elbows for advanced roof angles
– End caps for a finished look and added safety
For a basic 3′ x 3′ pyramid tent, plan on 8 × 90° elbows, 4 × T-joints, and 4 × 45° slip elbows for the sloped roof.
Choose Your Cover Material
Use a 6 ft x 6 ft blanket for quick setups. For a more durable finish, pick a 10 ft x 10 ft canvas drop cloth from Home Depot or Lowe’s. Outdoor tents need UV-resistant fabric to prevent sun damage. Fleece is soft and washable, making it perfect for indoor use. Always choose a non-slip or textured blanket to keep the tent stable on hardwood or tile floors.
Required Tools Checklist
Gather these tools before you start building:
– Tape measure for accurate cuts
– Pipe cutter for clean, burr-free cuts
– Scissors or utility knife for trimming fabric
– Level to keep vertical supports plumb
– Sewing machine only if making a custom cover
– Spray paint and polyurethane for finishing touches
Cut Pipes to Exact Lengths
Standard Cuts for a 3′ x 3′ Pyramid Tent
Follow these cuts for a balanced, kid-friendly tent frame:
– 4 pieces @ 36″ for vertical supports
– 4 pieces @ 24″ for top crossbars
– 4 pieces @ 18″ for the base sides
– 4 pieces @ 12″ for the front and back base
Use a pipe cutter for smooth, precise cuts. Label each piece with painter’s tape to avoid mix-ups during assembly.
Alternative Cut List for Detailed Builds
For a more advanced frame using 1/2″ PVC Sch 40 fittings, cut:
– 5 pieces @ 40″ for floor edges and roof sides
– 4 pieces @ 33″ for walls
– 2 pieces @ 24 1/2″ for front and back floor pieces
– 4 pieces @ 17 1/2″ for the roof
– 4 pieces @ 3/4″ as connector spacers
Assemble the Frame Step-by-Step
Build the Base First
Connect the 18″ and 12″ pipes with 90° elbows to form a rectangle. Lay it flat on the ground and check with a level to confirm it’s even. If you’re gluing, apply PVC cement or Gorilla Glue to each joint now. Let the base dry for about 30 minutes before adding verticals.
Attach Vertical Supports
Slide a 36″ pipe into each corner elbow. Make sure all vertical pipes stand straight using a level. Secure each joint with glue if you’re building a permanent tent. For a temporary setup, friction-fit joints work fine but offer less stability during rough play.
Construct the Roof Frame
Top each vertical with a T-joint. Connect 24″ crossbars across the top to form a ridge beam. Then attach 17.5″ roof pieces at angles using 45° elbows or side outlet fittings. Bring them together at the peak with short connectors. This creates a stable, sloped roof that resists sagging over time.
Secure the Fabric Cover
Drape and Tuck Method (No Sew)
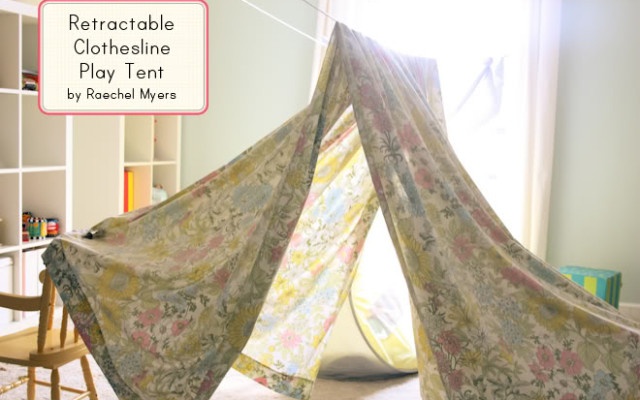
Lay a large blanket or drop cloth over the frame. Let excess fabric hang down on all sides, then tuck the edges under the base pipes to anchor it. This fast method works great for kids’ forts. Use bungee cords or rope to pull the fabric taut and prevent flapping during play.
Sew a Custom Canvas Cover
For a polished, store-bought look, make a fitted cover using these steps:
1. Wash and dry a 10 ft x 10 ft canvas drop cloth to pre-shrink the fabric.
2. Drape it over the frame with the wrong side facing out.
3. Cut one long piece for the walls and roof, leaving a few extra inches.
4. Pin and sew the back panel to the main piece.
5. Create the front opening using the drop cloth’s existing hem.
6. Sew a bottom hem and add ribbon trim for decoration.
Basic straight-line sewing is all you need to pull off a professional result.
Stop Sagging and Slipping
Tighten fabric with bungee cords tied from base to base. On slick floors, place a non-slip mat or three old pillows in a sewn casing under the tent. This adds comfort and prevents the frame from sliding during energetic indoor play.
Customize for Fun and Function

Add a Door with Velcro
Cut a vertical slit in the front fabric. Sew Velcro strips along both sides to create a closable door that keeps drafts out. Use heavy-duty Velcro for frequent opening and closing.
Decorate with Lights and Tassels
String fairy lights along the roof beam for a cozy evening glow. Hang DIY tassel rope from the peak or corners using yarn and a simple tutorial. Add stickers, themed fabric, or painted pipes to match your child’s favorite themes like space, jungle, or princess castles.
Use Colorful or Themed Fabric
Pick bright patterns like rainbows, stars, or animals to spark imagination. Try different colored blankets for a playful patchwork look. Spray paint PVC pipes to match the fabric, applying 4 coats for full coverage, then seal with spray polyurethane to protect the finish.
Ensure Safety and Stability
Prevent Frame Tipping
Always use a wide, square base to resist tipping. On hardwood or tile, place a weighted mat inside the tent. Avoid placing the tent near stairs or sharp furniture. Supervise young children during play, especially if the tent is tall.
Avoid Sharp Edges
PVC pipes are naturally smooth, but file down any rough cut ends. Use end caps on all open pipes, especially at head height. This small step adds safety and gives the frame a clean, finished look.
Choose a Safe Location
Set up indoors to avoid wind damage. If using outdoors, pick a sheltered area and secure the base with stakes. Never leave the tent unattended in high winds. For camping, use it as a daytime play shelter only.
Optimize for Long-Term Use
Glue Joints for Durability
Use PVC cement or Gorilla Glue for permanent builds. This prevents kids from disassembling the frame. One builder reported that their unglued tent lasted only 3 weeks before kids took it apart into 30 scattered pieces. Glued joints last for years with minimal maintenance.
Protect Paint and Fabric
After spray painting, apply clear polyurethane to prevent chipping. For outdoor use, choose mildew-resistant canvas or treat fabric with a water repellent spray. Clean fleece covers regularly to keep them fresh and hygienic.
Store Properly When Not in Use
Disassemble friction-fit frames and store pipes and fittings in a labeled bin. Keep fabric covers in a dry, sealed bag to prevent dust and pests. Reassemble seasonally or whenever your kids want to play.
Troubleshoot Common Issues
Fix a Wobbly Frame
If the tent wobbles during use, check that:
– The base sits level on the ground
– All joints are fully seated in their fittings
– Verticals are plumb and straight
Reinforce loose connections with duct tape as a temporary fix. For a long-term solution, disassemble and glue the joints properly.
Stop Fabric from Sagging
Sagging happens when fabric isn’t pulled tight enough. Stretch it taut and secure with bungee cords across the base. Use a ridge rope along the roof peak to lift the center. Avoid heavy fabrics that stretch over time.
Prevent Kids from Taking It Apart
If you want a permanent tent, glue all joints. Friction-fit frames are fun to reassemble but often end up in piles of scattered pipes within weeks of active play.
Scale and Adapt for Any Space
Build a Larger Family-Sized Tent
Double the base size to 6′ x 6′ and use longer verticals between 48″ and 60″. Add extra T-joints and crossbars for roof support. Use heavier-duty fabric like a vinyl tarp. This creates a tent big enough for parents and kids to sit in together comfortably.
Make It Portable for Camping
Use 1/2-inch PVC and friction-fit joints. Cut pipes so the frame fits through doorways without disassembly. Pair with a lightweight blanket for easy transport. Pack everything in a duffel bag for road trips and weekend adventures.
Repurpose for Seasonal Themes
Swap covers to match holidays like red and green for Christmas or pastels for Easter. Use the same frame year after year with new fabrics. Paint pipes different colors to refresh the look whenever your child’s interests change.
Frequently Asked Questions About PVC Pipe Tent Frame Plans
What size PVC pipe is best for a kids play tent?
1-inch diameter PVC is the most common choice for general builds, while 1/2-inch PVC with Sch 40 fittings works well for lighter child-sized tents. Both sizes provide good stability and are easy to work with.
How long does it take to build a PVC tent frame?
Most frames take just a few hours to assemble once you’ve gathered materials and cut your pipes. If you’re gluing joints, add about 30 minutes of drying time before the tent is ready for play.
Can I leave a PVC pipe tent outside?
Yes, but use UV-resistant fabric to prevent sun damage, and avoid leaving the tent in high winds. Glue the joints for permanent outdoor setups and choose mildew-resistant canvas for longer-lasting outdoor use.
Will my kids take apart an unglued PVC tent?
Most likely, yes. One builder reported their unglued frame was disassembled into scattered pieces within 3 weeks. Use PVC cement or Gorilla Glue on all joints if you want the tent to stay together long-term.
Do I need sewing skills to make a cover?
Not necessarily. You can use the drape and tuck method with a large blanket and bungee cords. If you want a fitted canvas cover, basic straight-line sewing is enough to complete the project.
Key Takeaways for Building Your PVC Pipe Tent Frame
A PVC pipe tent frame is a budget-friendly, customizable project that delivers big fun for kids. With basic tools and affordable materials from any hardware store, you can build a safe, stable play space in a single weekend. Choose your design based on where you’ll use it, cut the pipes to the exact measurements, and assemble the frame with the right fittings. Drape or sew a cover that matches your child’s style, then add lights, doors, and decorations to bring it to life. Start with a simple version, then scale up as you gain confidence. With proper care and glued joints, your DIY PVC tent can become a beloved feature in your home or backyard for years to come.