You’ve laced up your boots, checked the forecast, and set out for a peaceful winter trail—but if you’re treating this like a summer hike, you’re already at risk. Cold weather hiking isn’t just about enduring lower temperatures; it’s a completely different game. A single misstep—like sweating in cotton layers or forgetting traction—can spiral into hypothermia or frostbite within hours. Trails vanish under snow, batteries die in minutes, and wind chill can make 30°F feel like -10°F. Yet, for those prepared, winter hiking offers unmatched rewards: silent forests dusted in snow, alpine ridges glowing in golden light, and trails free of crowds.
This cold weather hiking checklist gives you everything needed to stay warm, dry, and safe—no matter how deep the snow or how biting the wind. Based on expert guidelines and real-world conditions, we’ll cover every essential, from layered clothing and traction devices to emergency readiness and nutrition. Whether you’re trekking through light snow in the Smokies or battling gales above treeline, this guide ensures you’re ready.
Master the Layering System

Your clothing is your lifeline in cold weather. The right three-layer system keeps you warm, dry, and in control of your body temperature.
Choose a Moisture-Wicking Base Layer
Start with a merino wool or synthetic base layer—never cotton. Cotton holds sweat, chills you fast, and increases hypothermia risk. Long-sleeve tops and leggings are essential. Opt for lightweight (150g/m²) in milder cold or high activity; midweight (200–250g/m²) when it’s freezing or you’re moving slowly.
Pack an extra dry base layer in a waterproof bag. If you get wet—from sweat or snow—changing clothes can save your hike. Top picks: Smartwool, Icebreaker, Arc’teryx Rho.
Add Insulating Mid Layers for Heat Retention
Your mid layer traps heat. A fleece jacket like the Patagonia Better Sweater or Arc’teryx Kyanite provides breathable warmth. Remove it before you start sweating—once your base layer is damp, cooling happens fast when you stop.
In extreme cold, carry a second mid layer. Avoid overheating by venting early: unzip your jacket or peel off a layer at the first sign of warmth.
Wear a Puffy Jacket to Seal in Warmth
A down or synthetic insulated jacket is critical for breaks, storms, or high winds. Down (e.g., Arc’teryx Cerium LT) is lighter and warmer but fails when wet. Synthetic (e.g., Patagonia Nano Puff) retains heat even in damp conditions.
Choose a hooded model that fits over all your layers. Keep it accessible—don’t bury it in your pack. Put it on before you feel cold, not after.
Finish with a Weatherproof Outer Shell
Your outer shell blocks wind, rain, and snow. A GORE-TEX jacket (e.g., Arc’teryx Alpha SV or Beta SL) with pit zips and an adjustable hood is ideal. For pants, pick water-resistant shells with full side zips, like Outdoor Research Helium Rain Pants. They let you vent heat and slide over boots easily. Avoid cotton pants at all costs.
Protect Your Head, Hands, and Face
You lose up to 10% of body heat through your head. Exposed skin risks frostbite in minutes. Full coverage is non-negotiable.
Wear a Beanie and Neck Gaiter
A wool or fleece beanie that covers your ears is mandatory. Bring a spare. Pair it with a neck gaiter or balaclava—pull it over your nose and mouth in high wind. A gaiter is lightweight, versatile, and can double as a hand muff.
Use Gloves and Mittens Strategically
Fingers freeze fast. Wear liner gloves under insulated gloves for dexterity and warmth. In brutal cold, switch to mittens—they keep fingers together, preserving heat.
Choose gloves with water-resistant shells and grippy palms. For extreme cold, use over-mitts (neoprene or insulated shells). Carry hand warmers and store them in your gloves or pockets.
Shield Your Eyes and Skin from Winter Hazards
Snow reflects 80% of UV radiation—sunburn and snow blindness are real. Wear polarized, wraparound sunglasses even on cloudy days. In wind or blowing snow, glacier goggles or ski goggles (like Smith) offer better protection.
Apply SPF 20+ sunscreen to exposed skin—including under your nose and behind ears. Use SPF lip balm to prevent cracking.
Gear Up for Cold Feet
Wet, cold feet can end a hike fast. Proper footwear and care prevent frostbite and keep you mobile.
Choose Insulated, Waterproof Boots
Your boots must be waterproof (e.g., Gore-Tex) and rated to at least 0°F. They need stiff soles for ice and ankle support. Top models: Danner Mountain 600, Oboz Insulated Boots, Altra Lone Peak All-Weather.
Wear merino wool or synthetic socks—never cotton. A liner sock + outer wool sock combo wicks moisture and adds warmth.
Always carry at least one extra pair of dry socks. Change them if your feet get wet.
Use Gaiters to Keep Snow Out
Gaiters prevent snow, ice, and debris from entering your boots. Choose mid-calf to knee-high models made of waterproof fabric. Black Diamond Frontpoint Gaiters are durable and reliable. Wear them whenever snow is present—even a few inches.
Add Traction Devices for Ice and Deep Snow
Slipping on ice can mean injury or a stranded hike.
Microspikes for Packed Snow
Kahtoola Microspikes wrap over boots and grip packed snow and ice. Ideal for moderate terrain. Test the fit at home.
Crampons for Hard Ice
For steep, icy slopes, crampons are essential. They require stiff-soled, mountaineering boots. Learn self-arrest techniques before use.
Snowshoes for Deep Snow
When snow exceeds 8 inches off-trail, snowshoes are often required (e.g., in New York’s High Peaks). They prevent post-holing. Choose size based on terrain: smaller for flat trails, larger for deep, steep snow. Practice at home.
Pack the Right Backpack and Tools
Your pack carries your survival gear. Size and organization matter.
Use a 20–35L Winter Daypack
A 20–35L pack (e.g., Osprey Talon 22 or Hyperlite Daybreak 17) holds essentials without bulk. Look for waist belts, trekking pole loops, and ice axe attachments.
Line your pack with a plastic compactor bag or use a pack cover to keep gear dry. Wet gear fails fast.
Carry Trekking Poles with Powder Baskets
Poles improve balance on ice and reduce knee strain. Choose flick-lock adjustable poles with cork or foam grips. Add powder baskets to prevent sinking in deep snow. Top picks: Black Diamond Alpine Carbon Cork or Cascade Mountain Tech for budget.
Navigate and Stay Connected
In winter, trails disappear. Electronics fail. You need backup systems.
Bring Map, Compass, and GPS
Always carry a physical topographic map and compass—electronics can die. Pre-download offline maps to a handheld GPS (e.g., Garmin GPSMAP). Never rely solely on your phone.
Practice navigation skills before you go.
Use a Satellite Communicator
Cell service is unreliable. A Garmin inReach Mini 2 or SPOT Locator sends SOS alerts and texts from anywhere. Critical for solo or backcountry hikes.
Keep your phone in an inner pocket to preserve battery. Cold drains power fast.
Store Batteries Close to Body Heat
Lithium batteries outperform alkaline in cold. Keep spare batteries for headlamps, GPS, and phones in an inner pocket. Insulate devices when not in use.
Stay Fueled and Hydrated
Your body burns 2,000–3,000 extra calories daily in cold weather. Dehydration is common—thirst is less noticeable, and water freezes.
Drink 2+ Liters of Water Daily
Use insulated Nalgene bottles stored inside your pack. Flip them upside down—ice forms at the top first, keeping the cap clear.
Avoid hydration bladders—tubes freeze fast. If you must use one, insulate the tube, blow water back, and keep the reservoir inside your jacket.
Sip Hot Drinks Frequently
A vacuum-insulated thermos with hot chocolate, tea, or broth warms you from within. Carry it in an accessible pocket for regular sipping.
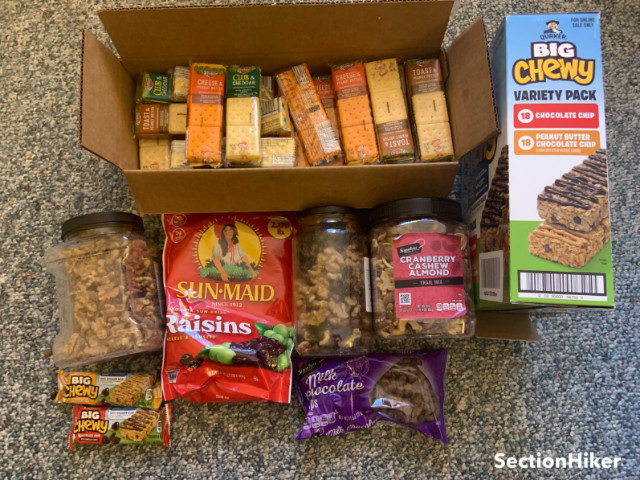
Eat High-Calorie, Non-Freezing Snacks
Pack soft, high-calorie foods:
– Nuts and trail mix
– Chocolate and candy bars
– Jerky, salami, cheese
– Bagels, sandwiches, energy bars
Eat every 30–60 minutes. Keep food close to your body to prevent freezing.
Prepare for Emergencies
Winter emergencies escalate fast. Being ready saves lives.
Pack the Ten Essentials—Plus Winter Upgrades
The Ten Essentials are just the start:
1. Navigation (map, compass, GPS)
2. Headlamp + extras
3. Sun protection
4. First aid kit
5. Knife/multi-tool
6. Fire starter
7. Emergency shelter
8. Extra food
9. Extra water
10. Extra clothes
Add these winter upgrades:
– Emergency bivvy or space blanket (SOL)
– Whistle (three blasts = distress)
– Fire starters (lighter, waterproof matches)
– Hand/toe warmers (HotHands)
– Foam pad (insulates from ground)
– Full dry clothing set (especially base layers)
Know How to Treat Hypothermia
Shivering, slurred speech, confusion are early signs. As it worsens, shivering stops—this is dangerous.
Treatment:
– Move to shelter
– Remove wet clothes
– Insulate with dry layers and emergency blanket
– Share body heat
– Give warm, sweet drinks (no alcohol)
– Call for help
Prevention: Dress in layers, eat often, stay dry.
Recognize and Respond to Frostbite
White, waxy skin; numbness; hard texture = frostbite. Most common in fingers, toes, nose, ears.
Do not rub or use hot water. Warm with body heat (e.g., hands in armpits). Never refreeze thawed tissue.
Seek medical care if blisters form.
Plan and Prepare Before You Go
Smart preparation starts before you leave home.
Check Weather and Trail Conditions
Look up wind chill, snow levels, and avalanche risk. Start early to maximize daylight.
Share Your Route and Return Time
Always tell someone your plan. If you’re overdue, this helps rescuers.
Practice Gear Setup at Home
Test snowshoes, microspikes, and layering on a short outing. Know how your gear works.
Adapt to Your Environment
Conditions vary—gear accordingly.
Hiking in the Great Smoky Mountains
Higher elevations get icy. Temperatures drop 10–20°F per 1,000 feet. Bring crampons, warm layers, and goggles.
Above Treeline or High Elevation
Expect extreme wind, rapid weather shifts, and avalanche danger. Carry an ice axe (with training) and avalanche gear if needed. Full face protection is essential.
Urban or Low-Elevation Winter Hikes
Even mild hikes need prep. Wear layers, headlamp, and microspikes if ice is present. Never assume “short hike” means low risk.
Final Note: Cold weather hiking is rewarding but demands respect. Use this checklist to prepare thoroughly. Stay dry, stay fueled, and stay aware. With the right gear and mindset, winter trails are yours to explore—safely.