
Cloudy, yellowed headlamp covers do more than make your car look old; they dangerously reduce your night vision. UV exposure and road grime cause oxidation that turns clear plastic into a hazy barrier, often leading to failed safety inspections.
This guide details proven methods to clean headlamp covers, ranging from simple toothpaste fixes for mild haze to professional sanding techniques for severe damage. You will learn exactly how to diagnose your specific issue and apply the right restoration strategy.
Diagnose Your Headlight Condition Before Starting
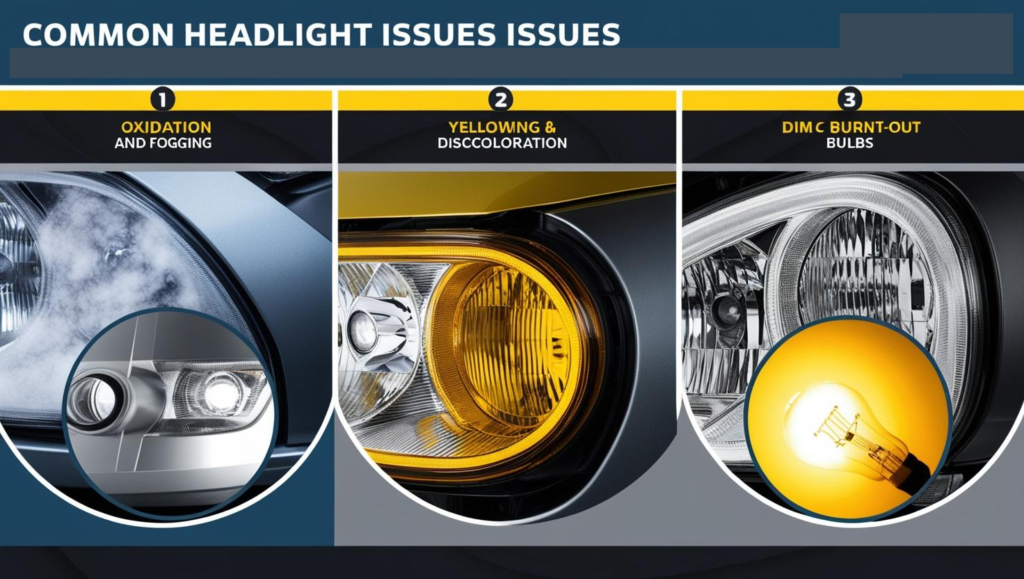
You must identify the type of damage before applying any cleaning solution. Using the wrong method on internal fog or deep pitting wastes time and yields poor results.
Check for External Oxidation
Run your finger across the lens surface to feel for roughness. If the plastic feels bumpy or looks distinctly yellow, the damage is external oxidation. This condition responds excellently to abrasives like toothpaste or sandpaper.
Test for Internal Cloudiness
Inspect the light output if the surface feels perfectly smooth. Fog appearing from the inside indicates a breached seal or moisture intrusion. External cleaning products cannot fix this; you must replace the unit or reseal the housing.
Gauge the Severity of Damage
Categorize the haze level to choose your tools.
* Mild: Slight yellowing that responds to gentle cleaners.
* Moderate: Noticeable dullness requiring sanding and polishing.
* Severe: Deep pitting or major scratches needing aggressive 500-grit sanding.
Use Toothpaste for Light Restoration
Toothpaste offers a budget-friendly solution for mild oxidation when you need a quick fix. This method uses mild abrasives to scrub away the top layer of damaged plastic.
Choose the Right Toothpaste
Select a standard white paste rather than a gel formula. Look for ingredients like baking soda, silica, or hydrogen peroxide which provide necessary grit. Add a pinch of baking soda if your chosen paste feels too smooth.
Apply and Scrub the Lens
- Wash the headlight with soapy water and dry it completely.
- Apply a thick layer of toothpaste using your fingers or a soft cloth.
- Scrub in small circular motions with a toothbrush, focusing on yellow spots.
- Watch the brush turn yellow as it lifts oxidation from the surface.
Rinse and Protect the Surface
Spray warm water to rinse away residue and wipe dry with a lint-free towel. Buff the lens firmly to enhance clarity before applying a thin coat of automotive wax. This wax layer shields the plastic from UV rays for several months.
Sand and Polish for Professional Results
Sanding removes the damaged plastic layer entirely to reveal fresh material underneath. This technique is essential for moderate to severe cases where toothpaste fails to restore clarity.
Gather Your Supplies
You will need specific tools to ensure a smooth finish without scratches.
* Dish soap and water
* Sandpaper in 800, 1000, 1500, 2000, and 3000 grits
* Plastic polish or restoration compound
* UV-resistant sealant
* Masking tape and microfiber cloths
Prep the Headlight Area
Turn off your vehicle and let the headlights cool completely. Apply masking tape around the lens edges to protect your paint from accidental scratches. Wash the lens thoroughly to remove any loose dirt.
Wet Sand the Lens
Keep the surface constantly wet to prevent heat buildup and scratching.
* 800 Grit: Use for severe damage to remove heavy oxidation uniformly.
* 1000–1500 Grit: Smooth out scratches left by the coarser paper.
* 2000–3000 Grit: Sand until a white film appears and no scratches remain.
Polish to Clarity
Apply plastic polish to a microfiber cloth or buffing pad. Work the compound into the lens using firm circular pressure until the haze disappears. Wipe away any remaining residue with a clean cloth to inspect your work.
Seal Against UV Damage
Apply a UV-resistant sealant immediately after polishing to prevent rapid re-oxidation. Apply the first coat, wait 30 seconds, then add a second coat for durability. Allow the sealant to cure for 2 to 4 hours before exposing the car to moisture.
Compare Commercial Restoration Kits

Commercial kits streamline the process by providing matched abrasives and sealants. Choosing the right kit depends on your damage level and desired durability.
3M Kit: Fast and Effective
This kit excels at handling moderate to severe damage quickly. It includes a drill attachment for the 500-grit stage, making heavy removal easy. The process takes 30 to 45 minutes and typically lasts up to two years.
Cerakote Ceramic Kit: Long-Lasting Protection
Ideal for mild cloudiness, this system uses chemical wipes and ceramic coating. It requires rigorous hand sanding with rigid pads, which can be difficult on curved lenses. The ceramic bond offers superior water repellency and claimed lifetime protection.
Try the Hybrid Ultimate Method
Combine the aggressive removal of the 3M kit with the durable coating of Cerakote. Use the 3M drill attachment for 500 and 800-grit sanding, then finish with 3000-grit wet sanding. Skip the included 3M sealant and apply the ceramic coating for maximum longevity.
Try Baking Soda for Minor Haze
Baking soda serves as a gentle, natural alternative for very light cloudiness. It is less abrasive than toothpaste but effective for routine maintenance.
Make and Apply the Paste
Mix two parts baking soda with one part water to create a thick consistency. Apply the paste with a soft cloth and scrub gently in circles. Rinse with warm water and dry thoroughly to reveal a cleaner surface.
Hire a Professional for Guaranteed Results
Professional services are the best option if you lack time or confidence in your DIY skills. Technicians use industrial-grade tools to ensure even results.
Mobile Restoration Services
Mobile technicians come to your location and complete the job in about one hour. These services often include a one to two-year guarantee on their work.
Auto Detail Shops
Local detail shops charge between $50 and $80 per pair for machine polishing. This option eliminates the risk of user error like uneven sanding or melted plastic.
Prevent Re-Clouding with Proper Maintenance
Restored headlights require ongoing care to maintain their clarity. Neglecting maintenance leads to rapid return of oxidation.
Clean Every Six Months
Wash your headlights with mild soap and water twice a year. Removing bug splatter and road grime prevents these contaminants from etching into the plastic.
Reapply UV Sealant
Reapply your protective wax or sealant every six months. Ceramic coatings last longer but still benefit from regular inspection to ensure the barrier remains intact.
Inspect Early
Check your lenses regularly for the first signs of returning haze. Catching the issue early means a quick polish rather than a full sanding job.
Avoid Common Mistakes

Many DIY failures stem from simple errors during the restoration process. Avoiding these pitfalls ensures a successful outcome.
Using High-Speed Tools
Running rotary tools above 15,000 RPM generates excessive heat. This heat melts the plastic surface, creating permanent distortions.
Dry Sanding
Never sand without water lubrication. Dry friction creates deep scratches and warps the plastic lens.
Skipping Grits
Jumping from coarse to fine sandpaper leaves deep scratches behind. Always progress sequentially through each grit level.
Forgetting the Sealant
Polishing removes the old UV layer, leaving new plastic vulnerable. Skipping the sealant step guarantees the headlights will cloud again within weeks.
Know When to Replace Headlights

Restoration has limits, and some damage cannot be fixed by cleaning.
Replace If Damaged
You must replace the unit if the lens is cracked or broken. Internal condensation that will not dry also requires replacement or professional rebuilding. If previous restoration attempts failed due to internal issues, buying new headlights is the only safe solution.
Frequently Asked Questions About Cleaning Headlamp Covers
Can I use regular glass cleaner on cloudy headlights?
No, glass cleaner does not remove oxidation. It may clean surface dirt but will not fix the yellowing or haziness caused by UV damage.
How often should I reapply sealant after cleaning?
You should reapply UV sealant or wax every six months. This regular maintenance prevents the oxidation from returning quickly.
Does toothpaste really work for headlight restoration?
Yes, toothpaste works for mild oxidation because it contains mild abrasives. However, it is a temporary fix that lasts only 6 to 12 months.
Why did my headlights get cloudy again so fast?
Rapid re-clouding usually means you skipped the UV sealant step. Polished plastic oxidizes quickly without a protective barrier.
Is it worth hiring a pro instead of doing it myself?
Hiring a pro is worth it if you want a guaranteed result without the physical effort. They can complete the job in an hour with professional-grade durability.
Key Takeaways for Cleaning Headlamp Covers Successfully
Cleaning headlamp covers restores both the appearance and safety of your vehicle. Success depends on matching your method to the severity of the damage and always applying a UV sealant.
Start by diagnosing whether your damage is internal or external. Use toothpaste for minor haze, sanding for moderate damage, and professional help for complex cases. Take action today to improve your night vision and avoid costly replacements.