
Cloudy, yellowed headlight lenses do more than age your vehicle; they drastically reduce visibility and compromise safety. If you are searching for how to clean headlamp lenses, you likely face this exact problem where oxidation blocks your view at night.
This guide reveals the precise steps to diagnose damage, remove heavy oxidation with sanding, and seal your lights for long-lasting results. You will learn to distinguish between fixable surface haze and internal failure while choosing the right method for your specific situation.
Diagnose External Oxidation Versus Internal Fog
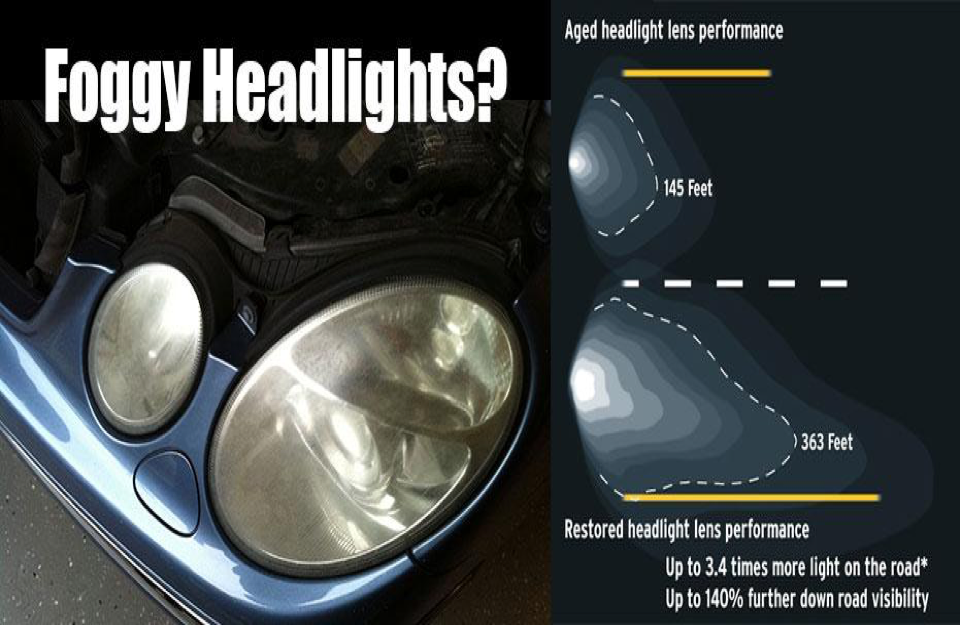
You must identify the root cause before applying any cleaning solution. Not all cloudiness responds to abrasives, and using the wrong method wastes time on a problem you cannot fix yourself.
Check Surface Texture for Roughness
Run your finger across the plastic surface to feel for bumps or a chalky texture. This roughness indicates external oxidation caused by UV rays and road pollutants degrading the polycarbonate. This specific type of damage responds excellently to abrasive cleaning and polishing techniques.
Identify Smooth but Cloudy Interiors
If the lens feels perfectly smooth yet looks foggy from within, moisture has breached the internal seal. No amount of external scrubbing or sanding will clear this type of fog because the damage lies inside the assembly. You must replace the unit or seek professional resealing services for internal condensation issues.
Assess Structural Integrity
Inspect the lens for deep cracks, chips, or broken seals that compromise the housing. Cleaning methods only work on structurally sound lenses where the plastic itself is intact. Severe physical damage requires full replacement to ensure safety and waterproofing.
Gather Essential Tools for Headlight Restoration
Selecting the correct materials determines whether you achieve a temporary fix or a durable restoration. Your toolkit changes based on the severity of the oxidation you identified in the previous step.
Basic Cleaning and Prep Supplies
You need specific items to prepare the surface without causing new scratches.
* Mild dish soap for initial washing
* Lint-free microfiber cloths
* Soft-bristle brush or old toothbrush
* Plastic scraper for stubborn tar
* Water spray bottle
Abrasives for Removing Oxidation
Choose your abrasive level based on how yellow or pitted the lens appears.
* Mild: Gritty toothpaste with baking soda
* Moderate to Severe: Wet sandpaper ranging from 500 to 3000 grit
* Power Option: Dremel or drill with buffing pad rated under 15,000 RPM
Safety Gear and Protection
Protect yourself and your vehicle paint before starting any abrasive work.
* Masking tape to shield surrounding paint
* Nitrile gloves to prevent skin contact with chemicals
* Safety glasses to block dust during sanding
* Well-ventilated workspace to avoid inhaling fine particles
Sealants for Long-Term Protection
Skipping the sealing step allows UV rays to re-oxidize the plastic within weeks.
* Car wax for short-term protection
* Two-part clear coat for up to two years of durability
* Ceramic coating for claimed lifetime results
* Dedicated UV headlight sealant
Clean Mild Haze Using Toothpaste Method
Slightly yellowed or rough lenses often respond well to this fast and affordable household remedy. This approach works best for maintenance or light oxidation that has not deeply penetrated the plastic.
Apply Gritty Toothpaste Correctly
Select a paste-based toothpaste containing baking soda or hydrogen peroxide rather than gel varieties. Squeeze a generous amount directly onto a microfiber cloth or an old toothbrush for application.
Scrub in Circular Motions
Rub the toothpaste over the entire lens surface using firm, circular motions with extra focus on yellowed areas. You will see the cloth or brush turn yellow as it lifts the oxidation layer from the plastic.
Pro Tip: Use a Dremel with a soft buffing wheel at low speed for larger areas to save effort. Never exceed 15,000 RPM because excessive heat can melt the plastic surface.
Rinse and Dry Completely
Spray the lens with water and wipe it clean using a fresh microfiber cloth. Buff the surface firmly to remove all residue before inspecting for remaining haze. Repeat the process once more if the cloudiness persists after the first attempt.
Seal Immediately After Cleaning
Apply a thin layer of car wax or headlight protectant right after drying the surface. This step shields the newly exposed plastic from UV rays and moisture for several weeks.
Restore Heavy Oxidation With Wet Sanding
Deeply yellowed or pitted lenses require mechanical removal of the damaged layer through wet sanding. This process takes more time but delivers professional-grade clarity that toothpaste cannot achieve.
Mask Surrounding Paint Areas
Apply masking tape around the edges of the headlight and adjacent body panels. Abrasives act like sandblasting media and will permanently scratch or dull your car paint if they spread beyond the lens.
Start With Coarse Grit Paper
Wet the lens with water or a soapy water mixture before beginning with 500-grit sandpaper. Use light pressure and overlapping strokes in one direction, then switch to perpendicular passes until the yellow layer disappears.
Keep the surface wet at all times to prevent overheating and clogging of the sandpaper. After four to six passes, the surface should appear uniformly frosted with no remaining yellow spots.
Progress Through Finer Grits
Rinse the lens thoroughly and switch to 800-grit, then 1000, and finally 1500. Wipe the surface dry between grit changes to check for remaining scratches from the previous step.
Warning: Skipping grit levels creates deep scratches that polishing cannot fix. Each finer grit removes the marks left by the previous coarser paper.
Finish With 2000 and 3000 Grit
These ultra-fine papers polish the surface toward optical clarity using light, circular motions. A milky residue will form during this stage, which indicates proper refinement of the plastic surface.
Rinse thoroughly and dry the lens to reveal a clear but slightly hazy finish. The lens is now ready for the final polishing stage to bring back full transparency.
Polish for Maximum Optical Clarity
Sanding removes the damage, but polishing restores the shine and transparency you expect from new headlights. This step refines the surface to eliminate any final haze left by the sanding process.
Use Plastic-Safe Polishing Compound
Apply a small amount of automotive plastic polish to a microfiber cloth or buffing pad. Work the compound into the lens using circular motions until the haze disappears completely.
Power Option: Attach a soft buffing pad to a Dremel or drill at low speed for faster results. Buff until the lens becomes fully transparent and reflective with no visible swirls.
Final Wipe Down
Use a clean, dry microfiber cloth to remove any leftover polishing residue. Inspect the lens under bright light to ensure no streaks or hazy spots remain before sealing.
Seal Against Future UV Damage
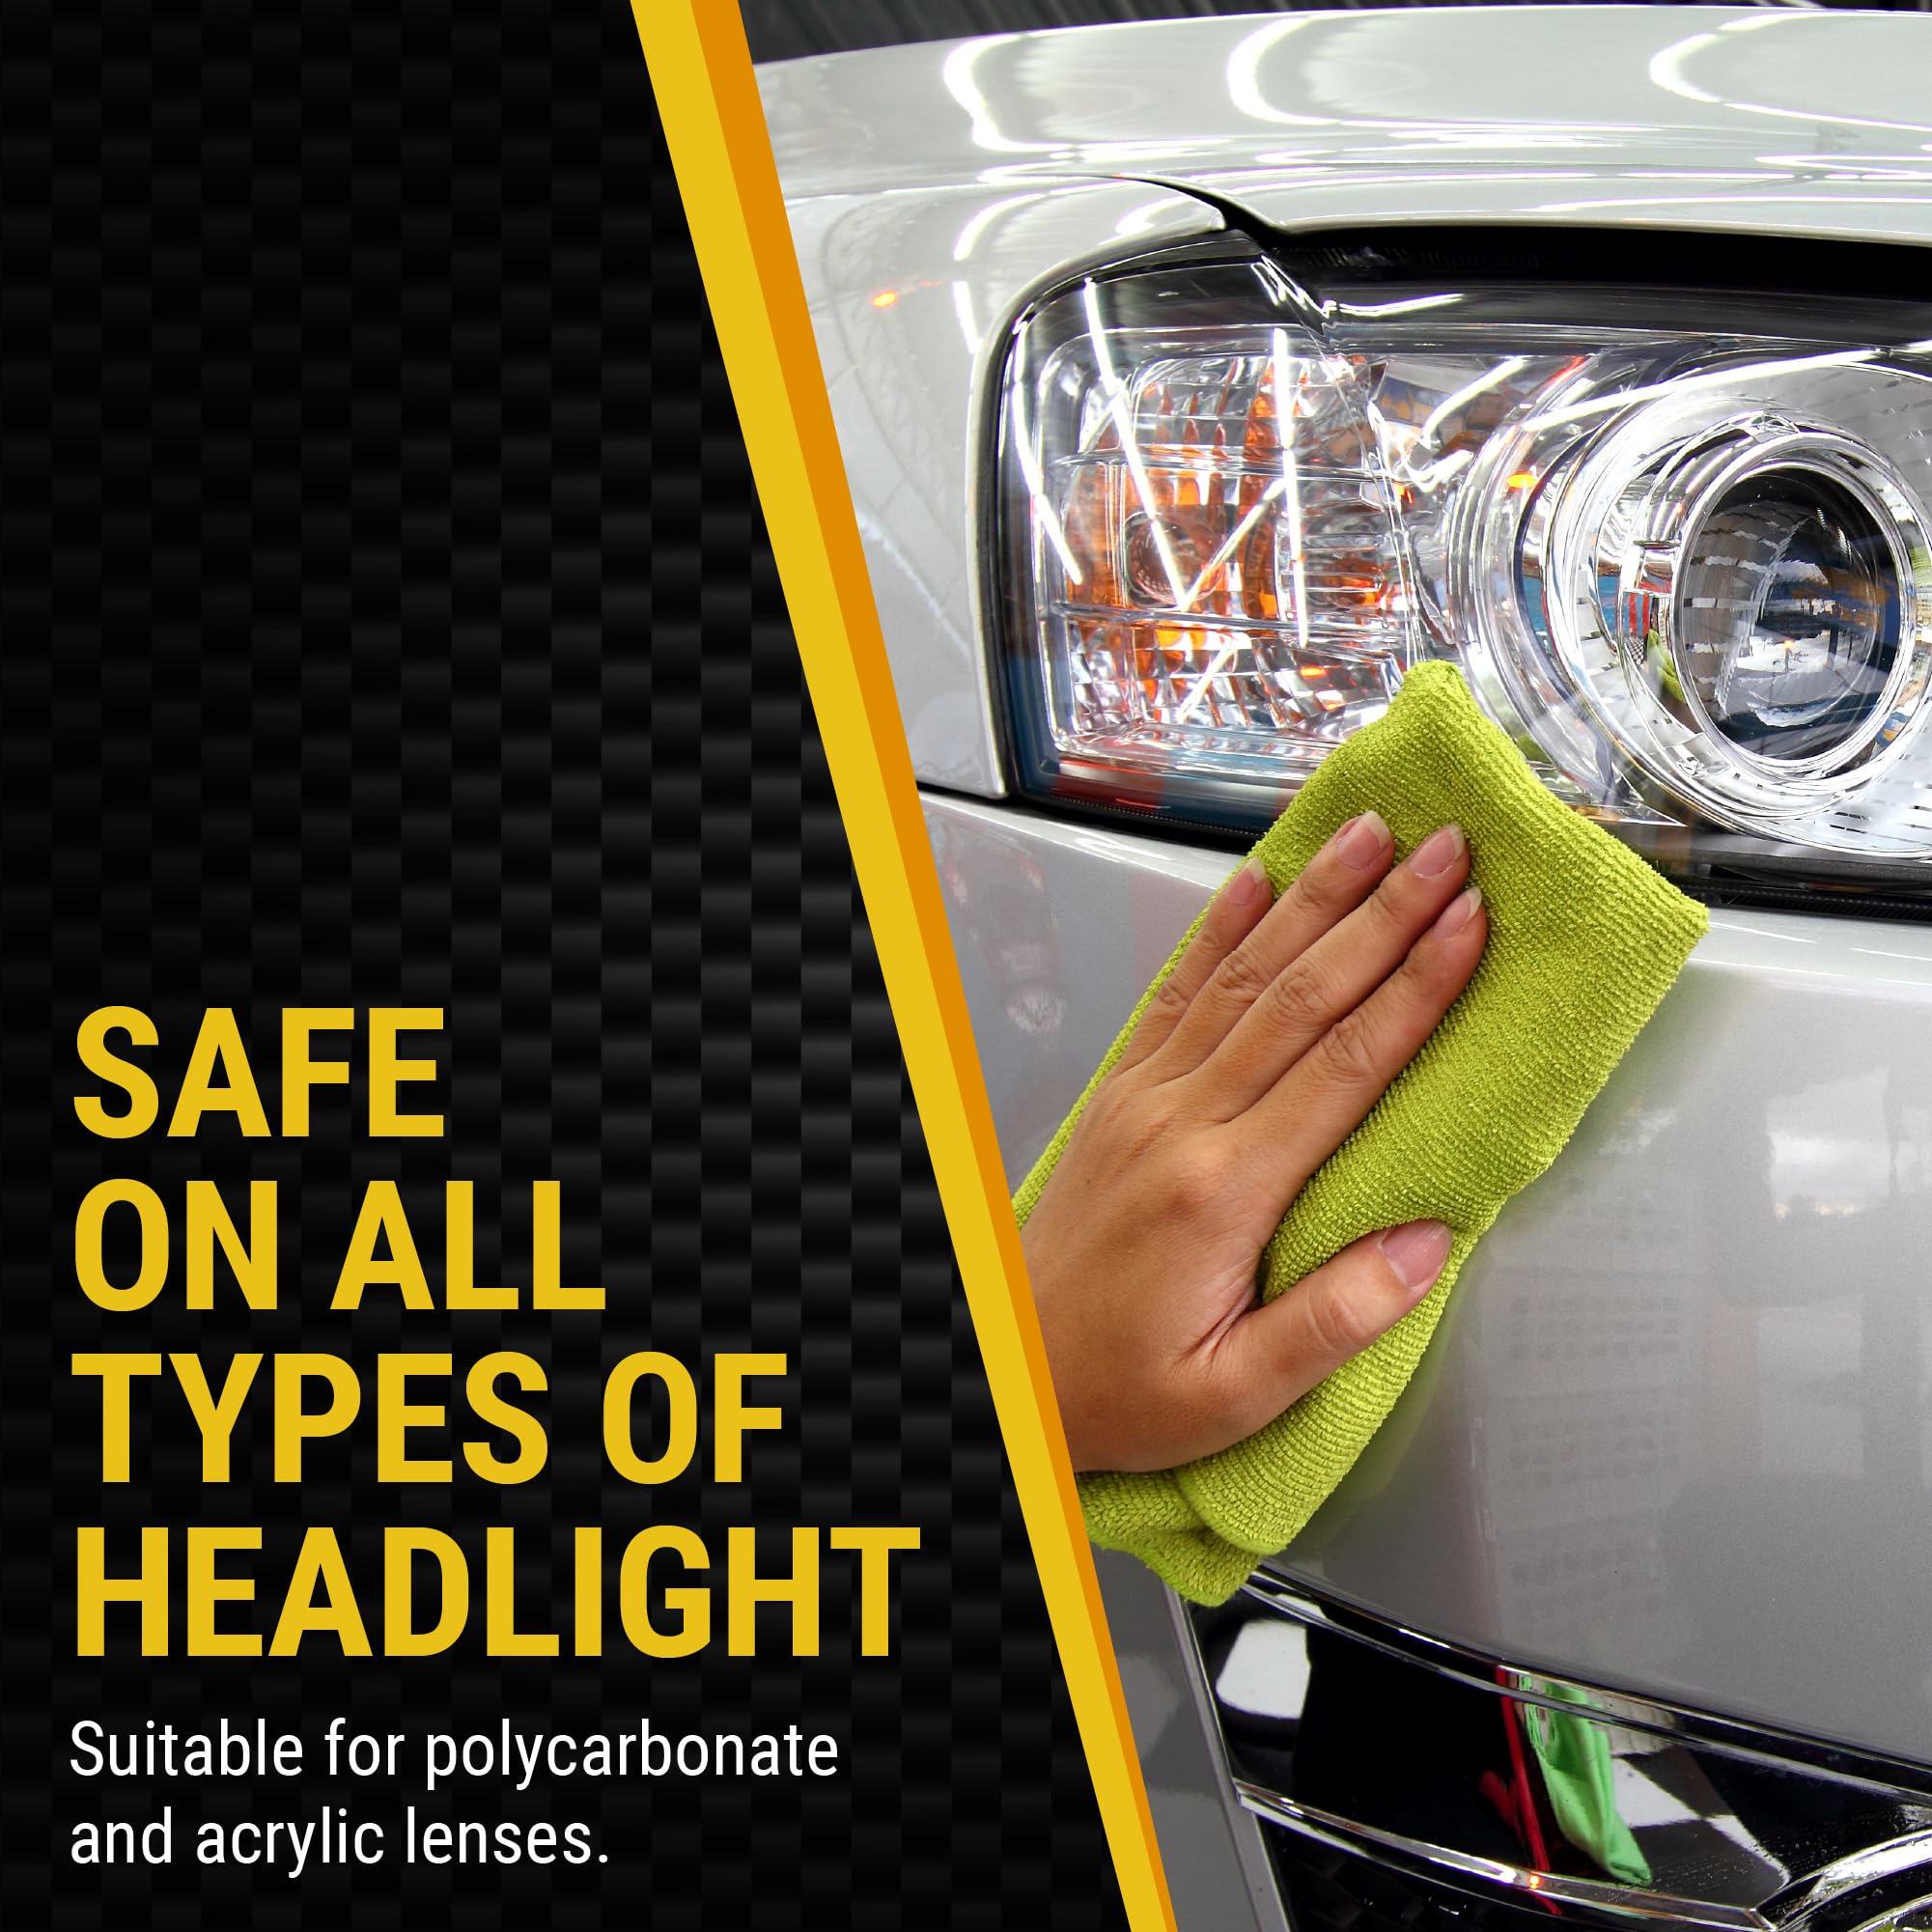
This step is the most critical part of the entire process because unsealed plastic re-oxidizes rapidly. Proper sealing locks in your hard work and extends the life of the restoration significantly.
Choose the Right Sealant Type
Select a protection method based on your desired longevity and effort level.
* Car Wax: Easy application lasting one to three months
* Two-Part Clear Coat: Chemical bond lasting up to two years
* Ceramic Coating: Hydrophobic wipe-on formula with claimed lifetime durability
* Dedicated UV Sealant: Specialized product requiring reapplication every six to twelve months
Apply Evenly and Thinly
Apply too much sealant causes streaks or hazing that ruins your clear finish. Use a microfiber applicator to wipe on thin, even layers and let it cure for ten to thirty minutes as directed.
Pro Tip: Test the hydrophobicity by spraying water on the lens after curing. Water beading indicates the sealant is working correctly to repel moisture.
Compare 3M Versus Cerakote Restoration Kits

Two popular kits offer different approaches to restoration, and knowing the difference helps you choose the right one. Each system targets different levels of damage with varying degrees of effort.
3M Kit for Severe Damage
This kit uses mechanical sanding with a drill attachment to remove deep oxidation.
* Method: Aggressive sanding with 500, 800, and 3000 grits
* Sealant: Two-part clear coat for durable protection
* Best For: Deep yellowing, pitting, and heavy oxidation
* Durability: Up to two years with proper application
* Effort: Moderate to high due to sanding intensity
Cerakote Kit for Light Maintenance
This system relies on chemical wipes and light hand sanding for less damaged lenses.
* Method: Chemical oxidation removal plus light sanding
* Sealant: Ceramic coating wipe for hydrophobic protection
* Best For: Mild haze and preventative care
* Durability: Claimed lifetime though real-world results vary
* Effort: Low physical exertion required
Smart Strategy for Best Results
Combine both systems by using the 3M kit to restore clarity on badly damaged lenses. Then apply the Cerakote ceramic coating as the final sealant for superior long-term protection.
Prevent Re-Clouding With Regular Maintenance
Simple habits keep your headlights clear longer and delay the need for heavy restoration work. Consistent care protects your investment and maintains visibility.
Clean Every One to Two Months
Wash lenses with mild soap and a microfiber cloth to remove road grime. Avoid ammonia, bleach, or harsh degreasers that degrade plastic over time.
Reapply Sealant Regularly
Check your headlights every six months for signs of wear. If water no longer beads on the surface, reapply your chosen sealant immediately.
Park in Shade or Use Covers
UV exposure causes most oxidation, so minimize sun exposure when possible. Parking in shade or using a car cover significantly slows the degradation process.
Spot-Clean Minor Haze Early
Keep a tube of gritty toothpaste in your glove box for quick touch-ups. Clean and reseal at the first sign of yellowing before the damage worsens.
Avoid Common Restoration Mistakes
Even experienced DIYers make errors that ruin their results or damage their vehicle. Awareness of these pitfalls ensures a successful restoration project.
Skipping Grit Steps
Jumping from 600 to 2000 grit leaves deep scratches that polishing cannot remove. Always progress gradually through every grit level from 500 to 3000.
Letting Surface Dry During Sanding
Dry sanding creates heat, scratches, and clogs the sandpaper quickly. Keep the surface wet at all times throughout the entire sanding process.
Using Metal Tools
Metal scrapers or steel wool scratch the lens permanently and ruin clarity. Only use plastic scrapers and soft cloths on polycarbonate surfaces.
Forgetting to Mask Paint
Abrasives destroy paint instantly if they spread beyond the lens area. Always tape off surrounding areas before starting any sanding or polishing.
Ignoring Internal Fog
Cleaning will not fix smooth lenses that are cloudy inside due to seal failure. Replace or professionally repair units with broken internal seals.
Know When Replacement Is Necessary
Some damage levels exceed what cleaning or restoration can fix safely. Recognizing these limits saves you time and ensures vehicle safety.
Cracked or Broken Lenses
Even small cracks let in moisture and compromise the structural integrity of the housing. Replacement is the only safe option for cracked lenses.
Tinted or Coated Lenses
Factory-tinted or IR-reflective lenses found on modern LEDs can be ruined by abrasives. Check your model specifications before using sandpaper or toothpaste on coated optics.
Failed Seals With Internal Condensation
If water pools inside the lens, external cleaning provides no benefit. The lens assembly must be replaced or professionally resealed to function correctly.
Expect Realistic Results From Restoration
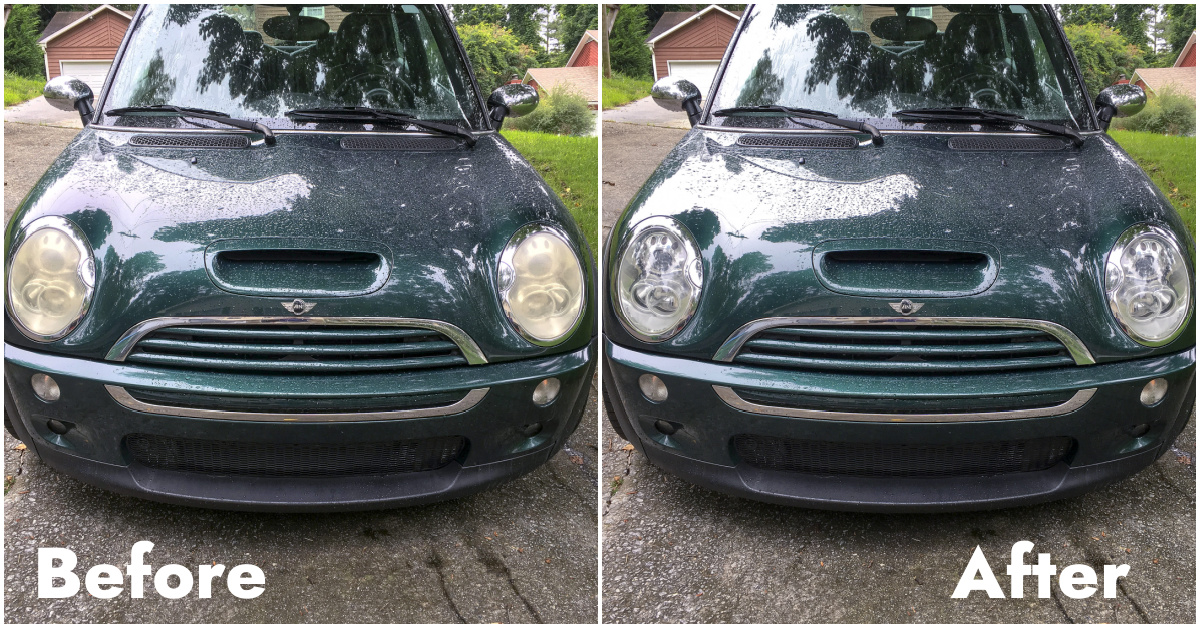
Understanding what is possible helps you set proper expectations for your restoration project. Proper technique yields dramatic improvements in both looks and performance.
Visual Improvement Potential
Proper restoration turns yellow, foggy lenses into clear, bright ones that look nearly new. The difference is often immediate and striking to the eye.
Light Output Boost
Clear lenses can improve nighttime visibility by up to 70 percent compared to degraded ones. This enhancement increases safety and reduces eye strain during night driving.
Time and Cost Savings
DIY methods cost a fraction of professional services while delivering similar results.
* Toothpaste method: Under 30 minutes and less than five dollars
* Sanding kit: 45 to 60 minutes and 15 to 30 dollars
* Professional service: Over 100 dollars for the same process
Longevity by Method
| Method | Expected Lifespan |
|---|---|
| Toothpaste + Wax | 1–3 months |
| Sanding + Clear Coat | 1–2 years |
| Sanding + Ceramic Coating | 2+ years |
| Unsealed Restoration | Weeks only |
Frequently Asked Questions About Cleaning Headlamp Lenses
How often should I clean my headlight lenses?
You should clean your headlights every one to two months using mild soap and water. Increase frequency to monthly if you drive in harsh conditions with road salt or heavy bug accumulation.
Can I use regular glass cleaner on my headlights?
No, avoid ammonia-based glass cleaners as they degrade polycarbonate plastic over time. Stick to mild dish soap and water for routine cleaning to preserve the lens material.
Why do my headlights get cloudy again so fast?
Headlights re-oxidize quickly if you skip the sealing step after cleaning. Always apply a UV-protective sealant, clear coat, or ceramic coating to prevent rapid re-clouding.
Is toothpaste effective for all types of headlight damage?
Toothpaste only works on external oxidation where the surface feels rough or bumpy. It cannot fix internal fogging, cracks, or smooth lenses with internal moisture issues.
How long does a professional headlight restoration last?
A properly sealed restoration using clear coat or ceramic coating lasts one to two years. Unsealed restorations may begin to re-oxidize within just a few weeks.
Can I restore headlights without sanding them?
Yes, mild oxidation responds well to toothpaste or baking soda paste without sanding. However, heavily yellowed or pitted lenses require wet sanding for full clarity restoration.
Key Takeaways for Cleaning Headlamp Lenses Effectively
Restoring your headlights requires diagnosing the damage type, choosing the right abrasive method, and sealing the finish properly. Skipping the sealing step or using the wrong technique on internal fog leads to wasted effort and poor results.
Start by testing the surface texture to determine if your lenses need simple cleaning or heavy sanding. Apply a high-quality sealant immediately after restoration to protect your work and maintain visibility for years to come.