
Cloudy, yellowed headlight lenses are more than an eyesore; they can cut your nighttime visibility by up to 80%. This dangerous fog results from UV damage and oxidation degrading the polycarbonate plastic found in most modern vehicles.
You do not need expensive replacements to fix this issue. This guide details proven methods to clean plastic headlamp lenses using household items or sanding kits while ensuring long-term protection against future damage.
Assess Headlight Damage Before Cleaning

Inspecting your lenses determines whether you need a simple wipe-down or aggressive sanding. Ignoring deep cracks or internal moisture renders surface cleaning useless.
Check for Cracks and Moisture Intrusion
Look closely for visible fractures or water trapped inside the housing.
* Small cracks: Dry the interior with a hairdryer for 30 minutes then seal the exterior with clear silicone.
* Trapped moisture: Drill a tiny hole at the top of the housing to blow warm air inside and evaporate water before resealing.
* Severe damage: Skip restoration if the lens is deeply cracked as water will continue to enter the assembly.
Classify Your Oxidation Level
Your cleaning strategy depends entirely on the severity of the yellowing.
* Mild haze: Slight yellowing that often responds to polishing compounds or DIY pastes.
* Severe oxidation: A thick, chalky film or brownish discoloration requiring wet sanding with multiple grits.
Run your fingernail across the surface. If it feels rough or chalky, you likely have deep oxidation that needs abrasive removal.
Prepare Your Workspace and Tools
Proper preparation prevents accidental damage to your vehicle paint and ensures the cleaning agents work effectively.
Work in the Shade Only
Never attempt to clean plastic headlamp lenses in direct sunlight. Heat causes cleaning mixtures to dry too quickly, leaving stubborn streaks and reducing chemical effectiveness.
Protect Surrounding Paint and Trim
Apply painter’s tape around the edges of the headlight assembly. This shields your fender, bumper, and trim from scratches or chemical exposure during the scrubbing or sanding process.
Remove Headlights for Best Results
Removing the headlight assembly offers full access and prevents uneven results.
1. Use a socket wrench or screwdriver to loosen mounting bolts.
2. Gently disconnect electrical connectors and label them for reassembly.
3. Place the unit on a soft towel to avoid scratching the lens during work.
Use the DIY Paste Method for Mild Haze
This budget-friendly technique uses common household items to tackle early-stage oxidation effectively.
Create Your Cleaning Paste
Mix the following ingredients to create a potent cleaning solution:
* 1 tablespoon of baking soda
* 2 teaspoons of citric acid or fresh lemon juice
* 1 ounce of baking soda-based toothpaste
* A few drops of water to thicken the mixture
The citric acid dissolves the oxidized plastic layer while the baking soda provides gentle abrasion to lift the haze.
Apply and Scrub in Phases
Follow this specific sequence for optimal results:
1. Wash the lens with soap and water, dry it, then wipe with isopropyl alcohol.
2. Apply the paste evenly using a microfiber cloth or garden glove.
3. Phase 1: Use the soft yellow side of a sponge to scrub in circles for 3–4 minutes.
4. Phase 2: Switch to the green abrasive side and use light pressure for another 3–4 minutes.
5. Let the paste sit for 5–10 minutes before wiping with paper towels and rinsing.
Repeat this process 2–3 times for heavily fogged lenses. Most users see dramatic improvement after the second pass.
Restore Severely Oxidized Lenses by Sanding
Deep yellowing or chalky surfaces require wet sanding to achieve true optical clarity. This method removes the damaged top layer of plastic entirely.
Gather Required Sandpaper and Tools
You need aluminum oxide sandpaper in specific grits to progress from rough removal to fine polishing:
* 320 grit for heavy oxidation removal
* 600, 1000, and 1500 grits for progressive smoothing
* 2000 and 3000 grits for final polish preparation
* Spray bottle filled with water
* Foam backing pad or sanding block
Keep the lens and sandpaper wet at all times to prevent overheating and clogging the paper.
Execute the Grit Sequence
Sand the entire surface systematically to ensure an even finish.
1. 320 Grit: Sand in circular motions until the yellow layer disappears completely.
2. 600 Grit: Switch to horizontal strokes. Stop when the runoff water turns milky white.
3. 1000–1500 Grit: Use vertical strokes to erase marks left by the 600-grit paper.
4. 2000–3000 Grit: Return to horizontal strokes to create a uniform matte surface.
The lens will look dull but smooth with no deep scratches remaining.
Polish to Crystal Clarity
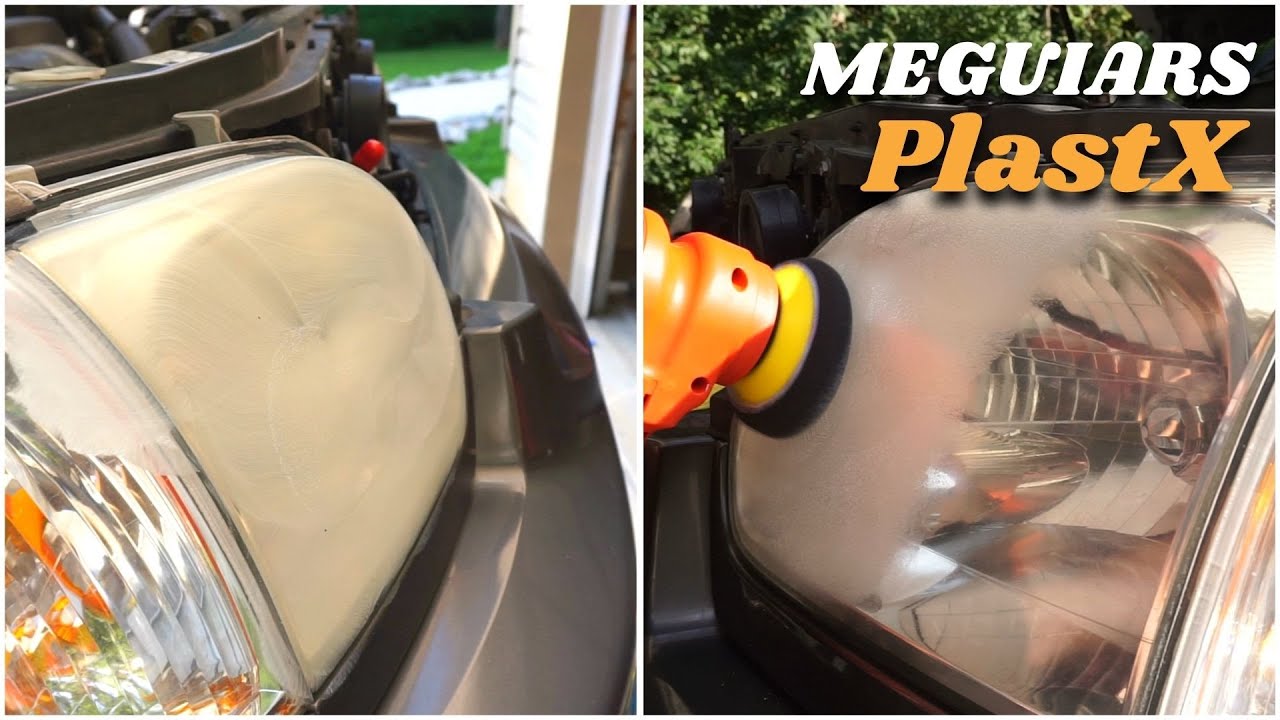
Apply a plastic-specific compound like Meguiar’s PlastX to a foam pad. Buff by hand in small circles or use a drill on low speed (1200–1800 RPM). Move constantly to avoid generating heat that could warp the plastic. Wipe away residue with isopropyl alcohol to reveal a mirror-like finish.
Seal Against UV Damage Immediately
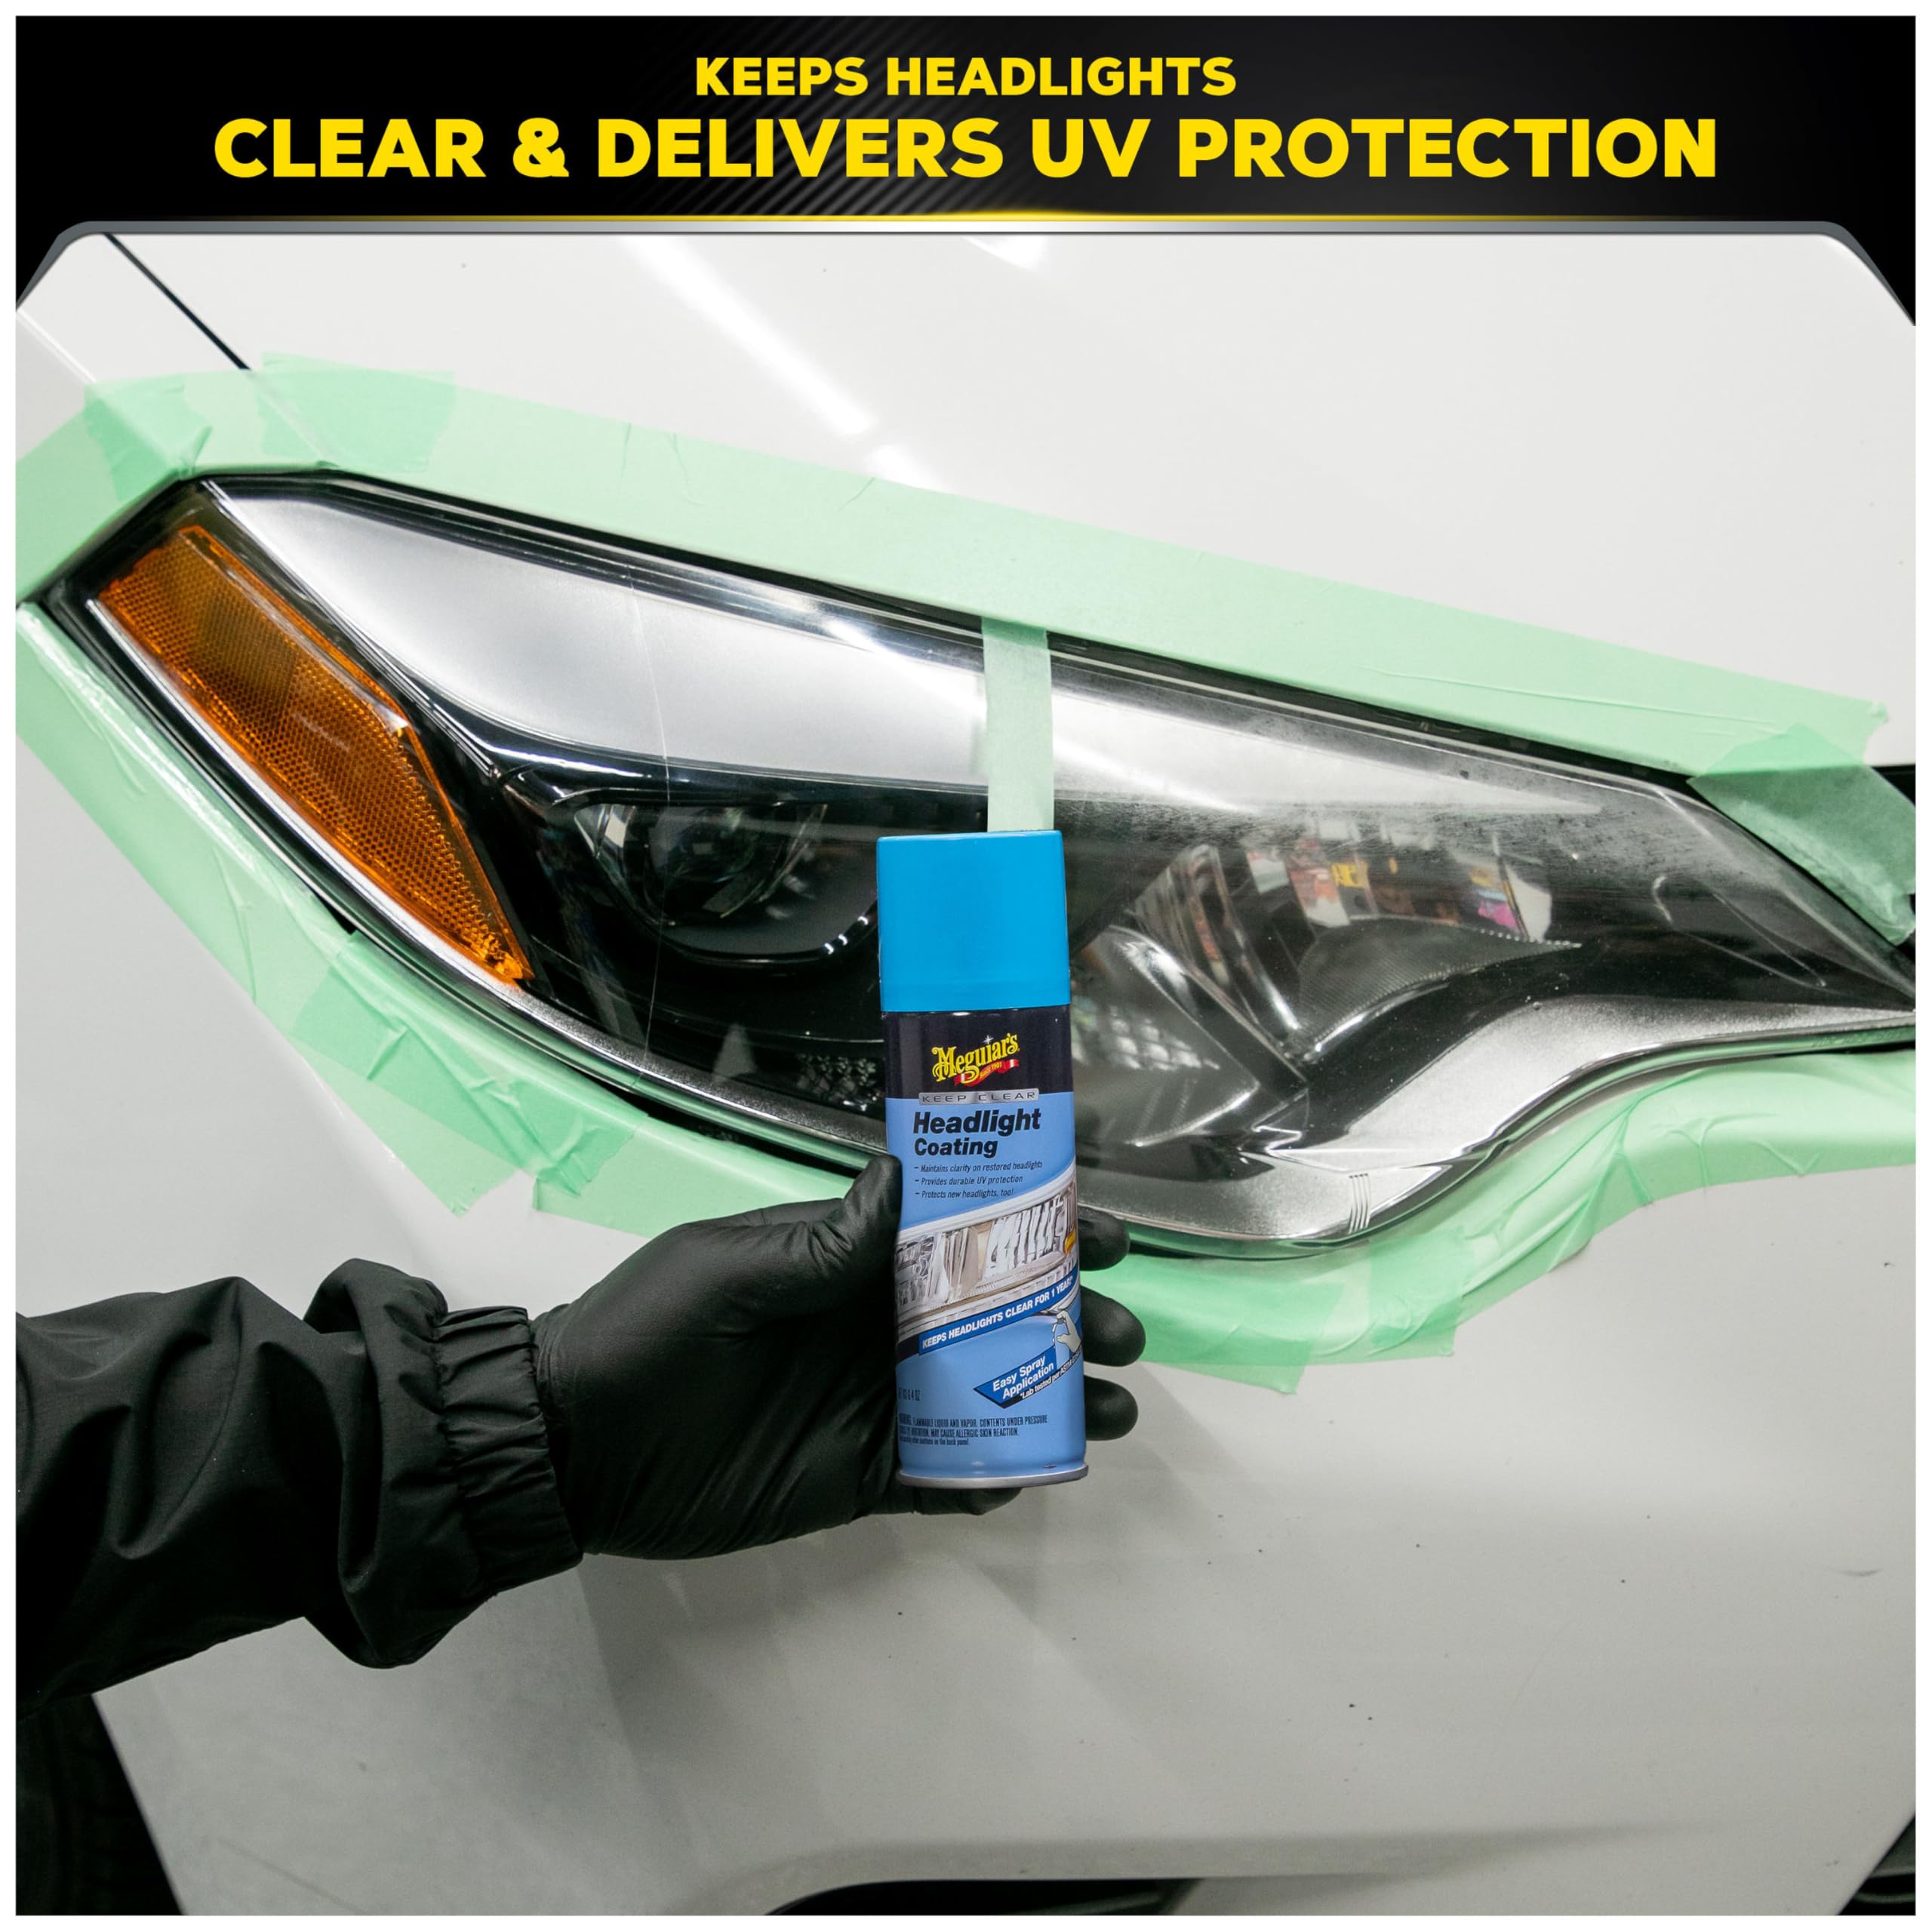
Unsealed plastic will re-oxidize within months. Applying a protective layer is the most critical step in learning how to clean plastic headlamp lenses effectively.
Apply UV-Blocking Spray Sealant
This option is ideal for DIYers wanting a quick shield.
1. Clean the lens with alcohol and let it dry completely.
2. Hold the can 4–6 inches away from the surface.
3. Spray two thin coats, waiting 5 minutes between applications.
4. Let the sealant cure overnight before driving the vehicle.
Top-tier products like Meguiar’s Headlight Restoration Coating typically last about one year.
Install Headlight Protection Film
For long-term defense, Headlight Protection Film (HPF) offers unmatched durability.
1. Clean the lens with distilled water or alcohol.
2. Mist the lens lightly with distilled water.
3. Peel the film and align it from one corner, squeegeeing out bubbles toward the edges.
4. Use a hairdryer to heat and stretch the film over complex curves.
5. Trim excess material with a razor blade.
HPF lasts up to 5 years, blocks UV rays, and resists rock chips while remaining fully breathable.
Avoid These Common Mistakes
Even experienced DIYers make errors that ruin their restoration efforts. Avoid these pitfalls to ensure success.
Skipping the Sanding Step
Polishing alone cannot fix deep oxidation. If you skip sanding on severely yellowed lenses, you simply polish over the damage. Always sand first to remove the degraded layer.
Using Harsh Household Cleaners
Avoid vinegar, bleach, or ammonia-based cleaners. These chemicals attack polycarbonate and cause micro-etching that worsens fogging over time. Stick to alcohol, citric acid, or plastic-safe compounds.
Forgetting to Clean Before Sealing
Any oil, wax, or dust trapped under your sealant causes bubbling or peeling. Always wipe the surface with isopropyl alcohol immediately before applying the final coating.
Overheating During Polishing
Running a polisher too fast melts the plastic surface. Use low RPM settings and keep the pad moving. If the lens feels hot to the touch, stop immediately and let it cool.
Driving Before Curing
UV sealants require 8–12 hours to cure fully. Driving too soon exposes the soft coating to rain, dirt, and vibration, which compromises adhesion and longevity.
Maintain Clarity With Simple Habits
Restored headlights can last for years with minimal ongoing maintenance.
Wash Regularly and Gently
Clean your lenses during every car wash using mild soap and a soft sponge. Never use abrasive mitts or stiff brushes that create new micro-scratches.
Remove Salt and Acid Fast
Rinse headlights promptly after winter driving or heavy rainstorms. Road salt and acidic precipitation accelerate oxidation faster than UV exposure alone.
Reapply Protection Annually
- Spray sealants: Reapply every 6–12 months depending on climate.
- HPF: Inspect yearly and replace if scratched or peeling.
Choose the Right Method for Your Needs

| Need | Best Method | Time Required | Cost | Longevity |
|---|---|---|---|---|
| Light haze, quick fix | DIY Paste | Under 20 min | Under $5 | 3–6 months |
| Severe yellowing, max clarity | Sanding + Polish | 1–2 hours | $15–$30 | 1 year (sealed) |
| Permanent protection | HPF Installation | 30–45 min | $20–$40 | Up to 5 years |
Why HPF Is the Smart Long-Term Choice
While sealants need annual reapplication, HPF acts like a clear bra for your headlights. It blocks UV rays, resists chips, and maintains clarity far longer than sprays. For drivers in sunny or harsh climates, it is the only true “set and forget” solution.
Frequently Asked Questions About Cleaning Plastic Headlamp Lenses
How often should I clean my plastic headlight lenses?
You should wash your lenses with mild soap during every regular car wash. If you live in an area with heavy road salt or acid rain, rinse them immediately after exposure to prevent accelerated oxidation.
Can I use toothpaste alone to clean plastic headlamp lenses?
Toothpaste works best when mixed with baking soda and citric acid. While toothpaste alone offers mild abrasion, adding these activators creates a chemical reaction that dissolves oxidation more effectively for better clarity.
Why do my headlights get cloudy again so fast?
Headlights become cloudy again because the UV protective coating was not restored after cleaning. Without a sealant or protection film, the bare polycarbonate plastic oxidizes rapidly when exposed to sunlight.
Is wet sanding safe for all plastic headlight lenses?
Wet sanding is safe for polycarbonate and acrylic lenses if done correctly with water lubrication. However, you must follow the correct grit sequence and avoid excessive pressure to prevent warping or damaging the lens structure.
What is the difference between sealant and protection film?
Sealants are liquid coatings that last about one year and primarily block UV rays. Protection film is a physical barrier that lasts up to five years, offering superior defense against UV rays, rock chips, and road debris.
Key Takeaways for Cleaning Plastic Headlamp Lenses
Restoring your headlights improves both the look of your vehicle and your safety on the road. Remember that cleaning is only half the battle; sealing the lens with a UV protectant or film is essential to prevent rapid re-oxidation.
Start by assessing the damage level to choose between a simple paste treatment or a full sanding restoration. Take action today to reclaim your nighttime visibility and protect your investment.