
Staring at a dim headlight often leaves car owners wondering exactly how to open headlamp cover assemblies without causing costly cracks. Whether you need to swap a burnt bulb or clear up foggy condensation, accessing the interior requires specific techniques to avoid breaking plastic clips or damaging seals.
This guide details the universal steps for locating hidden fasteners, separating sealed lenses with heat, and reinstalling components securely. You will learn model-specific tricks and safety warnings to ensure your repair job lasts.
Identify Hidden Fasteners and Access Points
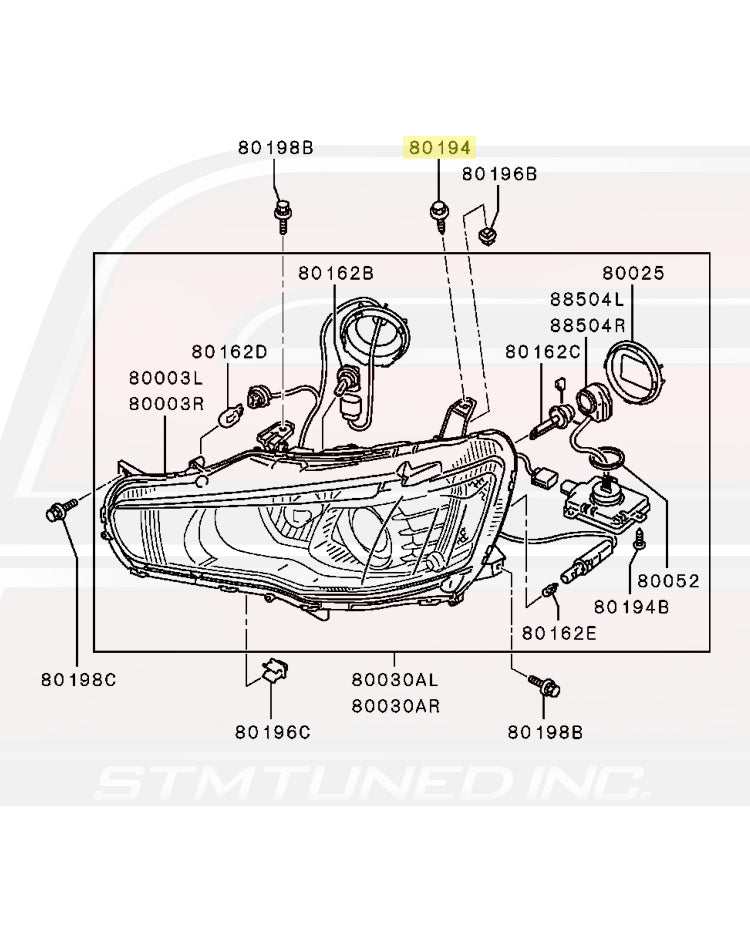
Modern vehicles rarely expose screws directly on the front of the headlight assembly. Manufacturers hide mounting points behind bumpers, within wheel wells, or under hood latches to maintain a sleek appearance. You must locate these specific anchors before attempting to pull any part of the housing.
Check for Rear Retaining Rings
Many halogen and HID systems use a circular ring to lock the bulb in place rather than securing the entire cover.
- Open the hood and look behind the headlamp housing for a large circular component.
- Identify if the ring is metal or hard plastic with notches for gripping.
- Rotate the ring counter-clockwise using your hand or a flat tool to unlock it.
- Pull the ring away from the housing to expose the bulb socket.
Pro Tip: Wear textured gloves to improve your grip on slippery or tight retaining rings.
Inspect for Concealed Mounting Screws
Some trucks and older sedans secure the whole unit with screws located on the top edge or side frames.
- Shine a bright flashlight along the perimeter of the headlamp assembly.
- Look for Phillips or Torx-head screws connecting the unit to the vehicle frame.
- Remove every visible screw and place them in a labeled magnetic tray.
- Gently tug the assembly forward only after confirming all fasteners are removed.
Warning: Never force the headlamp out if it feels stuck, as you likely missed a hidden screw.
Extract the Bulb Socket Without Full Removal
You often do not need to completely remove the headlamp cover to change a bulb. Most designs allow rear access through the engine bay, saving you significant time and effort.
Disconnect Electrical Connectors First
Power wires must be detached before manipulating the bulb or socket to prevent electrical shorts.
- Locate the wiring harness plug attached to the back of the bulb socket.
- Press the small release tab firmly and pull the connector straight back.
- Avoid yanking the wires themselves, as this can break internal copper strands.
- Move the loose connector aside so it does not interfere with bulb removal.
Twist and Remove the Old Bulb
The bulb is typically held in place by a simple twist-lock mechanism within the housing.
- Grasp the rubber dust boot or plastic base of the bulb firmly.
- Rotate the socket counter-clockwise about a quarter to half turn.
- Pull the bulb straight out of the housing with a steady motion.
- Insert the new bulb and twist clockwise to lock it into position.
Note: Never touch the glass portion of a new halogen bulb with bare skin, as oils cause premature failure.
Separate Sealed Beam and Retrofit Units
Opening a sealed headlamp unit requires separating the front lens from the rear housing, which are often glued or welded together. This process is common for fixing internal moisture or upgrading to custom LEDs.
Apply Heat to Soften the Adhesive Seal
Factory seals use strong adhesives that become pliable only when heated to specific temperatures.
- Use a heat gun or hair dryer to warm the seam where the lens meets the housing.
- Move the heat source in a slow circular motion for two to five minutes.
- Aim for a surface temperature between 120 and 150 degrees Fahrenheit.
- Test the seam gently with a plastic tool to see if the adhesive has softened.
Pry the Lens Away with Plastic Tools
Once the adhesive is soft, you can carefully separate the components without cracking the glass.
- Insert a plastic trim tool or guitar pick into the heated gap.
- Slide the tool slowly around the entire perimeter of the headlight.
- Apply minimal pressure to avoid snapping the plastic lens tabs.
- Clean off old adhesive residue once the lens is fully separated.
Pro Tip: Apply masking tape along the seam before heating to protect the paint from scratches.
Troubleshoot Stuck Assemblies and Barriers
Even after removing visible screws, some headlamps remain stubborn due to hidden brackets or complex mounting systems. Diagnosing these obstacles prevents unnecessary force.
Access Bolts Through the Wheel Well
Certain vehicles hide critical mounting bolts behind the inner fender liner near the wheel.
- Turn the steering wheel away from the side you are working on.
- Remove plastic clips holding the fender liner using a trim removal tool.
- Peel back the liner to reveal bolts securing the headlamp bracket.
- Support the headlamp with one hand while removing the final bolts.
Example: Many Subaru and Toyota models require this wheel well access method.
Determine Required Access Level
Clarifying your goal helps you decide how much disassembly is actually necessary.
- Bulb Replacement: Requires only rear socket access.
- Moisture Removal: Requires opening the lens seal partially.
- Full Retrofit: Requires complete separation of lens and housing.
Misidentifying your task often leads to unnecessary removal of bumpers or grilles.
Reassemble and Seal Components Properly

Reinstalling the headlamp correctly ensures water resistance and proper beam alignment. Rushing this stage can lead to foggy lights or electrical failures.
Secure Wiring and Bulb Placement
Ensure all internal components are seated correctly before closing up the assembly.
- Push the new bulb firmly into place until it sits flush against the housing.
- Plug the electrical connector in until you hear a distinct click.
- Give the wire a gentle tug to confirm the locking tab is engaged.
- Reinstall any rubber dust covers over the bulb base.
Reattach Fasteners and Reseal Lenses
Proper sealing is critical if you opened a bonded unit to prevent water intrusion.
- Reinstall retaining rings by turning them clockwise until snug.
- Apply fresh butyl rope sealant or UV adhesive to the lens channel if opened.
- Press the lens and housing together firmly and clamp if necessary.
- Allow the sealant to cure for 12 to 24 hours before exposing to rain.
Warning: Driving with an unsealed headlamp invites moisture, corrosion, and bulb failure.
Address Model-Specific Variations

While general principles apply, specific car models often have unique quirks you must address to open the cover successfully.
Honda Civic (2006–2011) Procedure
- Locate two screws on the top edge of the headlamp facing the radiator.
- Remove screws and pull the unit forward gently without prying.
- Twist the bulb socket 90 degrees counter-clockwise to release.
Ford F-150 (2015–2020) Procedure
- Remove grille pins to gain full access to the headlamp mounting points.
- Release three retaining clips using a trim tool.
- Slide the entire headlamp assembly forward out of the body.
Toyota Camry (2012–2017) Procedure
- Check for push-in clips rather than screws on the top frame.
- Pull the assembly straight forward with firm, even pressure.
- Access the bulb cover through the wheel well if rear engine access is blocked.
Recognize When Professional Help Is Needed
Some headlight systems are too complex or fragile for safe DIY repair. Knowing when to stop can save you from expensive mistakes.
Complex LED and Laser Systems
Adaptive lighting systems often require computer calibration after removal.
- Look for multiple connectors or active cooling fans on the unit.
- Check for labels explicitly warning against disassembly.
- Note if daytime running lights share integrated circuitry with the main beam.
Brittle or Cracked Housings
Older plastic housings become fragile over time and may shatter if forced.
- Stop immediately if you hear cracking sounds or see stress marks.
- Consider purchasing a complete aftermarket assembly instead of repairing.
- Replace the unit entirely if the plastic feels dry or brittle to the touch.
Frequently Asked Questions About Opening Headlamp Covers
Can I open a headlamp cover without removing the bumper?
Yes, many vehicles allow bulb replacement through the engine bay or wheel well. However, full lens separation often requires bumper removal on modern cars to access hidden screws.
What tool is best for separating a sealed headlamp lens?
A heat gun set to low or a powerful hair dryer works best to soften the adhesive. You should also use plastic pry tools to avoid scratching the lens or cracking the housing.
How do I know if my headlamp is sealed or removable?
Inspect the back of the housing. If there is a large removable cap or twist-lock ring, it is serviceable. If the entire unit appears as one solid piece with no rear access, it is likely a sealed beam unit.
Is it safe to use a screwdriver to pry open the headlamp cover?
No, metal screwdrivers can easily crack the plastic lens or damage the sealing channel. Always use plastic trim tools or guitar picks when separating bonded parts.
How long does headlamp sealant take to dry?
Most butyl rope sealants set immediately upon cooling, but full curing takes 12 to 24 hours. UV adhesives cure instantly under UV light but may need time to reach full strength.
Key Takeaways for Opening Your Headlamp Cover
Mastering how to open headlamp cover assemblies saves money and restores your vehicle’s safety features effectively. Remember to always locate hidden fasteners, use heat for sealed units, and reseal components thoroughly to prevent future moisture issues.
Start by identifying your specific vehicle model and gathering plastic tools to avoid damage. If you encounter complex adaptive lighting or brittle plastics, consult a professional to ensure your headlights remain safe and functional.