
Your Petzl headlamp fails to turn on with no flicker or light at all. This critical failure often happens during night hikes or alpine climbs when you need reliability most. Panic is unnecessary since most issues stem from simple causes like dead batteries or dirty contacts rather than internal damage.
This guide helps you fix a Petzl headlamp not working by walking through step-by-step diagnostics. You will learn to check battery wrappers, clean corroded terminals, and reset specific LED modes. These methods apply to Reactik, Swift RL, Actik, and Tikka models to restore your light quickly.
Verify Battery Status and Remove Insulating Wrappers
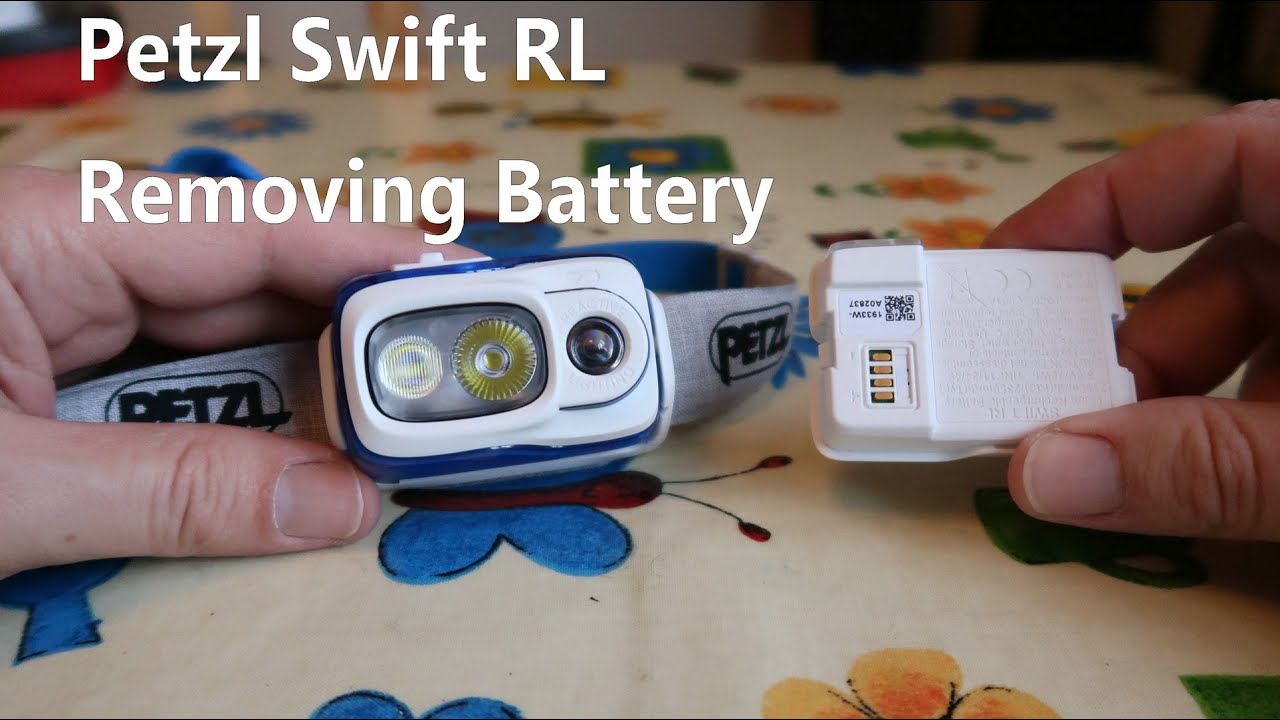
Power source issues cause the majority of headlamp failures before any internal component is at fault. You must verify the integrity of your energy cells before attempting complex repairs or assuming the unit is broken.
Remove Plastic Seals from New Batteries
New alkaline batteries often arrive with a thin plastic film covering the terminals. This wrapper acts as an insulator that completely blocks electrical flow even if the battery is fresh.
* Pull all batteries out of the compartment immediately.
* Inspect both ends of each cell for shiny plastic coverage.
* Peel off any film completely before reinserting the batteries.
Many users assume new batteries work instantly but forget this removal step. This single action resolves many cases where a Petzl headlamp is not working due to blocked conductivity.
Test with Known Good Power Cells
Even unwrapped batteries can be defective or drained from long storage periods. You should always test with verified power sources to rule out cell failure.
* Use brand-new, high-quality alkaline batteries from reputable brands.
* Ensure rechargeable lithium packs are fully charged before testing.
* Try the batteries in another device to confirm they hold a charge.
Pro Tip: Cold environments cause battery voltage to drop significantly. Warm your batteries in a pocket for 10 minutes before testing if you are in freezing conditions.
Ensure Correct Battery Installation and Polarity
Wrong polarity or loose fitting prevents circuit completion even when you have good batteries installed. Precise alignment is required for the electrical current to flow through the device.
Match Polarity Symbols Exactly
Petzl headlamps require strict adherence to polarity indicators inside the housing. Reversing the orientation will stop the lamp from turning on although it rarely causes permanent damage.
* Open the battery compartment completely.
* Locate the plus and minus symbols molded into the plastic.
* Align the batteries so the spring connects to the negative terminal.
* Close the compartment securely and attempt to power on.
Improve Contact Pressure with Tin Foil
Loose batteries cause intermittent power loss or total failure due to insufficient pressure on the terminals. You can bridge small gaps using a conductive material in emergency situations.
* Cut a small square of tin foil approximately 5mm by 5mm.
* Place the foil on the spring side or negative contact point.
* Reinsert the battery to press the foil against the terminal.
This temporary fix boosts pressure and conductivity for immediate use. You should remove the foil and clean the contacts properly as soon as possible to prevent long-term issues.
Clean Corroded Electrical Contacts Thoroughly
Dirt and oxidation on metal contacts create resistance that stops electricity from reaching the bulb. This is the second most common reason a Petzl headlamp is not working especially after exposure to humidity.
Identify Corrosion on Terminals
Visual inspection reveals white or green crusty residue on battery terminals and internal copper contacts. This buildup breaks the electrical circuit and dims or kills the light output entirely.
* Remove all batteries from the housing.
* Look for dull blackened areas or colored crust on the metal.
* Check the contact point located under the bulb socket carefully.
Scrape Contacts Until Shiny
Mechanical cleaning restores conductivity by removing oxidation layers from the metal surfaces. You need a pocket knife or small screwdriver to perform this task effectively.
1. Gently scrape the positive terminal at the bottom of the compartment.
2. Scrape the negative spring contact until it shines.
3. Clean the contact beneath the bulb socket if accessible.
4. Wipe away all debris with a dry cloth.
5. Bend the metal contacts slightly outward to increase pressure.
User Feedback: Many hikers report this fix worked a treat by restoring full function instantly. Apply a tiny drop of dielectric grease after cleaning to slow future corrosion.
Diagnose Light Source and Bulb Integrity
If power delivery is confirmed but no light appears the issue may lie with the bulb or LED component itself. Different technologies require different diagnostic approaches for accurate repair.
Replace Burnt Out Incandescent Bulbs
Older Petzl models use replaceable 3V incandescent bulbs that burn out over time. Total darkness despite fresh batteries often indicates a failed bulb in these specific units.
* Unscrew the lens or bulb holder according to your manual.
* Remove the old bulb carefully without touching the glass with bare hands.
* Insert a compatible 3V replacement bulb sold by Petzl.
* Reassemble the unit and test the light function.
Inspect the socket for bent pins or melted plastic during this process. Physical damage to the socket may require professional replacement rather than a simple bulb swap.
Reset LED Modes on Modern Models
LEDs rarely fail completely so dim light or flickering often points to mode lock or voltage issues. Specific models like the Swift RL feature Boost modes that can get stuck.
* Turn the lamp off completely before attempting a reset.
* Press and hold the main button for more than five seconds.
* Release the button to allow the lamp to reset its internal logic.
* Toggle through modes to confirm normal operation returns.
Rapidly pressing the button cycles through settings and can clear glitches in the control circuit. This simple reset often fixes a Petzl headlamp not working due to software hiccups.
Test Charging System on Rechargeable Models
Rechargeable units like the Reactik+ rely on USB-C charging ports that can fail due to debris or cable issues. A dead battery pack might simply be unable to receive a charge.
Verify Cable and Port Functionality
Charging failures often stem from faulty cables rather than the headlamp itself. You must isolate the power source to determine the true cause of the issue.
* Use a known-working USB-C cable for the test.
* Plug into a reliable power source like a wall adapter.
* Look for the charging indicator LED on the device.
* Check the port for lint sand or bent pins if no light appears.
Clear Debris from Charging Ports
Dust and sand often block USB-C ports especially after outdoor use. Cleaning the port gently can restore the connection needed for charging.
* Power off the lamp before cleaning.
* Use a toothpick or compressed air to clear debris.
* Reconnect the cable and watch for the charging light.
Warning: Lithium-ion batteries shut down below minus 20 degrees Celsius. Warm the lamp close to your body before attempting to charge it in cold weather.
Assess Internal Circuit Damage Risks
If all previous steps fail the problem likely lies within the internal electronics or structural integrity. Water ingress or severe impact can fry the circuit board beyond user repair.
Recognize Signs of Fried Circuitry
Internal damage often presents as total non-response even with verified good batteries and clean contacts. You should look for specific indicators of electronic failure.
* No response from the unit despite fresh power sources.
* Absence of charging light on USB capable models.
* Visible discoloration or burnt smell from the housing.
Determine Repair Viability
Most internal PCB damage cannot be fixed by end users due to tiny solder joints. Petzl units are not designed for DIY circuit board replacement.
* Check your warranty status if the unit is under guarantee.
* Contact Petzl After-Sales Service for professional diagnostics.
* Replace the unit if it is out of warranty and non-responsive.
Professional repair costs often exceed the value of the unit making replacement the practical choice. Save disassembly attempts for last since they void warranties and risk further damage.
Model-Specific Troubleshooting Quick Reference
Different Petzl models have unique failure points based on their design and power systems. Targeted checks save time when diagnosing why a Petzl headlamp is not working.
Reactik+ Charging Issues
- Check USB-C port for debris blockage.
- Use a different cable and power source.
- Warm battery if used in cold environments.
- Try a reset by holding the button for 10 seconds.
Swift RL and Actik Dim Light
- Remove battery wrapper from new cells.
- Clean contacts under bulb and in housing.
- Reset Boost mode with long button press.
- Replace with 3V bulb if using incandescent version.
Tikka Intermittent Connection
- Bend negative spring contact outward gently.
- Use tin foil trick for temporary field fix.
- Inspect headband buckle for loose fit issues.
Prevent Future Headlamp Failures
A working headlamp today does not guarantee reliability tomorrow without proper maintenance habits. Preventive care extends the life of your gear significantly.
Pre-Adventure Checklist
- Test before every trip to ensure function.
- Carry spare batteries even for rechargeable models.
- Clean contacts monthly if used in wet conditions.
- Store with batteries removed to prevent leakage.
Proper Storage Techniques
- Keep in a dry room-temperature place always.
- Avoid leaving in direct sunlight or hot cars.
- Charge lithium-ion batteries to 50 percent for long storage.
When to Contact Petzl Support
Professional help is necessary when your headlamp still will not work after trying fresh batteries cleaning contacts and resetting modes. Expert diagnosis is the next logical step.
Service Channels Available
- Sport Line for hiking and camping models.
- Pro Line for industrial or rescue-grade units.
Have your model name and serial number ready when contacting support. Petzl may offer repair replacement or recycling options depending on the issue.
Frequently Asked About Petzl Headlamp Issues
Why is my Petzl headlamp flashing red?
A flashing red light usually indicates low battery voltage or a charging error. Replace the batteries or check the charging cable and port for debris.
Can I use rechargeable batteries in all Petzl models?
No only specific models support rechargeable lithium packs. Standard AAA models require alkaline batteries unless specified otherwise in the manual.
How do I fix a Petzl headlamp stuck in Boost mode?
Press and hold the main button for more than five seconds to reset the mode. This clears the glitch and returns the lamp to normal operation.
Why does my headlamp work when I press the battery?
This indicates loose contacts or weak spring pressure. Clean the terminals and bend the spring outward to improve connection stability.
Is water damage covered under Petzl warranty?
Water damage is typically not covered if the IP rating was exceeded or seals were compromised. Contact support for specific case evaluation.
Key Takeaways for Fixing Your Petzl Headlamp
Most cases of a Petzl headlamp not working stem from simple issues like battery wrappers dirty contacts or incorrect polarity. Start with these basic checks before assuming internal circuit damage or seeking professional repair.
Regular maintenance including contact cleaning and proper storage prevents most failures before they occur. Follow the diagnostic steps in this guide to restore your light and ensure reliable performance on your next adventure.