
You’re deep in a cave or on a night hike when your Fenix headlamp starts flashing wildly before dying. This frustrating Fenix headlamp flashing issue often signals a simple lockout mode or low battery rather than a broken device.
This guide helps you decode every blink pattern to fix your light fast. You will learn specific steps to unlock your headlamp, resolve charging errors, and stop random flickering using official troubleshooting methods.
Decode Specific Fenix Headlamp Flashing Patterns

Identifying the exact blink sequence is the fastest way to solve your problem. Different flash counts indicate distinct states ranging from safety locks to critical power loss.
What Does 3 to 4 Blinks Mean?
If your light flashes three or four times when you press the button, it is likely in lockout mode. This safety feature prevents accidental activation while the light is stored in your pack.
- Common Models: HM65R-T, HM65R, and HM70R
- Visual Cue: The small indicator LED often blinks four times simultaneously
- Diagnosis: Many users mistake this signal for a dead battery or switch failure
Pro Tip: If the light worked recently but now refuses to turn on, lockout mode is the primary suspect, especially after water exposure.
Why Does My Light Blink Rapidly During Use?
A rapid triple flash while the light is on indicates low battery voltage. The system triggers this warning just before stepping down to a lower brightness level to preserve power.
- Trigger Point: Occurs after 6–8 hours on the HM70R or 4 hours in Turbo on the HM60
- System Response: The light instantly drops to the next lower lumen setting
- Critical Note: Turning the light off immediately after this flash may prevent it from restarting until recharged
How Do Blue Charging Lights Behave?
The blue LEDs on HM65R series models communicate charging status through specific patterns. Abnormal flashing usually points to power delivery issues instead of battery failure.
| Flash Pattern | Meaning |
|---|---|
| All 4 lights fast flashing | Battery is deeply discharged (<5%) and charging is initiating |
| Persistent fast flashing | Charging error due to cable, adapter, or battery issues |
| 3 solid, 1 flashing | Charging in progress but may indicate adapter incompatibility |
Expert Note: Some Samsung 3A wall chargers cause a “3 constant, 1 flashing” pattern even with a full charge. Swap adapters to test compatibility.
Unlock Your Fenix Headlamp From Lockout Mode
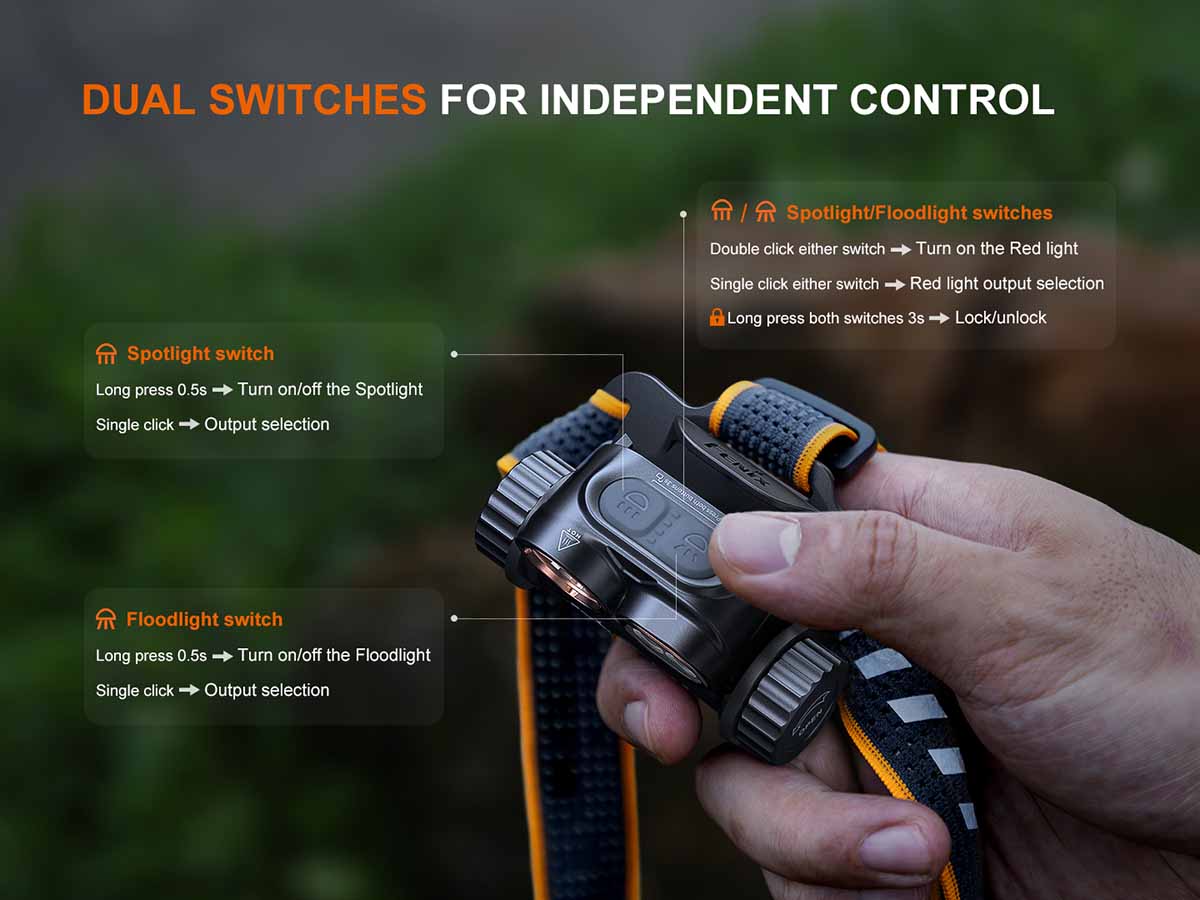
If your device blinks 3–4 times and shuts off, it is locked. This is the most frequently misdiagnosed issue among Fenix users.
Steps to Unlock the Device
- Press and hold both buttons on the headlamp simultaneously
- Maintain pressure for exactly 3 seconds
- Wait for the light to blink 4 times as confirmation
- Press the power button normally to turn the light on
- Compatible Models: HM65R, HM65R-T, and HM70R
- Time Required: Less than 10 seconds
- Tools Needed: None
Warning: Do not disassemble the unit or repeatedly tap the switch. Always attempt the unlock sequence first.
Resolve Persistent Charging Flashing Errors
Fast-flashing blue lights during charging can be alarming but are often easily fixed without opening the unit. Follow these steps to restore normal charging function.
Wait for Battery Recovery
If all four LEDs flash blue rapidly, your battery may be deeply discharged. This pattern is normal for the first 10 to 20 minutes of charging a dead battery.
- Action: Leave the device plugged in for at least 15 minutes
- Expected Result: The flashing should slow down or turn solid as voltage rises
- Patience Required: Some batteries take up to 30 minutes to register a charge from zero
Test Your Power Source Chain
Most charging errors originate from the power delivery equipment rather than the headlamp itself.
- Use a dedicated wall outlet instead of a computer USB port
- Swap to the original Fenix USB cable to ensure proper voltage
- Try a different power adapter to rule out incompatibility with specific 3A chargers
Critical Insight: Certain 3A adapters look identical to compatible ones but fail to negotiate the correct voltage with Fenix drivers.
Verify Battery Authenticity
Third-party or counterfeit 18650 batteries frequently cause charging errors and erratic behavior.
- Requirement: Use only protected 18650 lithium-ion cells
- Avoid: Unprotected cells or cheap brands from unauthorized sellers
- Recommendation: Stick to Fenix OEM batteries or trusted brands like Samsung, Sony, and LG
Safety Risk: Fake batteries may lack overcharge protection, leading to swelling or fire hazards.
Diagnose Flickering and Random Shutoffs
Intermittent flickering or random cutouts usually indicate a mechanical connection issue rather than electronic failure.
Check for the Insulating Disc
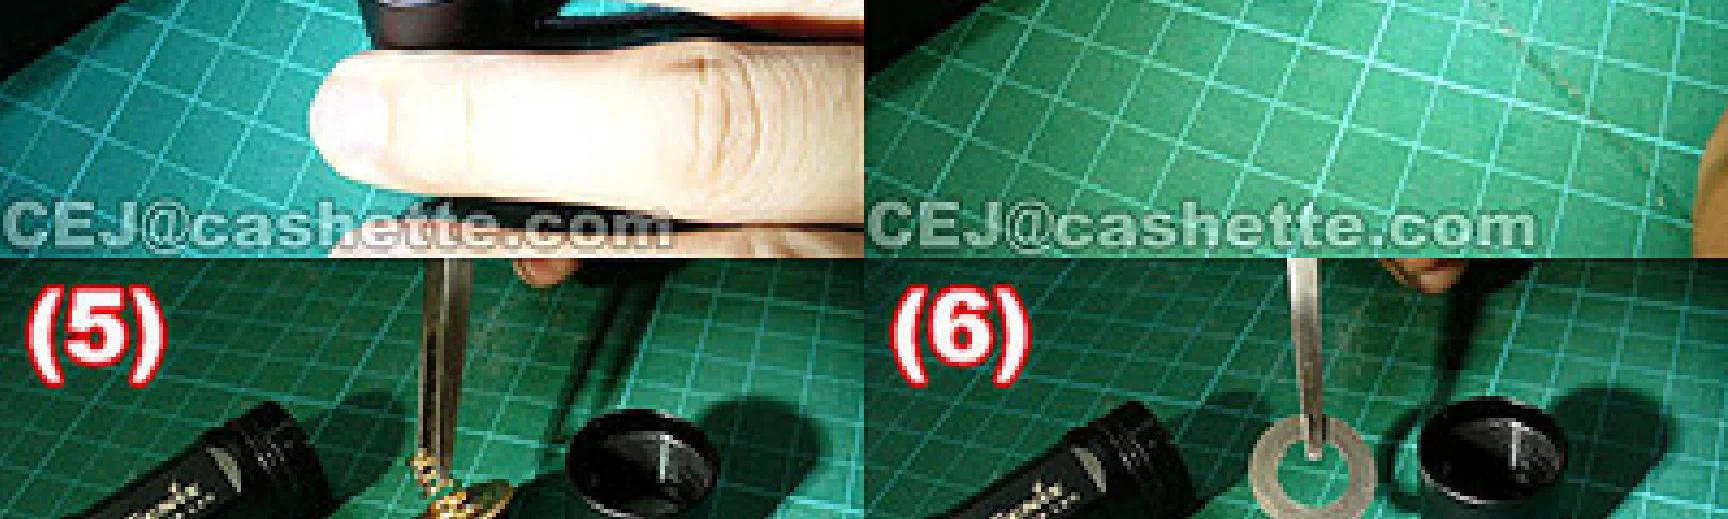
New Fenix headlamps ship with a white plastic insulating disc located between the battery and the tail cap.
- Symptom: The light will not turn on at all
- Fix: Remove the disc completely from inside the tail cap
- Location: Situated between the spring and the negative end of the battery
Quick Test: If your light is brand new and unresponsive, check for this disc first.
Tighten the Battery Cap
Loose caps cause intermittent contact issues, particularly in new units with stiff threads.
- Action: Fully tighten the tail cap to ensure engagement
- Technique: Rotate the cap back and forth to break in the threads
- Test: Try turning the light on while gently applying pressure to the cap
Pro Move: Ensure the cap is tight enough to stop but do not force it beyond its natural limit.
Clean Battery Contacts
Corrosion or debris on contact points is a leading cause of flickering during use.
- Use a fiberglass contact cleaning pencil to gently scrub contacts
- Apply isopropyl alcohol if heavy oxidation is present
- Wipe the area clean before reassembling the battery
Maintenance Tip: Clean your contacts every 3 to 6 months if you use your light in humid conditions.
Address Thermal Step-Down Flickering
Users often report flickering when the light is actually stepping down due to internal heat generation.
How Thermal Regulation Works
In Turbo mode, the light generates significant heat. When the internal temperature hits a threshold, the output drops instantly to protect the electronics.
- Behavior: No gradual dimming occurs before the sudden switch to a lower setting
- Perception: Many users think the light is failing when it is actually self-regulating
Prevent Premature Step-Down
- Keep the light body clean and free of mud or clay
- Avoid running Turbo mode inside enclosed spaces like stuff sacks
- Allow the light to cool between high-output bursts
Real-World Example: A caver reported flickering after 10 minutes because mud blocked the heat exchanger. Cleaning the body resolved the issue.
Verify Battery Compatibility and Authenticity
Using the wrong battery type is a silent cause of poor performance and flashing errors.
Require Protected 18650 Cells
Models like the HM65R and HM70R strictly require protected 18650 cells. Unprotected batteries can cause charging failure and erratic flashing.
- Function: Protection circuits prevent over-charge and over-discharge
- Risk: Incompatible logic in third-party cells triggers low-voltage warnings prematurely
Avoid Counterfeit Units
Counterfeit Fenix headlamps are common on unauthorized marketplaces and often exhibit erratic flashing.
- Signs of Fakes: Missing holographic seals, poor build quality, and inconsistent firmware
- Solution: Purchase only from authorized dealers like REI or official Fenix distributors
Verification: Genuine units come with consistent build quality and full warranty support.
Prevent Future Flashing Issues
Proper maintenance ensures your Fenix headlamp remains reliable for years of use.
Clean After Wet Use
- Rinse with fresh water if submerged in salt water
- Dry thoroughly before storing to prevent corrosion
- Clean contacts if exposed to mud or debris
Store Properly
- Keep the tail cap tightened to prevent moisture ingress
- Engage lockout mode before storage to save battery
- Remove batteries for long-term storage if not using lockout mode
Best Practice: Use lockout mode instead of removing batteries for routine storage to maintain seal integrity.
Rotate Cables and Adapters
- Keep a spare original Fenix cable in your gear kit
- Test chargers periodically to ensure they still deliver correct voltage
- Label adapters that are known to work well with your device
Field Hack: If charging fails in the field, swapping the cable is the most effective first step.
When to Contact Fenix Support
If troubleshooting steps fail, your unit may require professional service under warranty.
Warranty-Worthy Issues
- Random shutoffs persist after cleaning and battery replacement
- Persistent charging errors occur with OEM cables and adapters
- Debris is visible inside the battery compartment
- Flashing patterns do not match any known diagnostic codes
How to File a Claim
- Record a video of the specific flash pattern
- Document the battery type, cable, and adapter used
- Contact Fenix support or your authorized dealer
- Include your purchase receipt for validation
User Experience: Many users report fast turnaround times and free repairs even for debris-related internal issues.
Frequently Asked Questions About Fenix Headlamp Flashing
Why does my Fenix headlamp blink 3 times and not turn on?
Your headlamp is likely in lockout mode to prevent accidental activation. Press and hold both buttons for 3 seconds until it blinks 4 times to unlock it.
What does it mean when all 4 blue lights flash fast while charging?
This indicates the battery is deeply discharged or there is a charging error. Leave it plugged in for 15 minutes. If it persists, swap the cable or power adapter.
Can a fake battery cause my Fenix light to flash?
Yes, counterfeit or unprotected 18650 batteries often cause charging errors and erratic flashing. Always use genuine, protected cells designed for high-drain devices.
Why does my light flicker when I switch to Turbo mode?
The light is likely stepping down due to thermal regulation. Ensure the body is clean and not covered in mud or clothing that traps heat.
How do I know if my Fenix headlamp is counterfeit?
Counterfeit units often have missing holographic seals, poor build quality, and erratic behavior not described in the manual. Buy only from authorized dealers.
Will my light restart immediately after the low battery flash?
If you turn the light off immediately after the low battery triple flash, it may not restart until recharged. This is a safety feature to preserve remaining voltage.
Key Takeaways for Fixing Fenix Headlamp Flashing
A flashing Fenix headlamp is communicating a specific status rather than signaling total failure. Most issues resolve by unlocking the device, waiting out a deep discharge, or cleaning dirty contacts.
Understanding these patterns saves you time and prevents unnecessary replacements. If basic troubleshooting fails, utilize the robust Fenix warranty for professional repair.