
Your Milwaukee headlamp not charging ruins a workday before it starts. You plug it in, but the LED stays dark or flashes red endlessly. This frustrating scenario often stems from a bad cable, dirty port, or faulty power source rather than a broken lamp.
This guide helps you diagnose why your Milwaukee headlamp won’t charge using proven troubleshooting steps. You will learn to test cables, clean ports, reset the battery, and decide if a replacement is necessary. Follow these instructions to restore your light quickly.
Verify Your Power Source and Cable Quality
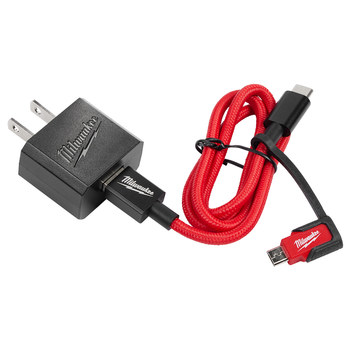
Most charging failures originate from the power outlet or the cable itself. You must rule out external factors before assuming the headlamp hardware is dead. A simple swap often solves the problem instantly.
Test the Wall Outlet or USB Port
Plug a different device like a phone into the same outlet or USB port. If the second device fails to charge, the issue lies with your power source. Try a different wall socket or switch to a dedicated wall adapter instead of a computer USB port.
Replace the Charging Cable
Cables fray and break internally over time. Use a known working micro-USB or USB-C cable to test your headlamp. Avoid cheap third-party cables that may not deliver the required amperage for Milwaukee batteries.
Use a High-Output Adapter
Laptop USB ports often output low current insufficient for charging tool batteries. Connect your headlamp to a wall adapter rated for at least 5V/2A. This ensures the battery receives enough power to initiate the charging cycle.
Inspect and Clean the Charging Port
Debris and physical damage frequently block the connection between the cable and the headlamp. A close visual inspection can reveal obstructions preventing a charge.
Check for Physical Damage
Look inside the charging port for bent pins or signs of corrosion. If the port feels loose or wobbly when you insert the cable, the internal soldering may be broken. This damage often occurs after dropping the headlamp on a job site.
Remove Dust and Lint
Use compressed air or a dry soft-bristled toothbrush to clear out pocket lint. For stubborn grime, dip a cotton swab in isopropyl alcohol and gently clean the port. Allow it to dry completely before attempting to charge again.
Insert the Cable Correctly
Forcefully jamming the cable can bend internal pins. Align the connector carefully and push straight in until it clicks. If resistance feels abnormal, stop immediately to prevent further damage.
Decode the LED Indicator Lights
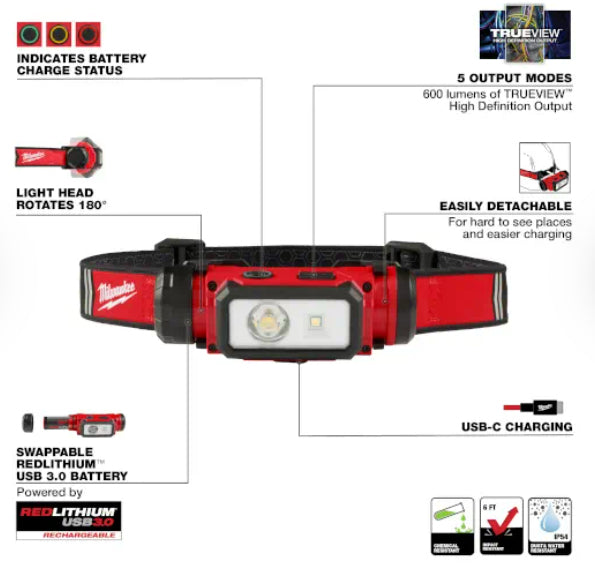
Milwaukee headlamps use specific light patterns to communicate battery status. Understanding these signals helps you pinpoint whether the issue is the battery, the charger, or the circuit board.
No Light When Plugged In
A completely dark indicator suggests no power is reaching the unit. This usually points to a dead battery, a broken cable, or a disconnected internal wire. Test with a different cable and outlet to confirm.
Blinking Red or Amber Light
Flashing lights often indicate a temperature fault or protection mode trigger. The battery may be too hot or too cold to charge safely. Let the headlamp sit at room temperature for 30 minutes before retrying.
Solid Red Light Stays On
A solid red light means charging is active. If it remains red after six hours, the battery might be degraded or the charger is underperforming. Try a different charger to see if the light turns green.
Reset the Headlamp Battery System
Electronic glitches can sometimes lock the charging circuit. Performing a hard reset clears temporary errors and allows the system to reboot.
Power Down Completely
Turn off the headlamp before removing any components. If your model has a removable battery pack, take it out carefully without using metal tools that could short the contacts.
Wait to Discharge Residual Power
Leave the battery out for at least 30 seconds. This waiting period allows residual electricity in the circuit board to dissipate, effectively resetting the protection logic.
Reconnect and Test
Reinsert the battery ensuring correct polarity. Plug in the charger and observe the LED indicator. This simple sequence resolves many false error states.
Isolate Faults with Spare Components
Swapping parts with known working units is the most effective way to identify the broken component. This step determines if you need a new battery, charger, or headlamp.
Test with a Spare Battery
Install a fully functional Milwaukee battery of the same voltage. If the spare battery charges normally, your original battery is defective. If it also fails, the issue lies within the headlamp or charger.
Try an Alternative Charger
Use a different Milwaukee charger compatible with your battery type. Some older chargers do not auto-detect newer battery chemistries correctly. A working charger confirms the original unit is faulty.
Verify Charger Compatibility
Ensure the charger matches your specific headlamp model requirements. Using an incompatible charger can prevent charging or damage the battery cells.
Evaluate Battery Health and Lifespan

Lithium-ion batteries degrade over time regardless of usage frequency. An old battery may simply refuse to hold a charge anymore.
Consider Battery Age
Batteries older than three years often lose their ability to recharge fully. Even with minimal use, chemical aging reduces capacity and eventually stops charging entirely.
Count Charge Cycles
Milwaukee batteries typically last for over 500 charge cycles. Heavy daily use on a job site will reach this limit faster than occasional DIY use.
Check for Physical Swelling
Inspect the battery pack for puffiness, heat, or burnt smells. These are critical signs of internal failure. Stop using the battery immediately if you notice these symptoms.
Perform a Hard Reset on the Unit
Some Milwaukee headlamp models respond to a specific button combination that forces a system reboot. This clears software stuck in an error loop.
Hold the Power Button
With the battery installed, press and hold the power button for 15 to 20 seconds. Release the button and immediately connect the charger to see if the LED activates.
Combine with Battery Removal
For a deeper reset, remove the battery, hold the power button for 10 seconds, then reinsert the battery. Connect the charger right after reinsertion to trigger a fresh charging cycle.
Check for Recalls and Firmware Issues
Newer electronic headlamps may have known defects or require firmware updates. Checking official resources can save you time on unfixable hardware bugs.
Search for Official Advisories
Visit the Milwaukee Tool website to search for recalls on your specific model number. Look for terms like “charging defect” or “hard hat light recall” in their support database.
Contact Customer Support
Call Milwaukee support or visit their website if you suspect a manufacturing defect. They can verify warranty status and advise on known issues affecting your specific batch of headlamps.
Decide When to Replace the Headlamp
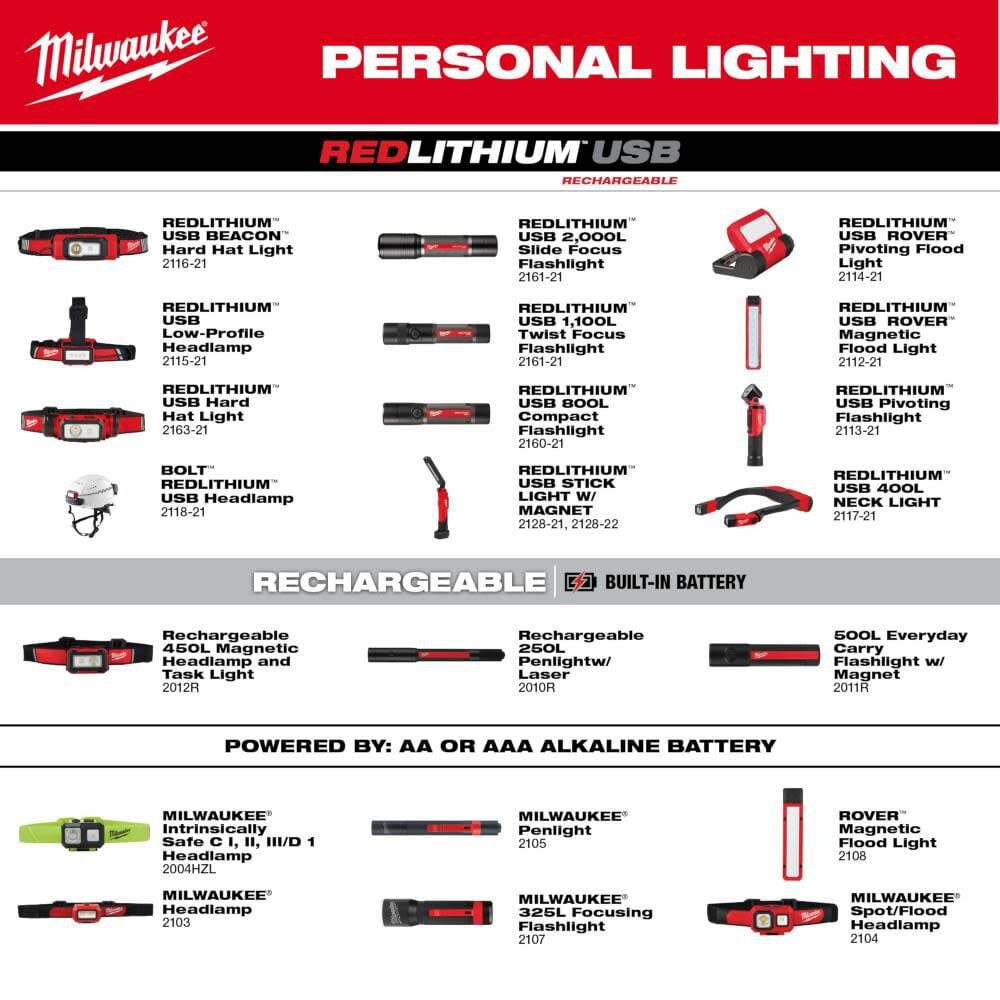
If troubleshooting fails, replacing the unit is often more economical than repair. Knowing when to cut your losses prevents wasted effort.
Review Warranty Coverage
Milwaukee offers a limited warranty on most headlamps. Register your product online and keep your receipt. Defects in materials or workmanship are often covered for up to five years.
Compare Repair Costs
Third-party repairs for sealed LED units are rarely cost-effective. Compare the repair quote against the price of a new headlamp, which often ranges from $40 to $100.
Consider Upgrading Models
Newer models feature USB-C charging and longer runtimes. Upgrading provides better reliability and modern features that prevent future charging headaches.
Prevent Future Charging Problems
Proactive maintenance extends the life of your headlamp and battery. Simple habits prevent the most common charging failures.
Store in Cool Dry Places
Avoid leaving your headlamp in hot vehicles or damp toolboxes. Extreme temperatures accelerate battery degradation and promote port corrosion.
Charge Monthly During Storage
Lithium batteries self-discharge over time. Charge the battery every 30 to 60 days even if you are not using the light to prevent deep discharge.
Use Genuine Accessories
Stick to Milwaukee OEM cables and chargers. Third-party accessories often lack proper voltage regulation and can damage your device.
Clean After Every Use
Wipe down the charging port and body after jobsite use. Removing dust, sweat, and grime prevents corrosion from blocking the electrical connection.
Frequently Asked Questions About Milwaukee Headlamp Charging
Why is my Milwaukee headlamp flashing red?
A flashing red light usually indicates a temperature error or a poor connection. Let the device reach room temperature and ensure the cable is seated firmly. If it persists, the battery may be faulty.
How long does it take to charge a Milwaukee headlamp?
Most Milwaukee headlamps fully charge within 2 to 4 hours depending on the battery capacity. If the light stays red beyond 6 hours, the battery likely needs replacement.
Can I use a phone charger for my Milwaukee headlamp?
Yes, provided the USB output matches the required voltage (usually 5V) and amperage (at least 1A). Low-power computer ports may not charge the battery effectively.
What should I do if the charging port is corroded?
Gently clean the port with isopropyl alcohol and a cotton swab. Allow it to dry completely before inserting the cable. Severe corrosion may require professional repair.
Is my Milwaukee headlamp covered under warranty?
Most Milwaukee headlamps come with a limited warranty covering defects. Check your proof of purchase and register the product on the Milwaukee website to verify coverage.
Key Takeaways for Fixing Your Milwaukee Headlamp
A Milwaukee headlamp not charging is usually caused by a bad cable, dirty port, or aged battery. Start by testing your power source and cleaning the charging port before assuming the worst. Most users resolve the issue by swapping the cable or resetting the battery connection.
Always check the LED indicator patterns to guide your troubleshooting steps. If the battery is swollen or the unit is under warranty, contact Milwaukee support immediately rather than attempting risky repairs. Regular maintenance and proper storage will keep your headlamp ready for any job.