
You’ve just arrived at your campsite, the sun is setting, and you need shelter fast. That’s where the acacia tent setup shines, especially the Space Acacia 2-3 Person Pop-Up Tent. Designed for speed, comfort, and durability, this tent delivers a near-instant shelter solution perfect for weekend getaways, festivals, or backyard camping. With a simple pop-up mechanism, removable rainfly, and smart ventilation, it’s built for real-world use. But to get it right the first time, you need clear, step-by-step guidance. In this guide, you’ll learn exactly how to set up your Acacia tent quickly, avoid common mistakes, maximize space, and keep it performing season after season.
Pop Up the Tent in Minutes
The Space Acacia 2-3 Person Pop-Up Tent is engineered for speed. Whether you’re new to camping or a seasoned outdoorsperson, you’ll appreciate how little time it takes to go from packed bag to full shelter.
First Time Setup Takes 5 to 7 Minutes
Even if you’ve never used a pop-up tent before, you can have this one standing in under 7 minutes. The automatic deployment system does most of the work; you just trigger it correctly.
Experienced Users Finish in Under 5 Minutes
Once you know the layout and sequence, setup becomes lightning fast. Many users report full assembly in under 5 minutes with practice.
Trigger the Pop Up Mechanism
This is the core of the Acacia tent’s design: the instant deployment feature. Get this step right, and the rest follows smoothly.
Locate the Door Before Unfolding
Before pulling anything, identify the door side of the folded tent. This ensures the pop-up orients correctly and prevents having to reposition later.
Pull the Sides Outward to Activate
Grasp both sides of the tent near the door and pull outward firmly. The pre-bent frame begins to expand automatically.
Pro Tip: Do this on a flat, clear surface. Rocks or roots can snag the fabric and delay deployment.
Raise the Central Peak

After the tent pops open, it won’t be fully upright yet. The next move lifts it into full shape.
Step Inside and Push Upward
Once the frame expands, step into the tent and place your hands under the central peak. Push straight up until the structure locks into place.
Visual Cue: When fully raised, the ceiling should allow a 6-foot person to stand comfortably in the middle.
Insert Long Support Poles
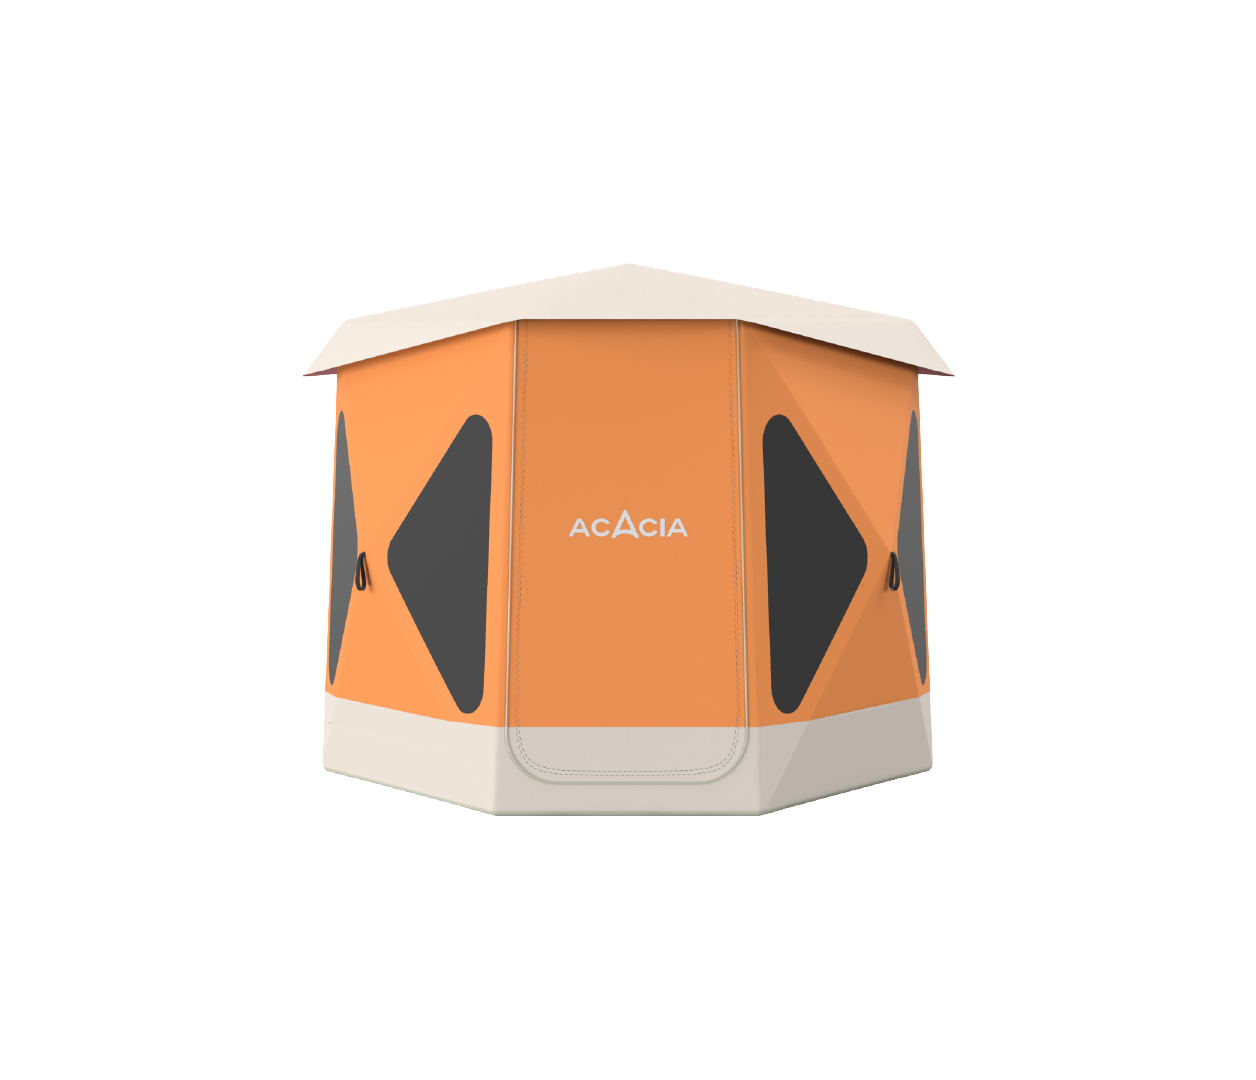
Now that the tent is upright, it needs reinforcement. The long poles add stability and prevent sagging.
Find the Orange Sleeves
Look for the elastic-lined orange sleeves running along the top and bottom of the tent’s roof. These hold the support poles.
Slide the Poles Through Carefully
Insert each long pole into the sleeve, starting from one end and feeding it through smoothly. Don’t force it; bending can damage the pole or fabric.
Common Mistake: Skipping this step leads to a wobbly tent. Even though it “looks” stable, wind or movement can collapse it without these poles.
Secure the Poles with Velcro Loops
Stability isn’t just about poles; it’s about how well they’re anchored.
Wrap Velcro Around Each Pole
At each pole connection point, there’s a Velcro loop. Wrap it snugly around the pole to prevent shifting.
Why It Matters: These loops stop the poles from slipping out during gusts or accidental bumps.
Stake the Full Perimeter
An unstaked tent is a wind hazard. Securing the base is non-negotiable.
Use Thick ¼ Inch Ground Stakes
The included stakes are ¼ inch in diameter, thicker than average, which means better grip in soil.
Hammer Stakes Into Corners and Midpoints
Stake every corner and any midpoint loops around the base. Angle stakes slightly away from the tent for maximum hold.
Ground Tip: On hard ground, use a mallet. On soft sand, consider longer sand stakes for deeper anchoring.
Attach and Tension the Guidelines
These cords are small but critical for wind resistance.
Connect to Pull Tabs with Half Hitches
Find the pull tabs near the top of the tent. Attach each guideline and tie it using two half-hitches, a secure knot that won’t slip.
Position Guidelines at 45 Degree Angles
Run the lines outward at a 45-degree angle from the tent. This distributes force evenly and prevents leaning.
Pro Tip: Leave guidelines attached during disassembly. They’ll be ready for next time and won’t get lost.
Install the Rainfly Correctly
Weather protection starts with the rainfly. Done right, it sheds rain and blocks wind. Done wrong, it leaks or flaps loudly.
Clip Golden Toggles to O Rings
Above the door, locate the O-rings. Attach the rainfly’s golden toggles to them first.
Insert Short Poles Into Designated Sleeves
Slide the short poles into the rainfly’s side sleeves. This creates a raised canopy that prevents water pooling.
Visual Check: The rainfly should hover slightly above the tent body, not touch it.
Stake the Rainfly Corners
Final anchoring ensures the fly stays taut in storms.
Angle Rainfly Stakes at 45 Degrees
Just like the tent base, stake each rainfly corner at a 45-degree angle away from the tent.
Pull Taut Before Hammering
Tighten the fabric gently before driving in the stake. This prevents sagging when wet.
Weather Hack: In heavy rain, roll down the rainfly’s side capes and secure with toggles to block spray while keeping airflow.
Maximize Interior Space
Even a 2 to 3 person tent can feel cramped if sleepers aren’t positioned wisely.
Sleep Near the Center for Headroom
The central peak offers full standing height. Tallest campers should sleep here.
Recommended Sleeping Arrangements
- Two tall people: Both near center, feet toward sides
- One tall, one short: Tall in center, short on side
- Three people: Tallest in middle, others angled toward ends
Reality Check: Three adults will fit, but it’s tight. Ideal for couples or parent + kids.
Optimize Ventilation in Heat
With 16 zippered windows across eight side panels, this tent excels in hot, humid conditions.
Open Windows Strategically
For cross-ventilation, open windows on opposite sides and keep those facing direct sun partially closed.
Use the Top Vent
The ceiling vent releases hot air. Pair it with open lower windows for airflow circulation.
Bug Protection: All windows have screened mesh, so you can stay cool without inviting insects.
Weatherproof Like a Pro
The Acacia tent handles wind and rain well when set up properly.
Use Double Layered Panels with Capes
Each side panel has a pull-down cape that extends coverage. Secure with toggles to block wind-driven rain.
Rely on YKK Zippers for Durability
All doors and windows use YKK zippers, which are smooth, strong, and resistant to jamming.
Maintenance Note: Clean zippers occasionally with a damp cloth to prevent grit buildup.
Use the Power Cord Port
One standout feature is the integrated power cord boot.
Run Cords Safely Inside
Feed extension cords from an external power source (like a portable AC or heater) through the sealed port.
Ideal For: Off-grid camping with electricity needs, including glamping, winter camping, or festival setups.
Hang Lights from the Ceiling Loop
No built-in lighting? No problem.
Attach Lanterns or String Lights
Use the interior ceiling loop to hang a battery-powered lantern or solar string lights.
Pro Tip: Avoid heavy fixtures. The loop supports lightweight gear only.
Clean and Store Properly
A well-maintained tent lasts for years.
Remove the Floor and Rainfly for Cleaning
Both are removable:
– Floor attaches with Velcro
– Rainfly uses golden toggles
Wash by hand or with mild detergent, then air dry completely before storage.
Repack in the Carry Bag
Use the included bag for transport and off-season storage.
Critical Rule: Never store the tent while damp. Mold and mildew can ruin fabric and zippers.
Upgrade with Optional Add Ons
Enhance comfort and functionality with compatible accessories.
Add the Space Acacia Air Floor
For cushioned sleeping, the optional air floor fits perfectly inside. It’s more comfortable than the standard groundsheet and easier to clean.
Connect External Climate Control
Pair the power port with:
– Portable AC units
– Electric heaters
– Power stations
Perfect for extreme weather camping.
Avoid Common Setup Mistakes
Even simple tents have pitfalls. Know these before you go.
Mistake: Skipping Support Poles
Some users think the pop-up frame is enough. It’s not. Without the long poles, the tent lacks rigidity.
Mistake: Not Staking Down Corners
An unstaked tent can blow over in 15 mph winds. Always stake, no exceptions.
Mistake: Misaligning the Rainfly
If the toggles aren’t clipped to O-rings first, the fly won’t sit evenly. Start at the top.
Compare to Standard Pop Up Tents

Why choose the Acacia over cheaper alternatives?
| Feature | Acacia Advantage |
|---|---|
| Build Quality | Premium fabric, strong stitching |
| Ventilation | 16 windows + top vent |
| Zippers | YKK brand, more durable |
| Stakes | Thicker (¼ inch) and stronger |
| Floor | Removable for cleaning |
| Power Port | Unique feature for modern campers |
Verdict: It’s a reliable upgrade from basic instant tents, worth the investment for frequent campers.
Ideal Use Cases
Know when this tent performs best and when to consider alternatives.
Best For:
- Weekend trips
- Music festivals
- Backyard camping with kids
- Hot, humid climates (thanks to ventilation)
- Off-grid setups needing power access
Not Recommended For:
- Groups larger than three
- Multiple tall adults (over 6 ft.)
- Expeditions requiring ultralight gear
Alternative: Consider the Space Acacia XL if you need more room.
Final Setup Checklist
Run through this list before calling it done:
- Tent fully popped and central peak raised
- Long poles inserted and Velcro-secured
- All perimeter stakes driven in
- Guidelines attached with half-hitches
- Rainfly clipped, poles inserted, corners staked
- Windows open for airflow (as needed)
- Power cord routed safely (if used)
- Interior organized and lights hung
Frequently Asked Questions About Acacia Tent Setup
How long does it take to set up an Acacia tent for the first time?
First-time setup typically takes 5 to 7 minutes. The pop-up mechanism handles most of the work; you just trigger it and finish the stabilization steps.
Can three adults sleep comfortably in the Space Acacia 2-3 Person tent?
Three adults can fit, but it will feel tight. The tent works best for two people or a parent with kids. For more space, consider the Space Acacia XL.
Do I need to stake the tent if it’s not windy?
Yes. Always stake the full perimeter, even in calm conditions. Stakes prevent shifting and are critical if unexpected weather arrives.
Can I use the rainfly on its own without the tent body?
No. The rainfly is designed to fit over the tent body. Using it alone won’t provide proper protection or structure.
How do I clean the tent floor and rainfly?
Both are removable. The floor uses Velcro and the rainfly uses golden toggles. Wash by hand with mild detergent and air dry completely before storage.
Is the power cord port safe to use in rain?
Yes. The integrated power cord boot is sealed to keep moisture out while allowing cords to pass through safely.
Final Thoughts on Mastering Your Acacia Tent Setup
The acacia tent setup is designed to be fast, intuitive, and reliable. With high-quality materials, smart ventilation, and a power port for modern needs, it’s a top choice for campers who want comfort without complexity. Follow these steps, avoid common errors, and you’ll have a durable, weather-ready shelter in minutes, every time.
Your next step: practice the setup at home before your first trip. A quick dry run in your backyard builds muscle memory and helps you spot missing parts before heading into the wilderness.