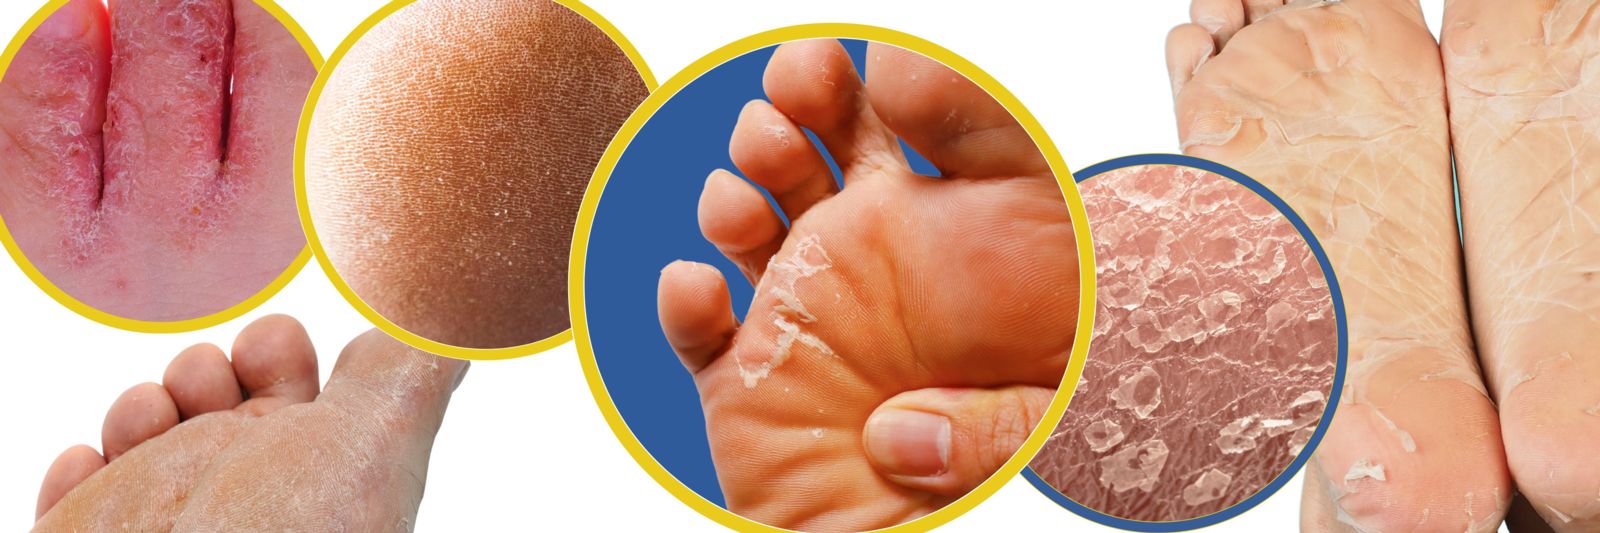
If your feet start flaking, cracking, or shedding in sheets days after a long hike, you’re not imagining things—and you’re far from alone. Feet peeling after hiking is a surprisingly common experience, especially following multi-day treks, ultramarathons, or long-distance trails like a 98km or 100km journey. While it may look alarming—like your soles are unraveling—it’s typically not a medical emergency. Instead, it’s your body’s natural way of repairing skin damaged by friction, sweat, and pressure over extended periods.
This peeling usually hits 3–7 days after your hike ends, peaking around 1–3 weeks post-adventure. Some hikers still report loose, flaky skin a full month later, particularly on the heels and balls of the feet—the areas that bear the most weight. Even hands can peel slightly, likely due to frequent washing or gripping trekking poles. The good news? With the right care, your skin will regenerate completely. In this guide, you’ll learn the science behind why peeling occurs, how to treat it effectively, and what to do before your next hike to prevent it from happening again.
The Real Reasons Your Feet Start Peeling After Hiking
Friction and Micro-Injuries from Boot Rubbing
Even if you didn’t get blisters, your skin endured constant rubbing between your foot and boot. This repetitive shear force causes microscopic tears in the outer layers of skin—especially on high-impact zones like the heels and the ball of the foot. Over time, this microtrauma triggers your body’s repair system: new skin cells form underneath, pushing the damaged layers outward to flake off.
Ill-fitting boots make it worse. Shoes that are too tight create pressure points; those too loose allow heel slippage, increasing friction with every step. Both scenarios lead to more skin stress—even if no blisters form during the hike.
Moisture Trapping Softens Skin (Maceration)
Wearing waterproof hiking boots for hours traps sweat, creating a warm, wet environment that softens the outer skin layer (stratum corneum). This process, called maceration, weakens the skin’s structure, making it fragile and more likely to break down once you remove your boots and the skin dries out. Rain, stream crossings, or humid climates only make this worse.
While your feet stay hydrated during the hike, the real damage shows up afterward—when the sudden shift from wet to dry conditions causes the weakened skin to crack and peel.
Delayed Skin Shedding (Desquamation)
Peeling doesn’t happen mid-hike because your skin stays plump and moist. It starts days later, once your feet are dry and your body kicks into repair mode. This delayed response—called desquamation—is your skin’s way of shedding damaged layers. It’s not inflammation or infection; it’s regeneration in action. For most hikers, this process peaks 1–3 weeks post-hike and can last up to four weeks or more.
How Long Does Peeling Last? Recovery Timeline Explained
When to Expect Flaking to Begin and End
- Onset: 3–7 days after finishing your hike
- Peak shedding: 1–3 weeks post-trail
- Full recovery: Up to 4 weeks or longer, depending on skin sensitivity and aftercare
One hiker reported still having “shredded” feet a full month after a 98km trek, despite no pain or infection. This is normal. Skin renewal takes time—especially after enduring days of continuous stress.
Factors That Slow Down Healing
- Skipping daily moisturizing
- Picking at loose skin (increases irritation risk)
- Dry indoor air or low hydration
- Pre-existing dry skin conditions (xerosis)
Letting the process unfold naturally—with consistent care—leads to faster healing and less discomfort.
How to Speed Up Healing: 4 Proven Treatments

1. Apply a Heavy-Duty Healing Ointment Daily
The best thing you can do is lock in moisture with a thick, protective ointment like Cerave Healing Ointment. It contains:
– Petrolatum: Forms a barrier to prevent moisture loss
– Ceramides: Repair the skin’s natural protective layer
– Hyaluronic acid: Draws water into the skin
Apply it right after showering, while your skin is still damp, to seal in hydration. For deeper absorption, wear clean cotton socks overnight after applying.
Avoid lotions with alcohol—they can dry out already compromised skin.
2. Gently Exfoliate with a Pumice Stone
Once peeling stabilizes and your skin isn’t tender, use a pumice stone to smooth rough areas. Focus on dry, non-sensitive spots—never scrub red or inflamed skin. If large flaps of skin are present, trim them carefully with clean scissors instead of pulling.
This helps remove dead layers without damaging new skin forming underneath.
3. Never Pick or Peel the Skin
It’s tempting to peel off loose skin, but resist the urge. Picking can lead to:
– Open sores
– Bacterial infection
– Scarring or discoloration
Let the skin shed on its own. If a flap is in the way, cut the free end—but leave attached portions to protect the healing tissue beneath.
4. Soothe with Epsom Salt Foot Soaks
A warm (not hot) foot bath with Epsom salts can relieve soreness and soften thickened areas. Limit soaking to 15–20 minutes—longer can worsen maceration. Afterward, pat feet dry thoroughly and apply your healing ointment immediately.
Prevent Peeling Before Your Next Hike: 5 Key Strategies
1. Wear Properly Fitted, Broken-In Boots
Your boots should:
– Fit snugly without pinching
– Allow slight heel lift (but not sliding)
– Be worn on shorter hikes before long trips
Breathable models with moisture-wicking liners reduce sweat buildup. Never start a big trek in brand-new boots—they increase friction and blister risk.
2. Choose Moisture-Wicking Socks (No Cotton!)
Cotton socks absorb sweat and stay wet, accelerating maceration. Instead, wear merino wool or synthetic blends that pull moisture away from your skin. Consider double-layer socks (liner + outer) to reduce friction. Change socks daily or more often in wet conditions.
3. Apply Anti-Chafing Balm to High-Friction Zones
Before hiking, rub Body Glide, Squirrel’s Nut Butter, or similar balms on:
– Heels
– Toes
– Ball of the foot
These create a slick barrier that reduces rubbing and prevents hot spots.
4. Tape Trouble Spots in Advance
Use Leukotape or Compeed blister plasters on areas prone to blisters—like your heels or little toes. Apply them before your hike starts, not after a hotspot forms. Once friction begins, it’s too late.
5. Trim Toenails Short
Long toenails increase pressure and cause your toes to bump inside boots, contributing to blisters and skin damage. Trim them straight across before any long hike.
When to Worry: Signs It’s Not Just Post-Hike Peeling
Most peeling is harmless, but certain symptoms suggest a medical issue.
See a doctor if you have:
– Increasing pain, redness, or warmth
– Pus or foul odor
– Itching and cracking between toes (possible athlete’s foot)
– Rash, swelling, or blistering (possible contact dermatitis)
– No improvement after 6 weeks
How to Tell It’s Not a Fungal Infection
| Feature | Post-Hike Peeling | Athlete’s Foot |
|---|---|---|
| Onset | Days after hiking | Gradual, during activity |
| Location | Soles, heels, pressure points | Between toes, sides of feet |
| Symmetry | Both feet (bilateral) | Often one-sided |
| Itching | Rare or mild | Intense and persistent |
| Odor | None | Usually present |
| Treatment | Moisturizer, time | Antifungal cream needed |
When in doubt, get a professional diagnosis—don’t treat with antifungals unless confirmed.
Real Hiker Stories: What Others Experienced
“Shredded” Feet a Month After a 98km Trek
One hiker reported severe peeling starting a week after finishing a 98km trail. Despite getting a pedicure, the skin remained flaky and uneven for over a month. No pain or infection—just cosmetic shedding. Daily moisturizing helped, but full recovery took nearly 5 weeks.
100km Hike: Expected and Unbothered
Another long-distance hiker accepted peeling as normal. They moisturized but avoided aggressive treatment, viewing it as a badge of honor. Skin resolved completely within 4 weeks.
The Hiking Community Consensus
- Peeling is common, expected, and temporary
- Most hikers don’t intervene beyond moisturizing
- No long-term damage reported
- Prevention beats treatment every time
Your Post-Hike Foot Care Routine (Step-by-Step)
First 3 Days: Clean, Dry, Protect
- Wash feet with mild soap and lukewarm water
- Dry thoroughly—especially between toes
- Apply healing ointment (e.g., Cerave)
- Wear soft, clean socks
- Avoid barefoot walking on rough surfaces
Weeks 1–4: Maintain and Monitor
- Continue daily moisturizing
- Begin gentle exfoliation only when skin is stable
- Watch for signs of infection
- Stay hydrated—your skin needs internal moisture too
Before Your Next Hike: Audit and Prepare
- Test your boot and sock combo on shorter hikes
- Pre-treat friction zones with tape or lubricant
- Pack a foot care kit: moleskin, antiseptic wipes, extra socks
Final Note
Feet peeling after hiking is a natural, self-limiting process—not a sign of failure, but of endurance. It’s caused by friction, moisture, and your body’s quiet effort to heal itself. With patience, moisturizing, and smart prevention, you can reduce recurrence and keep your feet strong for the next adventure.
While it may be unsightly, many hikers wear peeling skin as a badge of honor—proof they went the distance. Treat your feet well, and they’ll carry you even farther next time.