
You’ve just returned from a weekend in the wild—mud on your boots, stories in your head, and a tent that’s seen better days. Before you toss it in the garage, ask yourself: is it truly clean? A dirty tent isn’t just unsightly; it’s a ticking time bomb for mold, degraded waterproofing, and zipper failure. Learning how to clean a camping tent the right way protects your investment and keeps you dry on future trips.
Cleaning isn’t just about removing dirt; it’s about preserving performance. Modern tents, especially ultralight models, use delicate fabrics and advanced coatings that harsh detergents or improper drying can destroy in a single wash. A washing machine can ruin waterproof seams, while storing a damp tent invites mildew and hydrolysis—silent killers of tent longevity. With proper care, your tent can last for years, staying waterproof, odor-free, and reliable. This guide walks you through the entire process, from inspection to storage, so your shelter stays ready for every adventure.
Pre-Cleaning Inspection Steps
Before water touches the fabric, inspect your tent thoroughly. This step helps you catch damage early and avoid worsening issues during cleaning.
Check for Damage and Debris
Lay the tent flat on a clean surface like a picnic table or grassy yard. Shake it upside-down to dislodge leaves, twigs, sand, and dirt, especially from corners, pockets, and seams. Look closely at high-wear areas: the floor, entryway, and rainfly. Check for torn fabric, mildew spots (dark, fuzzy patches), stains from sap or sunscreen, and cracked or peeling waterproof coating. Also inspect zippers, stakes, and pole sleeves for hidden wear.
Remove Poles and Set Up for Cleaning
Take the tent off the poles before cleaning. This prevents stress on pole sleeves and allows full access to all fabric surfaces. Never clean a tent while it’s pitched, as this traps dirt and moisture. Lay it out flat, inside and out, so you can clean both sides effectively.
Essential Cleaning Supplies Checklist
Using the right tools makes all the difference. Harsh soaps or abrasive brushes can strip waterproof coatings, so choose carefully.
Recommended Cleaning Tools
Gather these supplies before you begin:
– Mild, pH-neutral soap: Dr. Bronner’s Castile Soap or Nikwax Tech Wash
– Soft-bristled brush or sponge: Prevents fabric abrasion
– Bucket or tub: For soaking or mixing soapy water
– Clean water source: Hose or multiple buckets
– Towels or drying rack: For blotting and air drying
– Large, flat surface: Grass, tarp, or picnic table
Supplies to Avoid
Stay away from these damaging options:
– Washing machines (destroy seams and waterproofing)
– Dryers (high heat melts urethane coatings)
– Bleach or harsh detergents (strip DWR coatings)
– Scouring pads or stiff brushes (scratch fabric)
– Lip balm on zippers (sticky and attracts dirt)
Step-by-Step Tent Cleaning Process
With your tent prepped and supplies ready, it’s time to clean. Follow these steps to remove dirt without damaging your gear.
Initial Rinse to Remove Loose Dirt
Start by rinsing the tent with clean, cool water. Use a hose or pour water from a bucket over both the exterior and interior. Focus on muddy areas like the floor and entryway. This step removes abrasive particles like sand and grit that can scratch fabric during scrubbing. Never skip rinsing; scrubbing a sandy tent is like sandpapering your waterproof coating.
Spot Clean Stains and High-Traffic Areas
For localized messes like sap, sunscreen, or bird droppings, use spot cleaning:
1. Dampen a soft sponge with mild soapy water
2. Gently wipe stained areas (floor, vestibule, seams)
3. Avoid soaking the interior; excess moisture weakens seams
4. Rinse immediately with clean water
This method works well for quick cleanups after short trips.
Deep Clean with Soak Method
For heavily soiled tents or seasonal maintenance, try the soak method:
1. Fill a bathtub or large tub with cool water
2. Add one to two capfuls of Nikwax Tech Wash or Dr. Bronner’s
3. Submerge the tent and gently agitate for 5 to 10 minutes
4. Soak for 20 minutes, then repeat if water is dirty
5. Drain and refill for two full rinses
Never twist, wring, or hang the tent by corners, as this damages fabric and seams.
Interior and Exterior Cleaning Tips
Each part of the tent has unique needs. Clean them correctly to avoid damage.
How to Clean the Tent Floor
The floor takes the most abuse and deserves extra attention:
– Use a soft brush to scrub dirt and scuff marks
– Focus on high-contact zones near the door
– Rinse thoroughly so soap residue doesn’t attract more dirt
– Avoid abrasive scrubbing that wears down the waterproof layer
Wipe Down the Interior Gently
The inner tent is breathable and moisture-sensitive:
– Dampen a cloth with mild soapy water
– Wipe down walls, especially near seams and corners
– Do not soak; this can lead to mildew and seam degradation
– Use minimal water and rinse with a clean, damp cloth
Never machine-wash or pressure-wash the interior.
Rinsing: The Most Critical Step
Rinsing is not optional; it’s essential. Leftover soap breaks down fabric and attracts grime over time.
Remove All Soap Residue
After cleaning, rinse the tent twice with fresh, clean water:
– Hose down both sides thoroughly
– Pay extra attention to seams and zippers
– Squeeze fabric gently to flush out soapy water
– Continue until no bubbles remain
When in doubt, rinse again.
Proper Drying Techniques
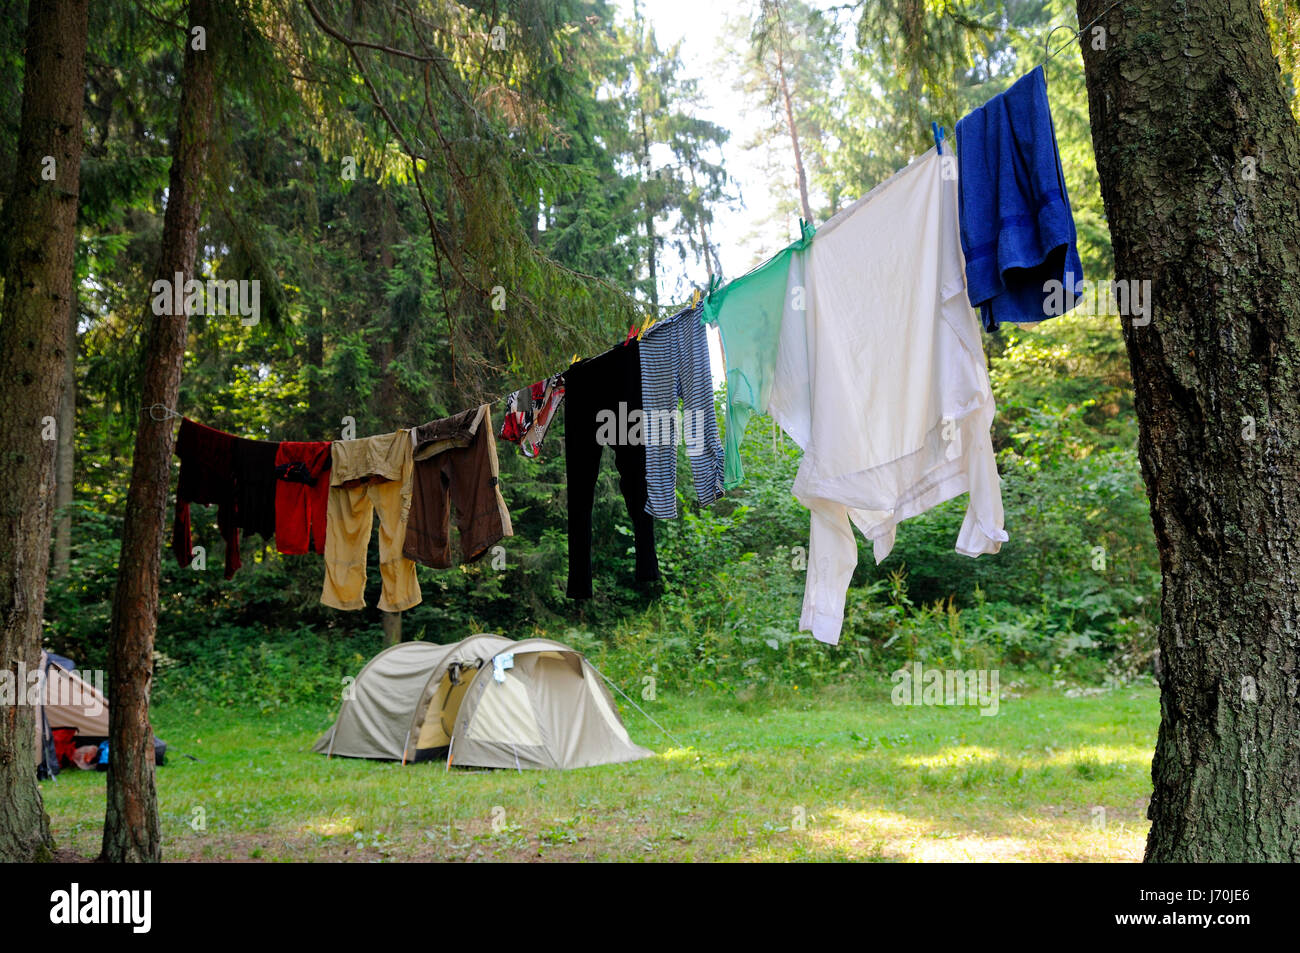
Drying is where most campers fail. A damp tent in storage leads to mold, odors, and hydrolysis.
Air Dry in Shade and Ventilation
Hang the tent on a clothesline or drying rack in a shaded, well-ventilated area. UV rays degrade fabric and coatings over time, so avoid direct sunlight. Flip the tent every few hours to dry both sides. Use a fan or dehumidifier to speed drying, which typically takes 2 to 3 days. Check seams, pockets, zippers, and pole sleeves before packing to ensure 100% dryness.
Emergency Wet-Tent Protocol
If you packed up wet after a storm, set up the tent at home immediately. Open all doors and vents for airflow and use fans to circulate air. Dry within 24 hours to prevent mildew, as even slight dampness invites mold.
Correct Storage Practices
How you store your tent matters as much as how you clean it.
Store Dry and Loosely Packed
Never compress the tent in a stuff sack long-term. Use a breathable mesh storage sack instead, and loosely fold or roll the tent to prevent creases. Store poles broken down, not assembled, to allow air circulation.
Ideal Storage Environment
Choose a cool, dry, temperature-controlled space. Avoid attics (too hot), basements (too humid), and garages (pests and moisture). A closet or under-bed bin with airflow works well. Low-humidity environments prevent hydrolysis and extend tent life.
Reapply Waterproofing and DWR
Cleaning removes dirt, but it can also strip DWR. Re-treat to restore performance.
When to Re-Waterproof
Reapply waterproofing annually or after heavy use, and when water stops beading on the rainfly. Nikwax TX.Direct works well for this purpose.
How to Apply DWR Spray
- Ensure the tent is completely dry
- Lay flat or hang
- Spray evenly on rainfly and exterior fabric
- Let dry for 24 hours
- Heat-activate with a hairdryer if the product requires it
This restores water beading and keeps you dry in downpours.
Zipper Maintenance and Repair

Zippers fail not from age, but from dirt and lack of care.
Clean and Lubricate Zippers
Brush debris with an old toothbrush, then blow out grit with compressed air. Apply Gear Aid Zipper Stick or dry ski wax, and wipe off excess. Avoid lip balm, which is sticky and attracts dirt.
Fix a Separating Zipper
If the zipper won’t stay closed, the slider may be worn or bent. Gently squeeze the slider sides with pliers, using one to two light squeezes. Test after each squeeze and don’t over-tighten. If it still fails, replace the zipper or slider.
Pole and Stake Care
Poles and stakes are often overlooked but critical for setup.
Maintain Shock Cords and Joints
Extend poles section by section and don’t force partial connections. Break down from the middle outward to reduce shock cord stress. Replace cracked or brittle shock cords with replacement kits. Store poles disassembled to prevent oxidation.
Handle Salt and Corrosion
After ocean trips, rinse aluminum poles with fresh water and wipe dry before storage. White powder indicates oxidation, which increases friction and makes poles hard to assemble.
Prevent Mold and Hydrolysis
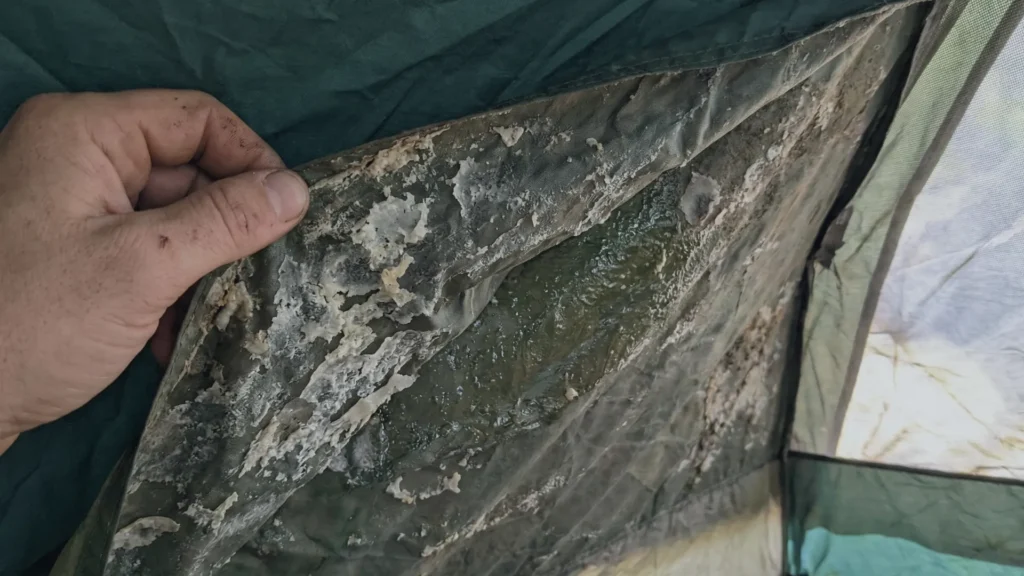
Two silent killers threaten tent longevity, but both are preventable.
Stop Mold Before It Starts
Dry the tent completely before storage, ventilate during camping by opening vents or doors slightly, and store in a dry, breathable sack. If a musty smell appears, air out the tent immediately.
Recognize and Treat Hydrolysis
Hydrolysis is urethane coating breakdown from moisture. Early signs include tacky or sticky fabric, while advanced stages show flaking, peeling, or gooey residue. For early-stage damage, apply Nikwax TX.Direct. For flaking, re-seal with a professional kit. Severe cases may require replacement.
Long-Term Tent Care Tips
Extend your tent’s life with smart habits.
Use a Footprint Every Time
A footprint protects the floor from abrasion and prevents punctures from rocks and sticks. It should be slightly smaller than the tent base to avoid water pooling. Using one every trip is the single most effective step to prolong tent life.
Ventilate While Camping
Open windows or vents and leave the door slightly unzipped at night. This reduces condensation from breathing and cooking, which means less moisture buildup and lower mold risk.
Pre-Pack Debris Removal
Before rolling up your tent, shake out leaves, dirt, and sand, and sweep corners and pockets. This prevents abrasive damage during transport.
Frequently Asked Questions About Tent Cleaning
How often should I clean my camping tent?
Clean your tent after every few trips or when visibly dirty. Spot clean after spills or mud contact, and deep clean when needed rather than after every outing.
Can I wash my tent in a washing machine?
No. Washing machines tear fabric, destroy waterproofing, and ruin seams. Always hand wash using mild soap and cool water.
How long does it take to fully dry a tent?
Drying typically takes 2 to 3 days when using a fan or dehumidifier in a shaded, well-ventilated area. Ensure seams, zippers, and pockets are completely dry before storage.
What is hydrolysis and how do I prevent it?
Hydrolysis is a chemical reaction where water breaks down urethane coatings, causing sticky or flaking fabric. Prevent it by storing your tent dry in a cool, low-humidity environment.
When should I reapply waterproofing to my tent?
Reapply DWR treatment annually or after heavy use. Apply when water stops beading on the rainfly or after deep cleaning.
What should I do if my zipper keeps separating?
The slider is likely worn or bent. Gently squeeze the slider sides with pliers using one to two light squeezes, testing after each adjustment. If this doesn’t work, the zipper may need replacement.
Key Takeaways for Cleaning Your Camping Tent
A clean tent is a reliable tent. The core principles are simple: rinse, clean gently, rinse again, dry fully, and store properly. Use mild soap, avoid machines and harsh chemicals, and never store your tent damp. Inspect zippers and poles regularly, reapply DWR when needed, and always use a footprint in the field.
Your next adventure deserves a dry, odor-free, fully functional tent. Start cleaning it right today, and your shelter will serve you faithfully for years to come.