
Folding a canopy tent the wrong way can leave you wrestling with twisted fabric, cracked frames, and a carry bag that refuses to close. Many people yank the corners inward, trap moisture inside, or skip smoothing the layers, which leads to bulky rolls that invite mildew. Learning how to fold a canopy tent correctly protects the material, saves storage space, and cuts your teardown time at events in half. This guide walks you through six reliable folding steps that work for most pop-up canopies, so you can pack up faster and keep your gear event-ready for years.
You will learn how to prep the canopy surface, make clean diagonal folds, tuck the peak for a compact shape, and finish with tight final folds that slide right into the carry bag. Whether you use your canopy for markets, tailgates, or backyard parties, these steps keep everything neat and protected.
Position Canopy Upside Down on a Clean Surface
The first step in any successful fold starts long before you touch the fabric. A flat, clean surface prevents dirt from grinding into the material and gives you a stable area to work on.
Choose a Flat, Debris-Free Area
Pavement, concrete, or clean grass all work well for folding. Avoid rocky patches, gravel, or dusty soil that can snag the fabric or leave grit embedded in the weave. A tarp or drop cloth underneath adds an extra layer of protection.
Flip the Canopy Inside-Out
Lay the canopy so the inside surface faces up. This protects the outer color and coating from scuffing during the folding process. It also helps the layers stack evenly when you begin folding.
Pro Tip: Confirm the canopy is completely dry before folding. Moisture trapped inside the folds leads to mildew, odor, and permanent staining.
Make the First Diagonal Fold
With the canopy in position, you can start shaping it into a manageable size.
Pull One Corner to the Opposite Corner
Grab a corner and bring it diagonally across the canopy until it meets the far corner. Align the edges as closely as possible. Smoothing wrinkles with your hands as you go prevents sharp creases that weaken fabric over time.
This single fold transforms the square into a large triangle. Keep tension even across the material. Pulling too hard can stress the seams, while loose folds create bulk later.
Check for Even Edges
The triangle should have clean, matching sides. If one edge hangs lower than the others, undo the fold and re-align the corners.
Complete the Second Diagonal Fold
Now you reduce the canopy to a quarter of its original footprint.
Fold the Triangle in Half Again
Take one corner of the triangle and fold it across to meet the opposite corner. You now have a smaller triangle, roughly half the size of the previous one.
Smooth each layer flat as you fold. Air pockets trapped between layers create uneven folds that resist compression later.
Common Mistake: Skipping the smoothing step leads to bulky, lumpy folds that will not fit inside the carry bag. Spend an extra ten seconds flattening each layer for a cleaner result.
Tuck the Peak Down Toward the Base

The top center of the canopy is the trickiest part to fold because it creates a sharp point.
Bring the Pointed Tip Down to the Bottom Edge
Fold the peak of the triangle down toward the flat base edge. This tucks the pointed tip into the body of the fold, transforming the triangle into a wider rectangle.
Press gently to flatten the fold without crushing the fabric. This step also protects any reinforcement or vent at the top from bending under pressure.
Expert Note: Many canopies include a metal or plastic cap at the peak. Handle this section carefully to avoid cracking the insert or damaging the stitching around it.
Fold the Remaining Section Over to One Side
You are now ready to shape the canopy into its final compact form.
Tuck the Folded Edge Against the Outer Edge
Take the folded peak and bring it over to one side, lining it flush with the outer edge of the triangle base. The result is a tidy rectangle with even layers.
Stop and reposition if the fabric starts shifting. Misaligned layers cause uneven bulk, which makes the final folds harder to manage.
Finish with Final Folds to Fit the Carry Bag
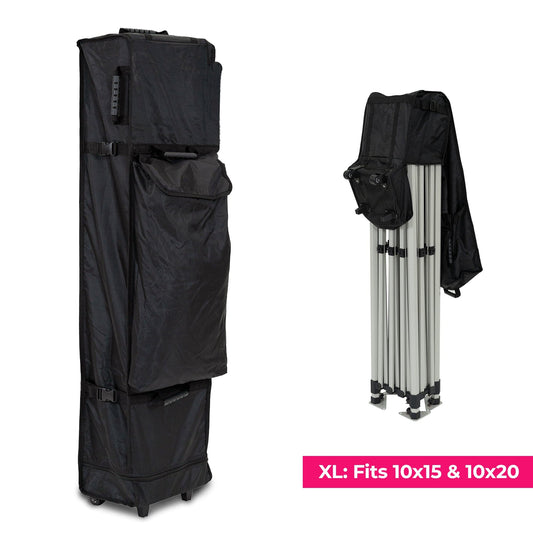
The last steps compress the canopy into a storage-ready bundle.
Fold the Rectangle in Half
Fold the rectangle so the two longest edges meet. Smooth the surface again to release any trapped air.
Fold in Half One More Time
Fold the rectangle in half again to create a small square or narrow strip, depending on the size of your canopy. This final shape should slide easily into the carry bag.
Time-Saving Shortcut: Keep a bungee cord or storage strap nearby. Wrapping it around the folded canopy keeps everything tight before you zip the bag closed.
Do Not Force the Canopy Into the Bag
If the bundle resists, undo the last fold and check for trapped air or uneven layers. Forcing it strains the fabric and can damage zippers on the carry bag.
Frequently Asked Questions About Folding a Canopy Tent
Can I fold a canopy tent while it is still wet?
Folding a wet canopy traps moisture inside the layers, which encourages mold and mildew. Always air-dry the fabric completely before folding and storing.
How do I prevent wrinkles when folding a canopy tent?
Smooth each layer flat as you fold, especially after each diagonal fold. Working slowly and aligning edges keeps creases shallow and prevents deep-set wrinkles.
Should I remove the canopy from the frame before folding?
Most folding instructions assume the canopy is detached or fully lowered. Removing it makes the folds cleaner and protects the frame hardware from bending under pressure.
What if my canopy does not fit back into the carry bag?
Do not force it. Unfold the canopy, check for trapped air pockets, and re-fold with tighter alignment. Forcing it risks tearing the fabric or breaking the bag zipper.
How should I store a folded canopy tent?
Keep the folded canopy in a cool, dry place, ideally inside the carry bag. Avoid damp garages, hot trunks, or direct sunlight, all of which degrade fabric and shorten the lifespan of your tent.
Key Takeaways for Folding a Canopy Tent
A clean, methodical fold protects your canopy and saves time at every event. Always start with a dry canopy on a flat surface, flip it inside-out, and work through the two diagonal folds before tucking the peak. Smooth each layer to remove air pockets, and finish with tight rectangle folds that fit the carry bag without forcing.
For the best long-term results, store your canopy in a cool, dry location and air it out before packing it away for the season. Practicing these six steps once or twice at home turns the process into a quick habit that pays off every time you pack up after an event.