
Thousands of weekend adventurers are turning to rooftop tents for their convenience, comfort, and unbeatable views, and the Honda CR-V is one of the most popular vehicles for this setup. But installing a rooftop tent on your CR-V requires careful attention to your roof type, weight limits, and rack compatibility. Skipping the right fittings or exceeding weight capacity can turn your dream setup into a dangerous liability on the road.
This guide walks you through confirming your CR-V’s roof rail type, choosing a compatible rack system, selecting the right tent, and securing everything properly. Whether you drive a 2004 model with raised rails or a 2021 CR-V with flush rails, you’ll learn exactly what it takes to mount your tent safely and confidently.
Confirm Your Honda CR-V Roof Rail Type

Before buying any rack or tent, identify which rail system your CR-V has. This single step affects compatibility, mounting method, and overall safety.
Flush Rails on 2021+ Models
Newer CR-Vs like the 2021 EX-L come with flush-mounted side rails that run front to back. These look sleek but limit your mounting flexibility.
- Fixed factory mounting points with no adjustment possible
- Rear crossbar spread is narrower than the front
- You must measure the exact distance between mounting points
- Tent mounting tracks must align with this fixed spacing
If your tent requires a 34-inch-wide crossbar setup, verify your rails can accommodate it before purchasing anything.
Raised Rails on 2004 and Older Models
Older CR-Vs feature raised roof rails that accept aftermarket crossbars directly.
- Compatible with Prorack, Yakima, and other universal systems
- Dynamic roof load limit: 75kg (165 lbs)
- Exceeding this affects handling and safety
- Static weight matters less but still requires proper load distribution
These rails offer more flexibility, but you still need the right fittings to lock everything down securely.
Choose the Right Roof Rack System

Your rack is the foundation of your entire setup. A weak rack risks damage to your vehicle and creates serious safety hazards on the road.
Yakima HD System for 2021 CR-V Flush Rails
For flush-rail models, the Yakima HD system delivers the strength and stability you need.
Recommended Parts:
– Yakima HD Crossbars #Y01156
– SkyLine Towers #Y53TR
– HD Bar Adapter #Y03541
– Landing Pad #Y00245
This combination is engineered for heavy-duty use and handles wind resistance and uneven terrain. The Landing Pads protect your roof finish while the HD bars support your tent’s weight.
Important Warning: Rhino Rack bars are not strong enough for rooftop tents. Save them for bikes or cargo boxes where they perform well.
Prorack P16 System for 2004 CR-V Raised Rails
For older models, the Prorack P16 offers durability and value.
- 1200mm crossbar width
- Requires K452 fitting kit (sold separately)
- Often overlooked by first-time buyers
The K452 kit ensures the bars clamp securely to the raised rails and distribute weight evenly. Without it, you risk slippage or rail damage during travel.
Pro Tip: Buy the full kit upfront. Many buyers order only the bars and discover they cannot install them without the K452 fittings.
Pick a Compatible Rooftop Tent
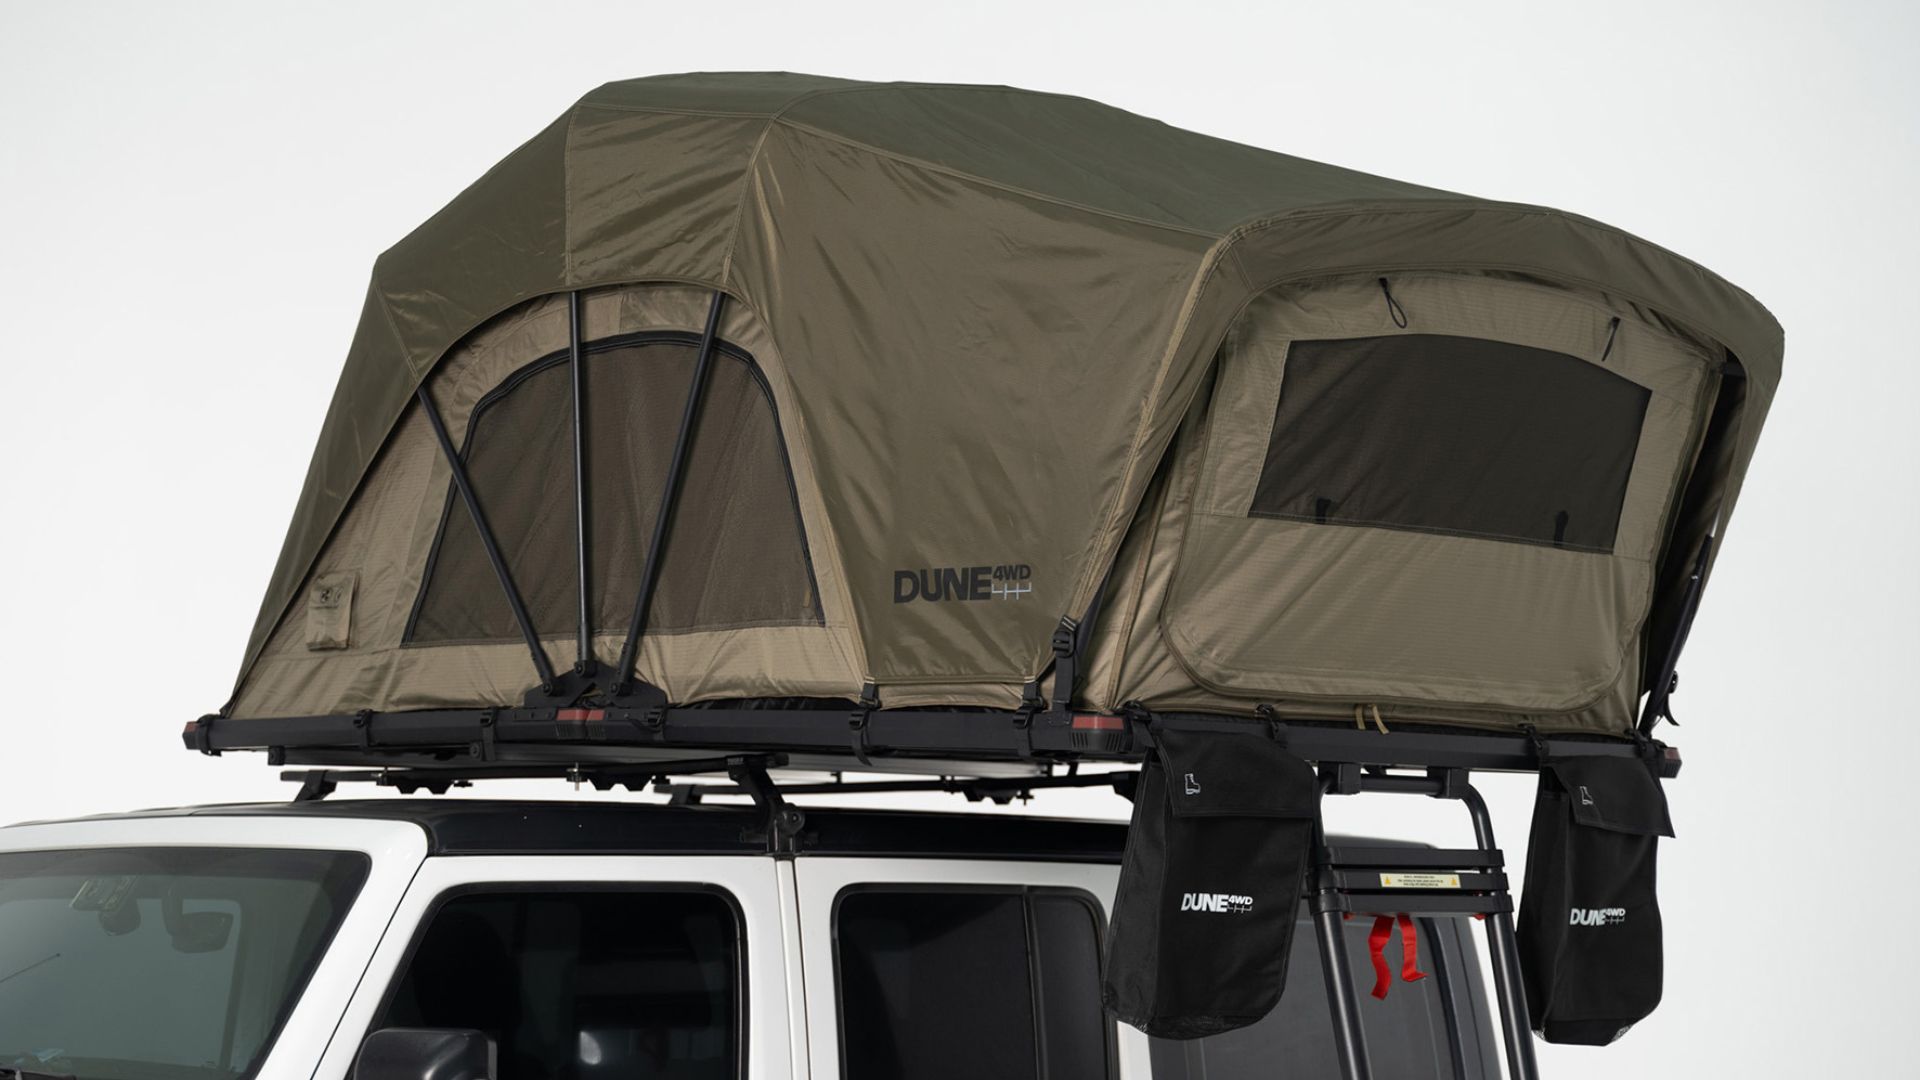
Not all tents fit all racks. Size, weight, and mounting style all determine whether a tent will work on your CR-V.
Dune 4WD 120cm Tent
This compact tent is ideal for the CR-V’s smaller roof footprint.
Why It Fits:
– 120cm width designed for smaller vehicles
– Lightweight construction keeps total load under 75kg
– Mounting tracks just under 34 inches align with crossbar spacing
– Setup time under 10 minutes with no poles or stakes
Features:
– Roomy interior for two adults
– Zippered mesh windows for airflow and bug protection
– Weather-resistant fabric built for harsh conditions
– Elevated sleeping platform keeps you off damp ground
Compared to King’s backpacker tents, the Dune 4WD deploys faster and packs smaller, making it ideal for spontaneous trips and frequent moves.
Check Weight and Balance Limits
Exceeding your CR-V’s roof capacity creates serious handling and safety problems. Stay within the recommended limits.
Dynamic Load While Driving
- Maximum weight while driving: 75kg (165 lbs) for 2004 models
- This includes tent, rack, and any additional gear on the roof
- Newer models may vary, so always check your owner’s manual
- Keep heavy items like water and stoves inside the car
- Distribute weight evenly by centering the tent on the roof
Static Load When Parked
- Higher weight is acceptable when your vehicle is stationary
- Still avoid overloading to prevent prolonged stress on roof rails
- If you’re under 75kg while driving, you’re operating within safe range
Mount the Roof Rack Correctly
A shaky rack means a shaky tent. Install it right the first time to avoid problems on the road.
Tools You’ll Need
- Torque wrench
- Socket set
- Measuring tape
- Ladder or step stool
Installation Steps
- Clean the roof rails thoroughly, removing all dirt and grease
- Attach towers or feet to the fixed mounting points or rails
- Install crossbars and tighten to manufacturer specifications
- Use Landing Pads on Yakima systems to protect roof finish
- Double-check alignment, ensuring bars are level and parallel
For Prorack P16 systems:
– Slide K452 fittings into the raised rails
– Secure crossbars with provided clamps
– Torque bolts to 8–10 Nm
For Yakima HD systems:
– Use SkyLine Towers with Landing Pads
– Attach HD Bar Adapter for proper bar height
– Tighten all bolts firmly with no wobble
Visual Check: Shake the rack after installation. No movement should occur at any joint.
Install the Rooftop Tent
With your rack secured, it’s time to mount the tent. Precision here prevents problems later.
Align Mounting Tracks
- Most tents have mounting tracks on the base
- These must align with your crossbar spacing
- For the Dune 4WD, tracks are just under 34 inches apart
Check Fit:
– Place the tent on the rack and verify it lies level
– Confirm mounting clamps can slide under the crossbars
– Ensure the tent sits centered over the roof
Secure the Tent
- Slide mounting clamps under the crossbars
- Tighten bolts evenly without overtightening
- Use a torque wrench if your tent manufacturer specifies one
- Check all four corners for gaps or tilting
Pro Tip: Do a test install before your trip. Load it with gear and drive a short distance, then recheck all bolts for tightness.
Safety and Maintenance Tips
A rooftop tent is only as safe as your maintenance routine. Regular checks prevent failures on the road.
Monthly Bolt Checks
- Vibration loosens fasteners over time
- Check all rack and tent bolts every month
- Re-torque any fasteners that have loosened
Warning: Loose bolts can lead to rack failure at highway speeds, creating extreme danger.
Use a Tent Cover
- Protects from UV rays, rain, and dust
- Extends tent lifespan significantly
- Essential in high-sun environments
Driving Adjustments
- Drive slower on rough roads to reduce strain on the rack
- Watch for low clearances since your vehicle is now 6+ feet taller
- Adjust your driving style for the changed handling characteristics
Optimize Your Setup Routine
Smart habits save time and reduce hassle at the campsite.
Leave Bedding Inside
- Keep sleeping bags and sheets in the tent between trips
- Saves significant packing and unpacking time
- Just fold everything up when you leave camp
Set Up Only Overnight
- Don’t deploy the tent for short stops
- Setup and pack-down take real time
- Keep the tent closed during the day to reduce sun exposure
Pack Smart
- Store cooking gear, water, and heavy items in the car
- Keep roof load light and balanced
- Use roof baskets only if you stay within weight limits
Real-World Performance Insights
This setup has been tested in extreme conditions with positive results.
Heat and Ventilation
- Tested in 37°C heat with excellent comfort
- Multiple mesh windows allow cross-ventilation
- Stays cooler than enclosed vans or trailers
- Use a sunshade or cover during peak sun hours
Setup Speed
- Under 10 minutes to open and secure
- No stakes, no poles, no hassle
- Game-changer compared to traditional ground tents
Morning Routines
- Expect spiderwebs across your face at dawn
- Best wildlife viewing happens in early morning hours
- Early risers get the best views and cooler temperatures
Cost and Value Breakdown
You don’t need an expensive van conversion to camp in genuine comfort.
Budget Setup Total: Under $3,000 AUD
This includes:
– Honda CR-V base vehicle
– Dune 4WD 120cm tent
– Prorack P16 rack plus K452 fitting kit
– All necessary mounting hardware
Why It’s Worth It:
– Cheaper than van life by thousands of dollars
– No monthly payments for expensive conversions
– Fuel-efficient and easy to drive anywhere
– Full freedom to camp almost anywhere you can park
Who Is This Setup For?
Ideal Users:
- Weekend adventurers seeking quick, clean camping
- Solo travelers or couples needing two-person comfort
- Digital nomads wanting an organized mobile base
- Wildlife watchers who value elevated views
- Budget-conscious explorers avoiding van costs
Not Ideal For:
- Full-time van lifers wanting a permanent setup
- Those unwilling to handle daily setup and teardown
- Groups needing more than two sleeping spots
Final Installation Checklist
Before your first trip, run through this list carefully:
- Confirm roof rail type (flush or raised)
- Measure mounting point spacing precisely
- Verify tent track width matches crossbars
- Install correct rack system for your model
- Purchase all required fittings and adapters
- Weigh total roof load and stay under 75kg
- Center tent on roof for proper balance
- Tighten all bolts to manufacturer specifications
- Test drive and recheck all fasteners
- Schedule monthly bolt inspections going forward
Frequently Asked Questions About Installing a Rooftop Tent on a Honda CR-V
What is the maximum roof weight for a Honda CR-V?
The 2004 Honda CR-V has a dynamic roof load capacity of 75kg (165 lbs). This is the maximum weight allowed while driving. Newer models may have different specifications, so always consult your owner’s manual for your specific vehicle.
Can you put a rooftop tent on a 2021 Honda CR-V?
Yes, but the 2021 CR-V with flush rails requires a specific heavy-duty rack system. The Yakima HD system with SkyLine Towers, HD Bar Adapter, and Landing Pads is the recommended setup for this model. The fixed mounting points on flush rails limit your crossbar placement options.
What roof rack fits a Honda CR-V?
For 2004 models with raised rails, the Prorack P16 system with the K452 fitting kit works well. For 2021 models with flush rails, the Yakima HD system is the recommended choice. Rhino Rack bars are not strong enough for rooftop tent use.
How wide are Honda CR-V roof rails?
The mounting point spread varies by model year and rail type. On 2021 CR-V models with flush rails, the rear crossbar spread is narrower than the front, and the spacing is fixed with no adjustment possible. Measure your specific vehicle before purchasing any rack or tent.
How much does a Honda CR-V rooftop tent setup cost?
A complete budget setup with a used 2004 CR-V, Dune 4WD 120cm tent, and Prorack P16 rack system costs under $3,000 AUD total. This includes all necessary fittings and provides a complete camping solution.
Do rooftop tents damage your roof?
When mounted correctly with proper fittings like Landing Pads, rooftop tents do not damage your roof. Regular maintenance, including monthly bolt checks and using a tent cover, helps protect both your vehicle and your tent over time.
Key Takeaways for Your CR-V Rooftop Tent Installation
Installing a rooftop tent on your Honda CR-V opens up incredible freedom for weekend trips and extended adventures. The three most important factors for success are matching your rack to your specific roof rail type, staying under the 75kg dynamic weight limit, and using all required fittings like the K452 kit or Yakima Landing Pads.
Your next step is to measure your CR-V’s mounting points today, then choose either the Yakima HD system for flush rails or the Prorack P16 for raised rails. With the right components and careful installation, your CR-V becomes a capable adventure vehicle that takes you anywhere you want to camp.