
You are halfway up a rugged trail when your pole suddenly collapses under your weight. This frustrating failure happens often because moving parts wear down from frequent use and impact.
Learning how to repair collapsible trekking poles saves you money and keeps your gear functional for future hikes. This guide covers step-by-step fixes for stuck locks, broken cords, and wobbly joints using basic tools.
Fix Broken or Stretched Shock Cords
The internal shock cord holds your pole sections together while allowing smooth extension. Over time, this elastic component stretches, frays, or snaps completely due to repeated impacts.
Replace a Snapped Elastic Cord
- Disassemble the pole sections by gently twisting and pulling them apart if they feel stuck.
- Remove the rubber foot at the bottom to expose the knot holding the cord in place.
- Extract the old cord using needle-nose pliers and note exactly how the base knot was tied.
- Thread new braided shock cord measuring 1.5 to 2 mm through each section starting from the bottom.
- Tie a secure triple overhand knot at the bottom tip to anchor the new cord firmly.
- Reassemble the pole by aligning all sections and feeding the top segment through the cord loop.
- Test the tension to ensure the cord holds sections snugly but still allows smooth extension.
Pro Tip: Apply a tiny drop of fabric glue to your knot to prevent unraveling, but keep glue away from inner walls.
Prevent Premature Cord Failure
- Always collapse your poles completely before swinging them or storing them in your pack.
- Avoid stepping on your poles or dropping them on hard rocks unnecessarily.
- Replace internal cords every one to two years if you hike frequently on rough terrain.
Repair Slipping Twist-Lock Mechanisms
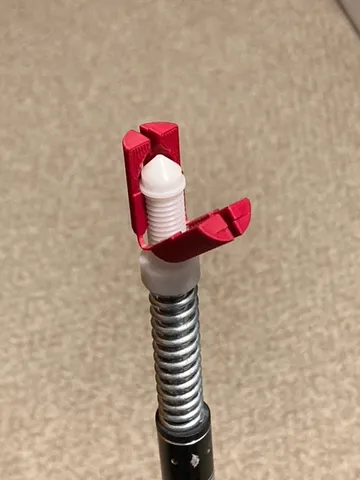
Twist-lock poles use threaded collars that compress segments to hold their position during use. These mechanisms often fail when dirt accumulates or threads become worn.
Tighten a Loose Twist Lock
- Fully extend the pole to locate the specific locking collar causing the issue.
- Twist the collar clockwise until it feels snug without applying excessive force.
- Test stability by applying downward pressure to see if the section still slips.
Clean and Maintain Locking Collars
- Unscrew the locking collar completely from the pole section to access internal threads.
- Wipe inner threads and the shaft with a dry cloth to remove all accumulated dirt and grit.
- Check for debris or burrs and use fine sandpaper to smooth out any minor damage on the surface.
- Reinstall the collar and test the lock again to ensure it holds firm under pressure.
Warning: Never use oil or lubricant on twist locks because this reduces friction and increases slippage.
Replace a Worn Locking Collar
- Order a specific replacement part directly from manufacturers like Black Diamond or Leki.
- Slide the old damaged collar off the shaft and slide the new one into place.
- Ensure perfect alignment with the inner shaft before securing it for use.
Fix Stuck Push-Button Locks
Push-button systems use spring-loaded buttons that click into alignment holes to secure each section. These mechanisms can jam when dirt blocks the spring chamber.
Clear a Stuck Lock Button
- Depress the button firmly while gently wiggling the pole section to free it.
- Apply compressed air or use a toothpick to remove packed dirt from the spring chamber.
- Drip isopropyl alcohol into the mechanism to dissolve grime and let it dry fully.
Replace a Broken Spring or Button
- Disassemble the lock housing by removing any retaining rings or caps on your specific model.
- Remove the damaged spring or plunger that is no longer functioning correctly.
- Insert the new spring from a repair kit and reassemble the housing components carefully.
- Test button action to confirm it snaps in and out smoothly without resistance.
Note: Push-button systems are less prone to slippage than twist locks but more vulnerable to mechanical failure.
Realign Bent or Misaligned Sections
A bent pole section prevents proper locking and creates dangerous instability on the trail. You can often fix minor warping with careful manual adjustment.
Straighten a Slightly Bent Shaft
- Inspect each section on a flat surface to identify exactly where the warping occurs.
- Use a soft-jaw vise or cloth-wrapped pliers to gently bend the tube back into alignment.
- Test fit and lock the sections together after making your adjustment to ensure stability.
Caution: Aluminum poles can crack if over-bent, and carbon fiber poles should never be straightened.
Replace a Damaged Pole Section
- Identify the model and diameter of your pole, such as 16 mm or 18 mm specifications.
- Order a replacement tube directly from the manufacturer to ensure a perfect fit.
- Thread in the shock cord and reassemble the pole following the cord replacement steps above.
Secure Loose Tips and Baskets
Worn tips and loose baskets reduce traction on slippery surfaces and can fall off mid-hike. Replacing these small parts is quick and inexpensive.
Replace Worn Rubber Tips
- Pull off the old tip which should stretch over the metal carbide tip at the pole base.
- Slide on a new rubber cap until it fits snugly against the metal shaft.
- Trim excess material with a utility knife if the new tip is slightly too long.
Pro Tip: Carry spare rubber tips in your pack since they are inexpensive and easy to swap on the trail.
Tighten or Replace Baskets
- Check the basket fit on the pole shaft to see if wiggling indicates looseness.
- Push firmly to reseat it or warm it slightly with warm water to expand the plastic.
- Replace cracked or missing baskets with model-specific parts for your pole brand.
Prevent Common Failures
Regular maintenance prevents most trekking pole issues before they ruin your hike. Simple habits extend the life of your gear significantly.
Clean After Every Hike
- Rinse poles with fresh water immediately if used in mud or saltwater environments.
- Dry all sections thoroughly before storing them in a collapsed state.
Store Poles Properly
- Always store poles fully extended to relieve constant tension on the internal shock cord.
- Avoid leaving them in hot cars because heat degrades elastic cords rapidly.
Inspect Before Each Trip
- Test all locks for tightness and ensure no sections slip under pressure.
- Check for cracks, frayed cords, or loose parts that need immediate attention.
- Carry a small repair kit with shock cord, glue, and spare tips for emergencies.
DIY Repair Kit Essentials
Building a lightweight kit ensures you can handle trailside fixes without panic. Keep these items in a snack-sized bag that fits easily in any backpack.
- 3 feet of 1.8 mm shock cord for emergency replacements
- Mini zip ties or paracord scraps for temporary binds
- Small needle-nose pliers for extracting broken parts
- Isopropyl alcohol wipes for cleaning mechanisms
- Fabric glue like Gear Aid Tenacious for securing knots
- Spare rubber tips and baskets for traction
- Replacement spring if you use a push-button model
When to Replace vs. Repair
Some damage is not worth fixing and requires buying new gear. Knowing when to stop repairing saves time and ensures safety.
Replace If:
- The carbon fiber shaft is cracked or splintered deeply.
- The aluminum tube is kinked severely or split open.
- The locking mechanism is stripped beyond simple repair.
- Multiple sections fail repeatedly despite your best efforts.
Repair If:
- The shock cord is broken but all tubes remain intact.
- Locks are dirty or slightly worn but still functional.
- Tips or baskets are loose or missing entirely.
Rule of Thumb: Repair costs should be less than 50 percent of a new pair’s price to make sense.
Frequently Asked Questions About Trekking Pole Repair
Can I use WD-40 on my twist-lock poles?
No, you should never use WD-40 or oil on twist locks. Lubricants reduce the friction needed for the lock to grip, causing the pole to slip dangerously during use.
How often should I replace the shock cord?
You should replace the shock cord every one to two years with heavy use. Replace it immediately if you notice fraying, stretching, or if the pole sections no longer stay connected.
Is it safe to straighten a bent carbon fiber pole?
No, it is not safe to straighten a bent carbon fiber pole. Carbon fiber will crack or shatter if bent back, so you must replace the damaged section entirely.
Why does my push-button lock stick?
Your push-button lock likely sticks because dirt or grime has packed into the spring chamber. Clean it with compressed air and isopropyl alcohol to restore function.
Where can I buy replacement pole parts?
You can buy replacement parts like collars and tips directly from manufacturers such as Black Diamond, Leki, or Komperdell. Outdoor retailers also sell universal repair kits.
Key Takeaways for Repairing Collapsible Trekking Poles
Knowing how to repair collapsible trekking poles turns a potential disaster into a minor inconvenience. Most issues like broken cords or slipping locks can be fixed quickly with basic tools and proper cleaning techniques.
Regular inspection and correct storage prevent the majority of failures before they happen. Build a small repair kit and check your gear before every trip to ensure stability on the trail.