
You found a vintage tent trailer on Facebook Marketplace—rustic charm, low price, and a solid frame. But inside? Faded carpet, mildew-stained canvas, and a ceiling held together with tape. Sound familiar? You’re not alone. A 1999 pop-up camper can be a goldmine for DIYers who know where to start. With smart tent trailer remodel ideas, even a $140 tire fix and $75 flooring upgrade can transform a tired camper into a cozy weekend escape.
This guide pulls from a real 25-year-old pop-up renovation, packed with proven, budget-conscious upgrades. You’ll learn how to tackle water damage, upgrade flooring without breaking the bank, safely remove mildew, and prioritize safety over style. Whether you’re restoring a classic or upgrading a hard-side Apache model, these actionable tips will help you turn a project camper into a reliable retreat—all within a tight timeline and tighter budget.
Start with a Smart Inspection
Before buying or beginning any remodel, a thorough inspection separates a diamond in the rough from a money pit. Focus on structural integrity, canvas condition, and hidden damage.
Check for Water Damage Clues
Look for taped or bulging ceiling panels—these often mask past leaks. In one 1999 model, a ceiling patch covered damp insulation caused by a leaking roof patch above. Always lift or gently press suspect areas. If it feels soft or moist, assume water damage.
Also inspect the floor. Finding linoleum glued directly to the subfloor? That’s a red flag. It usually means someone removed old carpet and skipped proper prep. This can trap moisture and weaken the floor over time.
Assess Canvas and Roof Condition
Canvas stored indoors ages far better. If the tent material is intact with no major tears, you’ve saved hundreds. But check for mildew, especially in folds and seams. Surface mold can be cleaned; deep penetration may require replacement.
Roof patches are common, but test their seal. Apply water around the patch and check inside for drips. Even small leaks cause big problems over time.
Never Skip the Tire Check
Dry-rotted, cracked tires are a safety hazard. One renovator admitted they were lucky not to blow a tire towing their camper home. Replace cracked tires immediately. $140 at Walmart for a pair is a small price for safe travel. Always inspect tread and sidewalls before purchase.
Set a Realistic Budget Fast
A successful tent trailer remodel balances cost, time, and safety. The goal isn’t perfection—it’s creating a clean, safe, functional space without overspending.
Prioritize Safety First
Spend on safety-critical items before aesthetics:
– Tires: $140 for a pair at Walmart
– Brakes and lights: Test and replace if faulty
– Propane system: Check for leaks, replace hoses if cracked
These prevent breakdowns and keep you legal on the road.
Allocate for Interior Upgrades
In a two-week renovation, $75 covered three boxes of vinyl plank flooring from Menards. That’s enough for most pop-up interiors. This budget-grade option is durable, water-resistant, and easy to install—perfect for DIYers.
Skip costly upgrades like full electrical rewiring unless absolutely necessary. Focus on what makes the camper livable: floor, ceiling, and canvas.
Track Every Expense
Use a simple spreadsheet or notebook:
– Pop-up camper purchase from Facebook Marketplace
– Tires: $140
– Flooring: $75
– Cleaning supplies: under $20
Total so far: under $250. This keeps you honest and helps decide where to splurge later.
Replace Old Flooring for Big Impact
Outdated carpet makes any camper feel dingy. Replacing it is one of the fastest ways to modernize the interior, and it’s easier than you think.
Remove Old Layers Completely
Start by pulling up the carpet. Underneath, you might find glued-down linoleum. This must go. It traps moisture and prevents proper subfloor prep.
Use a floor scraper to remove adhesive. Sand rough spots. Wipe clean with a damp cloth and let dry fully. A smooth, dry subfloor ensures your new flooring lasts.
Choose Durable, Easy-to-Install Flooring
Vinyl plank is ideal for tent trailers:
– Waterproof
– Lightweight
– DIY-friendly with click-lock installation
– Resists dents from foot traffic
Buy budget-grade from Menards or similar. Three boxes covered a standard pop-up camper for about $75. Light gray or wood-look planks give a modern, clean feel.
Install with Precision
Measure the space. Cut planks to fit with a utility knife or saw. Start in one corner and work across, snapping pieces together.
Avoid gluing down the flooring. Floating floors handle camper movement better and can be replaced section by section later.
Pro tip: Leave a small gap around edges for expansion. Cover with trim or molding for a finished look.
Fix Leaks and Repair the Ceiling
A damp ceiling leads to mold, rot, and ruined insulation. If you find a taped panel or soft spot, act fast.
Confirm the Leak Source
In one case, a roof patch was the culprit. Water seeped in during rain, soaked the insulation, and caused a persistent damp spot.
To test, spray water on the roof patch while someone watches inside. If moisture appears, reseal or replace the patch.
Replace Damaged Ceiling Panels
Cut out the damaged section with a utility knife. Measure and cut a new panel from matching material (often thin plywood or composite board).
Secure with panel adhesive and small screws. Paint or texture to match the rest of the ceiling.
Seal the Roof Thoroughly
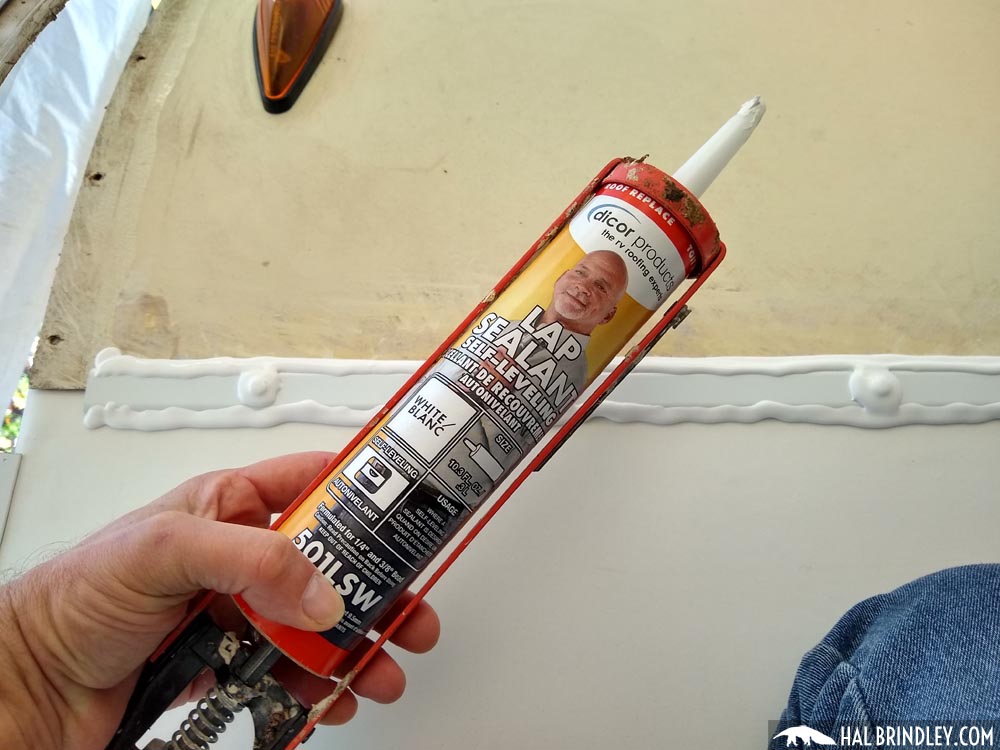
Clean the roof surface. Apply a high-quality RV sealant over all seams, vents, and patches. Use a caulk gun for even coverage.
Let dry 24 to 48 hours before closing the roof. Recheck seals annually.
Clean Mildew the Right Way
Mildew is the number one canvas problem. Vinegar might seem safe, but it often fails on stubborn stains. A stronger, controlled method works better.
Why Vinegar Fails
One DIYer scrubbed with vinegar, hard, but saw little improvement. Vinegar kills surface mold but doesn’t penetrate deep into fabric. It also doesn’t prevent regrowth in humid conditions.
Use Diluted Bleach Safely
A TikTok-recommended bleach solution delivered instant results, but with caution:
– Mix: 1 part bleach to 10 parts water
– Test: Apply to a small, hidden area first
– Apply: Use a sponge or soft brush, section by section
– Wipe: Rinse immediately with clean water
– Dry: Let air dry fully in sunlight
Never soak the canvas. Too much bleach weakens fibers and causes brittleness.
Prevent Future Mildew
- Air out the camper after every trip
- Never store damp canvas
- Use a breathable cover
- Treat stains early
A quick bleach wipe-down once a season keeps mildew at bay.
Upgrade Curtains for Instant Style
Outdated, clunky curtains drag down the whole interior. A quick swap costs little but makes a big visual difference.
Remove Old Curtains First
Take them down even if you don’t replace them right away. Bare windows look cleaner than dated fabric.
Check the track system. If it’s bent or stuck, replace it with a universal RV curtain rod.
Choose Lightweight, Modern Fabrics
Pick moisture-resistant, UV-protective fabric in neutral tones:
– Light gray
– Navy blue
– Natural linen
Pre-made RV curtains are affordable and fit standard sizes. Or use outdoor fabric remnants to DIY.
Install for Function and Style
Use grommet tabs or clips for easy opening. Add blackout liners if you like to sleep in.
Pro tip: Hang sheer inner curtains with solid outer ones for versatility.
Boost Wind Stability and Safety
Pop-up campers aren’t built for hurricanes, but they can handle moderate wind with the right setup.
Test in Real Conditions
One renovator tested their camper on a windy day. It held up well, no flapping or shaking. Sleeping inside felt comfortable.
But strong gusts are a real concern. Always check wind forecasts before camping.
Secure with Guy Lines and Weights
Use:
– Guy lines: Attach to roof corners and stake into the ground
– Sandbags or water jugs: Weigh down frame legs
– Wind skirts: Block gusts under the trailer
These simple additions prevent tipping and reduce canvas stress.
Share and Learn from Others
Ask for tips in RV forums or comment sections. Community knowledge is free and invaluable for high-wind camping.
Stick to a Two-Week Renovation Timeline
Time is money. A focused two-week plan keeps momentum and prevents burnout.
Week 1: Assess and Repair
- Day 1 to 2: Inspect, clean, and document issues
- Day 3 to 4: Replace tires, test lights and brakes
- Day 5 to 6: Treat mildew, remove old flooring
- Day 7: Prep subfloor, order materials
Week 2: Transform the Interior
- Day 8 to 9: Install new flooring
- Day 10: Repair ceiling, seal roof
- Day 11: Paint or refresh walls
- Day 12: Hang new curtains, organize storage
- Day 13 to 14: Final clean, test systems, pack for first trip
Skip perfection. Focus on progress.
Make It Feel Like Home

A camper doesn’t need luxury to feel cozy. Small touches create comfort on a budget.
Add Warmth with Lighting
Replace harsh overhead bulbs with warm LED strips or string lights. Battery-powered puck lights under cabinets add ambiance.
Use Multi-Functional Furniture
- Fold-down table doubles as prep space
- Bench seats with storage underneath
- Overhead bins for linens and gear
Bring in Soft Textures
- Throw pillows in weather-resistant fabric
- A small rug over vinyl flooring
- Blankets in a woven basket
These make the space inviting without adding weight.
Maintain Your Remodel Long-Term
A one-time fix isn’t enough. Regular care keeps your tent trailer in top shape.
Seasonal Canvas Care
- Clean with diluted bleach twice a year
- Inspect for tears or loose stitching
- Reapply waterproofing spray as needed
Roof and Sealant Checks
Every spring, walk the roof. Look for cracked sealant, loose screws, and lifting patches. Touch up with RV sealant before summer trips.
Tire and Frame Maintenance
Store tires off the ground or cover them. Check pressure before every trip. Inspect the frame for rust, especially near wheel wells.
Frequently Asked Questions About Tent Trailer Remodels
How much does a budget tent trailer remodel cost?
A complete budget-friendly tent trailer remodel can cost under $250. The main expenses are tires (around $140 for a pair) and vinyl plank flooring (around $75 for three boxes). Cleaning supplies and minor hardware add under $20. The camper purchase itself is separate and varies by location and condition.
What should I check first when buying a used tent trailer?
Start with safety-critical items: tires for cracking and dry-rot, brakes, lights, and the propane system. Then inspect the canvas for tears and mildew, the ceiling for water damage signs like taped panels, and the floor for moisture problems or unusual installations like glued linoleum over subfloor.
Can I remove mildew from canvas without damaging it?
Yes, but avoid soaking the canvas. Use a diluted bleach solution (1 part bleach to 10 parts water), test on a small hidden area first, apply with a sponge section by section, wipe clean immediately, and let air dry fully. Vinegar is safer but often ineffective on stubborn mildew.
How long does a pop-up camper remodel take?
A focused remodel takes about two weeks. Week one covers inspection, safety repairs, mildew treatment, and floor removal. Week two focuses on installing new flooring, repairing the ceiling, sealing the roof, and final cosmetic touches. Weather delays can extend the timeline.
Is vinyl plank flooring good for pop-up campers?
Yes, vinyl plank is an excellent choice for pop-up campers. It’s waterproof, lightweight, durable, and easy to install with click-lock systems that don’t require glue. Budget-grade planks from Menards cost around $75 for three boxes, enough to cover most pop-up interiors.
How do I handle a leaking roof patch?
First, confirm the leak by spraying water on the patch while someone watches inside. Clean the roof surface thoroughly, then apply a high-quality RV sealant like Dicor over all seams, vents, and patches using a caulk gun. Let dry 24 to 48 hours before closing the roof, and recheck seals annually.
Key Takeaways for Your Tent Trailer Remodel
A successful tent trailer remodel comes down to smart priorities. Start with safety: replace cracked tires and test all critical systems before anything else. Fix water damage early by sealing roof patches and replacing damp ceiling panels. Upgrade flooring with budget vinyl plank for a fast, dramatic transformation. Clean mildew safely using diluted bleach in small sections. Keep costs low by skipping nonessential upgrades and focusing on what makes the camper livable.
Your next step: grab a notebook, inspect your camper systematically using the checklist above, and create a two-week action plan. With around $250 and focused effort, you can turn a forgotten pop-up into a reliable adventure machine—and every mile you tow it, you’ll know you built it yourself.