
Cloudy headlamps scatter light and reduce your nighttime visibility, creating a dangerous driving situation. You do not need expensive replacements to fix this common safety hazard.
This guide explains how to clean a headlamp using household items or professional kits for lasting results. You will learn specific sanding techniques, sealing methods, and maintenance tips to keep your lenses clear.
Assess Headlight Oxidation Levels First
Determining the severity of damage dictates your cleaning strategy. Light surface haze requires different tools than deep yellowing or pitting.
Distinguish Surface Haze from Deep Damage
Turn on your headlights and observe the beam pattern. Dim or scattered light usually indicates severe oxidation inside the plastic.
* Mild: Slight yellow tint visible only up close.
* Moderate: Noticeable haze with uneven color distribution.
* Severe: Deep yellowing, chalky texture, or visible water spots.
Perform the Tape Test
Apply masking tape across the center of the lens to divide it. This allows you to compare treated and untreated sides instantly. It prevents you from overworking the plastic or missing subtle improvements during the process.
Prepare the Lens Surface Properly
Skipping preparation leads to uneven results and potential paint damage. A clean surface ensures your abrasives work effectively.
Wash Away Road Grime
Use mild car soap and a microfiber cloth to remove bugs, grease, and dirt. Rinse thoroughly with water. Avoid harsh dish soaps that strip existing waxes or dry out the plastic further.
Mask Surrounding Paint Areas
Dry the lens completely with a clean towel. Apply painter’s tape around the edges where the plastic meets the car body. This protects your paint from sanding slurry and chemical splashes.
Select the Right Cleaning Method
Choose your approach based on damage severity and available budget. Household hacks work for mild issues while kits handle heavy restoration.
Use Toothpaste for Minor Clouding
This method suits light oxidation and requires non-gel white toothpaste. Gel formulas lack the necessary abrasives and may harm the plastic.
1. Mix one tablespoon of toothpaste with a short spray of WD-40.
2. Apply the paste to the taped half of the lens.
3. Let it sit for 30 minutes to soften the oxidized layer.
4. Rinse gently and rub with a damp sponge in circular motions.
Pro Tip: Follow up with 2000-grit wet sanding if the toothpaste method leaves slight residue.
Sand Away Heavy Oxidation Layers
Severe damage requires mechanical removal of the damaged plastic layer. Wet sanding physically strips away the yellowed surface to reveal clear material underneath.
Start with 500-Grit Sandpaper
Soak the sandpaper in water for five minutes before starting. Use a drill attachment or hand sand in slow circles while keeping the surface wet.
* Stop when the lens looks uniformly frosted.
* Ensure all yellowing disappears before moving forward.
* Keep the paper moving to prevent heat melting the plastic.
Refine with 800-Grit Paper
Switch to 800-grit to remove scratches left by the coarser paper. Sand in circles until those marks vanish completely.
* Remove the disc from the drill for tight corners.
* Rinse frequently to check your progress.
* Do not proceed until the surface feels smooth.
Polish with 2000 to 3000 Grit
Use 2000-grit followed by 3000-grit paper to eliminate micro-scratches. A white slurry will form as you polish away the plastic.
* The lens should feel glass-smooth to the touch.
* Ensure no deep scratches remain before sealing.
* Never skip grit steps or scratches will persist.
Polish and Reveal Crystal Clarity
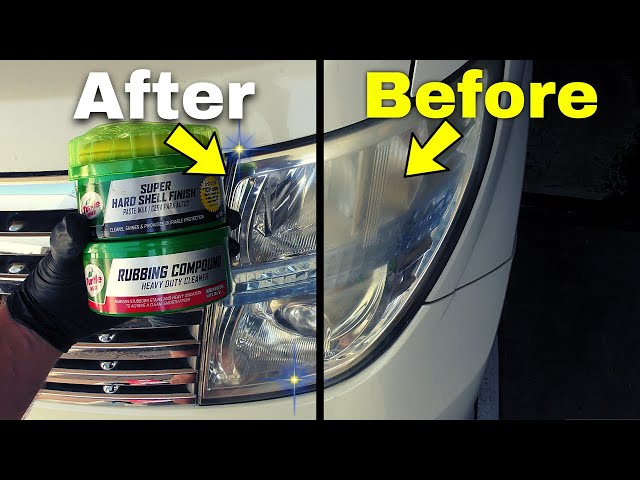
Sanding leaves a matte finish that requires polishing to restore optical transparency. This step brings back the gloss and brightness.
Apply Plastic Polishing Compound
Place a dab of plastic-safe compound on a clean microfiber cloth. Rub in slow circular motions across the entire lens with light pressure.
* Watch the surface transform from foggy to clear.
* Work in small sections for even coverage.
* Allow the compound to haze over slightly.
Buff with a Dry Microfiber Cloth
Use a fresh dry towel to buff off the dried compound. The lens should now appear reflective and transparent. Compare this side to your taped section to verify the improvement.
Seal Against Future UV Damage
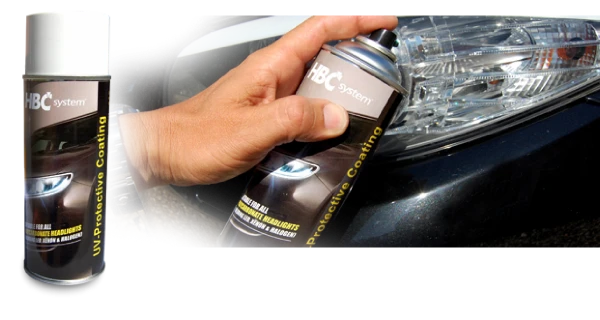
Unsealed plastic re-oxidizes quickly when exposed to sunlight. Applying a protective barrier is essential for long-term clarity.
Apply UV-Protective Clear Coat
Most kits include a two-part sealant designed for polycarbonate. Spray or wipe the first layer and let it dry for 10 to 15 minutes.
* Apply a second coat for maximum durability.
* This layer blocks UV rays that cause yellowing.
* Proper application lasts up to two years.
Consider Ceramic Coating Options
Ceramic coatings bond permanently to the plastic for lifetime protection. They repel water and dirt while blocking UV radiation.
* Apply with a microfiber applicator pad.
* Let cure for 24 hours before driving.
* Ensure the surface is perfectly smooth before application.
Combine Methods for Best Results

Hybrid approaches often yield superior clarity and durability. You can mix mechanical removal with advanced sealing technologies.
Strip with Sanding and Seal with Ceramic
Start with the 500 and 800-grit stages to remove deep damage. Refine with 2000 and 3000-grit for a smooth base.
* Skip the standard UV sealant included in kits.
* Apply ceramic coating as your final protective layer.
* This combines thorough restoration with premium protection.
Avoid Common Restoration Mistakes
Errors during the process can ruin your lens or shorten the life of your repair. Awareness prevents costly do-overs.
Using Incorrect Toothpaste Types
Gel or whitening pastes contain chemicals that damage plastic. Always use plain white non-gel toothpaste for any household method.
Dry Sanding the Lens
Never sand without water. Dry sanding generates heat that melts polycarbonate and creates deep permanent scratches.
Skipping Grit Progressions
Jumping from 500-grit directly to 2000-grit leaves visible scratches. Each finer grit removes the marks from the previous stage.
Sealing Prematurely
Applying sealant to a wet or dirty surface prevents bonding. Ensure the lens is clean, dry, and cool before sealing.
Maintain Clear Headlights Long Term
Restoration is an investment that requires ongoing care. Regular maintenance extends the life of your repair significantly.
Wash Monthly with Care
Clean headlights with car shampoo and water during regular washes. Avoid high-pressure washers that force water into the housing.
Inspect Every 30 Days
Check for early signs of haze or yellowing monthly. Catching issues early allows for quick polishing before major damage occurs.
Reapply Protectants Regularly
Wipe on a UV-blocking spray or ceramic booster every 6 to 12 months. This refreshes the barrier against sun damage.
Troubleshoot Poor Restoration Results
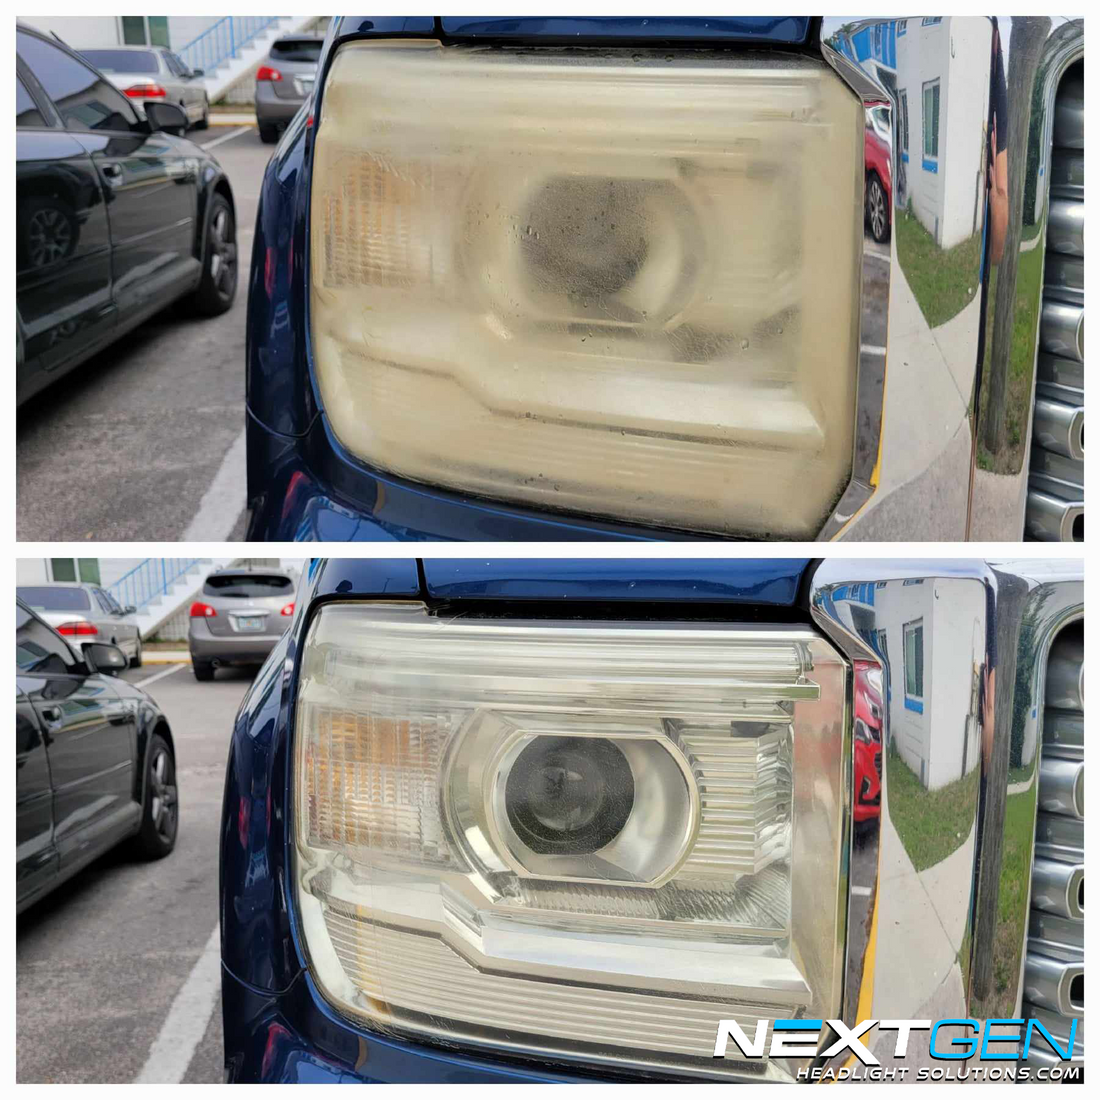
Unexpected issues often have simple fixes if you know what to look for. Address these problems immediately for best outcomes.
Addressing Persistent Cloudiness
If haze remains after 2000-grit sanding, the damage is deeper than expected. Return to 800 or 500-grit and restart the progression.
Fixing Uneven Finishes
Inconsistent pressure causes uneven results. Resand the entire lens with your last used grit to ensure full coverage.
Removing Water Spot Marks
Mineral deposits require aggressive 500-grit sanding to remove. Chemical wipes alone cannot dissolve baked-in minerals.
Clearing Curved Areas
Power tools struggle on tight curves. Remove the sanding pad from the drill and finish these spots by hand.
Frequently Asked Questions About Cleaning Headlamps
How long does a headlight restoration last?
Professional kits with UV sealant last up to two years. Ceramic coatings claim lifetime protection, while household hacks like toothpaste may only last six months.
Can I use regular toothpaste to clean my headlights?
Yes, but only non-gel white toothpaste works effectively. Gel formulas lack abrasives and contain additives that can damage polycarbonate plastic.
Is wet sanding necessary for cloudy headlights?
Wet sanding is essential for moderate to severe oxidation. It physically removes the damaged plastic layer that causes cloudiness and yellowing.
What grit sandpaper should I start with?
Start with 500-grit for heavy oxidation and deep yellowing. Use 1200-grit or higher only for very mild surface haze or final polishing stages.
Why do my headlights turn yellow again?
UV rays degrade polycarbonate plastic over time. Without a proper UV-blocking sealant, new oxidation will form quickly after cleaning.
Can I restore headlights without buying a kit?
Yes, you can use toothpaste and WD-40 for mild cases. However, professional kits provide better tools and durable sealants for severe damage.
Key Takeaways for How to Clean a Headlamp
Restoring your headlights improves safety by maximizing nighttime visibility and reducing glare. The process involves assessing damage, wet sanding with progressive grits, polishing, and applying a UV-resistant sealant.
Choose your method based on severity, from simple toothpaste hacks to professional ceramic coatings. Start your restoration today by gathering your materials and taping off your lenses for a safer drive.