You crushed it on the trail—summit views stretched endlessly, the air was crisp, and every step felt like progress. But now, hours or even a full day later, your legs are screaming. Standing up is a chore. Walking downstairs feels like punishment. This isn’t just tiredness—it’s extreme leg pain after hiking, and if you’re wincing with every movement, you’re not alone.
This intense discomfort is most often caused by Delayed Onset Muscle Soreness (DOMS), a natural reaction to muscles being pushed beyond their usual limits—especially during steep descents or long, grueling ascents. While not dangerous, DOMS can be severe enough to disrupt your routine and make simple tasks feel impossible. The good news? It’s temporary, manageable, and, with the right approach, preventable in the future.
In this guide, you’ll learn exactly why hiking triggers such extreme soreness, how to tell if it’s something more serious, and science-backed strategies to recover faster and hike stronger next time.
What Causes Extreme Leg Pain After Hiking
DOMS: Why Your Muscles Rebel 24–48 Hours Later
Delayed Onset Muscle Soreness (DOMS) is the #1 reason for extreme leg pain after hiking. It occurs when your muscles endure eccentric contractions—when they lengthen under tension. This happens most during downhill hiking, where your quads and calves work overtime to control your descent, absorbing impact with every step.
These tiny micro-tears in muscle fibers trigger inflammation, stiffness, and soreness—not lactic acid, as was once believed. DOMS typically starts 8–24 hours after your hike, peaks around 48 hours, and gradually fades within 3–5 days.
“Walking downhill forces your quads to act like shock absorbers. That’s when eccentric loading damages fibers and sets up soreness.”
Even experienced athletes feel it when tackling unfamiliar terrain. The key? Your body adapts over time—each tough hike makes you stronger.
Hiking Factors That Make Soreness Worse
| Factor | Why It Increases Pain |
|---|---|
| Downhill hiking | Eccentric loading on quads and calves causes the most muscle damage |
| Long duration | Prolonged effort leads to cumulative fatigue and micro-tears |
| Heavy backpack | Extra weight amplifies stress on joints and muscles |
| Steep elevation | More effort per step, especially during climbs and drops |
| Uneven trails | Constant ankle adjustments engage stabilizing muscles not used daily |
| Lack of conditioning | Untrained muscles break down faster under stress |
Even fit individuals get sore on challenging trails. The solution? Progressive adaptation—your body learns to handle stress with consistent exposure.
When to Worry: DOMS vs. Serious Conditions

Signs of Normal DOMS
Most post-hike pain is harmless. Look for:
– Dull, widespread soreness in quads, calves, or hamstrings
– Stiffness and tenderness, worse when moving
– Gradual onset, peaking on day two
– Improvement within 3–5 days
If this sounds like your experience, you’re likely just dealing with DOMS.
Red Flags: Seek Medical Help Immediately
Certain symptoms mean it’s not just soreness. See a doctor if you have:
- Dark, tea-colored urine → Possible rhabdomyolysis (dangerous muscle breakdown)
- Severe swelling, numbness, or tightness → Could be acute compartment syndrome
- Cramping during walking that eases with rest → May indicate peripheral artery disease (PAD)
- Sharp, shooting pain down the leg → Likely sciatica or nerve compression
- Localized pain with redness or warmth → Could be tendonitis or ligament injury
“If pain is extreme, worsening, or comes with dark urine or swelling, don’t wait—seek medical care.”
Immediate Recovery: First 60 Minutes After the Hike
Cool Down to Prevent Stiffness
Don’t sit down the moment you finish. Walk slowly for 5–10 minutes on flat ground to keep blood flowing and prevent pooling in your legs.
Tip: Move around before a long drive—this simple step cuts next-day soreness.
Stretch While Muscles Are Warm
Stretching post-hike maintains flexibility and reduces tightness. Focus on:
- Calves: Standing calf stretch (30 sec each)
- Quads: Standing quad pull (hold behind your back)
- Hamstrings: Seated forward fold
- Hip flexors: Low lunge with back knee down
Hold each stretch 30 seconds, repeat 2–3 times. Breathe deeply—no bouncing.
Static stretching works best after exercise. Save dynamic moves for warm-ups.
Rehydrate and Replace Electrolytes
Dehydration worsens cramps and soreness. Drink water consistently and replenish key minerals:
- Sodium, potassium, magnesium, calcium
- Sources: Coconut water, bananas, sweet potatoes, avocado, electrolyte tablets
Avoid alcohol—it dehydrates and slows recovery.
Eat a Recovery Meal Within 60 Minutes
Fuel repair with the right nutrients:
– 30–50g protein (chicken, Greek yogurt, protein shake)
– Complex carbs (quinoa, sweet potato, whole grains)
– Anti-inflammatory foods (turmeric, ginger, walnuts, leafy greens)
Try a recovery smoothie: banana + protein powder + flaxseed + almond milk + spinach + fresh ginger
Next 72 Hours: Speed Up Healing
Move Gently: Active Recovery
“Motion is lotion.” Light activity boosts blood flow and speeds healing.
Try:
– Easy walking
– Swimming or low-resistance cycling
– Gentle yoga or stretching
Avoid intense workouts until soreness fades.
Foam Roll Tight Areas
Foam rolling breaks up tight fascia and reduces stiffness.
For calves:
1. Sit, place roller under one calf
2. Cross other leg over for pressure
3. Roll slowly from ankle to knee
4. Pause on tender spots for 20–30 seconds
Alternatives: Tennis ball, massage gun, or trigger point ball.
It may hurt at first, but relief often follows.
Use Topical Pain Relief
Apply creams with:
– Menthol – Cooling, numbing effect
– Arnica – Reduces swelling
– Peppermint or eucalyptus oil – Soothing and anti-inflammatory
– CBD or lidocaine – Pain-relieving
Massage into sore areas twice daily.
Soak in Epsom Salt
An Epsom salt bath may ease soreness through magnesium absorption.
- Add 2 cups Epsom salt to warm bath
- Soak for 15–20 minutes
- Alternative: Calf soak in a bucket
Try Contrast Therapy
Alternating heat and cold improves circulation.
How to do it:
1. 1–2 minutes heat (heating pad)
2. 1–2 minutes cold (ice pack wrapped in cloth)
3. Repeat for 15–20 minutes
4. End with cold if swelling is present
Great for lingering tightness.
Elevate and Compress
Reduce swelling with:
– Elevation: Legs above heart level
– Try “legs-up-the-wall” pose
– Compression: Wear compression socks or sleeves
– Helps circulation and reduces muscle shake
Wear during recovery or travel.
Use Cold or Heat Wisely
- Right after hike: Cold reduces inflammation (ice packs, cold plunge)
- After 24 hours: Heat increases blood flow (warm baths, heating pad)
Apply ice for 20 minutes every 2–3 hours in the first 48 hours. Never apply ice directly to skin.
Prioritize Sleep
Muscle repair peaks during deep sleep. Aim for 7–9 hours.
During sleep:
– Micro-tears heal
– Energy stores refill
– Inflammation is regulated
Boost recovery:
– Elevate legs with a pillow
– Apply magnesium lotion before bed
Consider OTC Pain Relief
Use only when needed:
– Ibuprofen (Nurofen): Reduces pain and inflammation
– Caution: May interfere with muscle adaptation
– Paracetamol (acetaminophen): Eases pain, no anti-inflammatory effect
One hiker reported taking ibuprofen before and after—always consult your doctor first.
Apply R.I.C.E. for Acute Soreness
For severe stiffness:
– Rest: Avoid overuse
– Ice: 20 minutes every 2–3 hours
– Compression: Elastic bandage or compression gear
– Elevation: Above heart level
Effective in first 48 hours.
Prevent Extreme Pain on Future Hikes
Build a Hiking-Specific Fitness Base
Strength and endurance reduce DOMS risk.
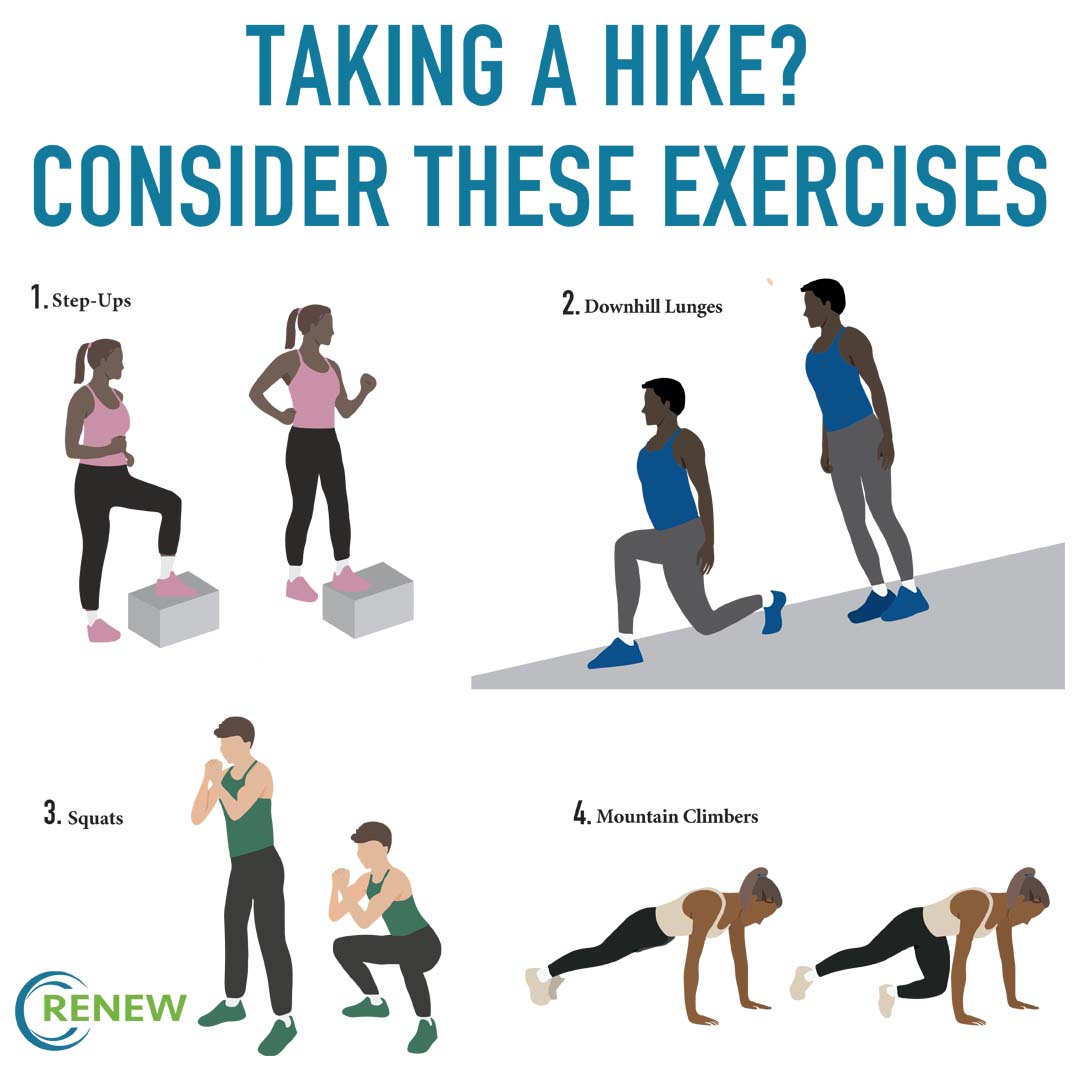
Strength (2–3x/week):
– Squats, lunges, step-ups
– Calf raises, glute bridges, planks
– Bulgarian split squats for unilateral strength
Cardio:
– Stair climbing, trail running, cycling
– Improves stamina and joint stability
“Even fit gym-goers get sore. Train specifically for hiking.”
Train Consistently Year-Round
Regular hikers adapt faster. Consistency beats intensity.
Schedule:
– Weekly hikes of increasing difficulty
– Easier hikes between big ones
– Track progress: distance, elevation, pack weight
Warm Up Before Every Hike
Skip static stretching. Do 5–10 minutes of dynamic moves:
– Leg swings (forward/side)
– Walking lunges
– High knees
– Butt kicks
– Arm circles
Prepares muscles for uneven terrain.
Use Trekking Poles
Poles reduce leg strain by up to 25%, especially on descents.
Benefits:
– Less impact on knees and quads
– Better balance
– Distributes effort to upper body
– Improves rhythm
Essential for heavy packs or long downhills.
Wear Proper Footwear
Bad shoes = more pain. Choose:
– Ankle support (for rocky trails)
– Arch and heel cushioning
– Room for toes to splay
– Broken-in fit (never wear new boots on long hikes)
Replace worn insoles or use orthotics.
Pace Yourself
Avoid the “hiking hangover” by:
– Starting slow
– Taking breaks every 30–60 minutes
– Using the talk test: If you can’t speak comfortably, slow down
– Adjusting for heat, altitude, or humidity
A steady rhythm prevents burnout.
Progress Gradually
Increase one variable at a time:
– Distance
– Elevation gain
– Pack weight
– Trail difficulty
Allow recovery days between hard hikes.
“Gradual progression prevents overuse and builds resilience.”
Fuel and Hydrate on the Trail
Eat every 45–60 minutes:
– Trail mix, energy bars, jerky
– Mix of carbs, protein, fats
Drink water consistently:
– Sip often, don’t wait for thirst
– Add electrolytes in heat or long hikes
Dehydration increases cramp and fatigue risk.
Wear Compression Socks
Graduated compression:
– Improves circulation
– Reduces muscle oscillation
– Lowers cramp and blister risk
Wear during and after the hike.
Pack a Post-Hike Recovery Kit
Keep a small bag ready:
- Electrolyte drink mix
- Protein bar or trail mix
- Refillable water bottle
- Mini foam roller or massage ball
- Muscle balm (menthol/arnica)
- Compression socks
- Stretching strap
“Use it the moment your boots come off—jumpstart recovery before soreness sets in.”
Target Muscles: Know Your Pain Zones
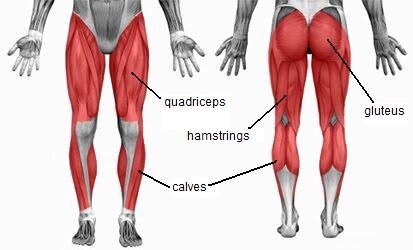
Calves: Propulsion and Stability
- Role: Push-off power, ankle control
- Recovery: Standing calf stretch, foam rolling
- Tip: Roll both upper (gastrocnemius) and lower (soleus) calf
Quadriceps: Braking on Downhills
- Role: Control descent, absorb shock
- Recovery: Standing quad stretch, lunge stretch
- Most affected during steep descents
Hamstrings: Uphill Power
- Role: Hip extension, climbing efficiency
- Recovery: Seated forward fold, lying hamstring stretch
Glutes: Strength and Balance
- Role: Drive uphill, stabilize hips
- Recovery: Pigeon pose, glute bridges
- Weak glutes shift load to quads and back
Hip Flexors: Stride Mechanics
- Role: Lift legs, maintain stride
- Recovery: Kneeling hip flexor stretch
- Often tight from sitting—stretch regularly
Focus on quads, hamstrings, calves, and glutes post-hike.
Recovery Timeline by Soreness Level
| Soreness Level | Recovery Time | Key Actions |
|---|---|---|
| Mild | 24–48 hours | Walk, stretch, hydrate |
| Moderate | 2–3 days | Foam roll, Epsom bath, sleep |
| Intense DOMS | 4–5 days | Contrast therapy, topical relief, compression |
| Strain/Injury | 1–2 weeks | Rest, medical check, physio |
Recovery depends on hike difficulty, fitness, and post-trail care.
Final Thoughts: Pain Is Temporary, Strength Is Lasting
Extreme leg pain after hiking is normal, not alarming—for most, it’s just DOMS doing its job: breaking down so muscles can rebuild stronger.
Yes, day two might be brutal. But remember:
– This too shall pass.
– You’re not injured—you’re adapting.
– The summit memory outlasts the soreness.
With smart training, proper recovery, and preventive habits, future hikes will leave you smiling, not limping.
“With time, these same trails won’t leave you hobbling—they’ll leave you smiling.”