
Your Mercedes dashboard flashes “Active Headlamps Inoperative,” instantly disabling swiveling beams and auto-leveling features essential for night driving safety. This critical warning often stems from blown fuses, failing control modules, or dirty sensors rather than simple bulb issues.
This guide details exactly how to fix active headlamps inoperative errors using proven diagnostic steps for models like the 2014 CLA 250 and E350. You will learn to inspect fuses, test wiring continuity, diagnose control module failures, and reset the adaptive lighting system effectively.
Verify Headlamp Fuses and Power Supply
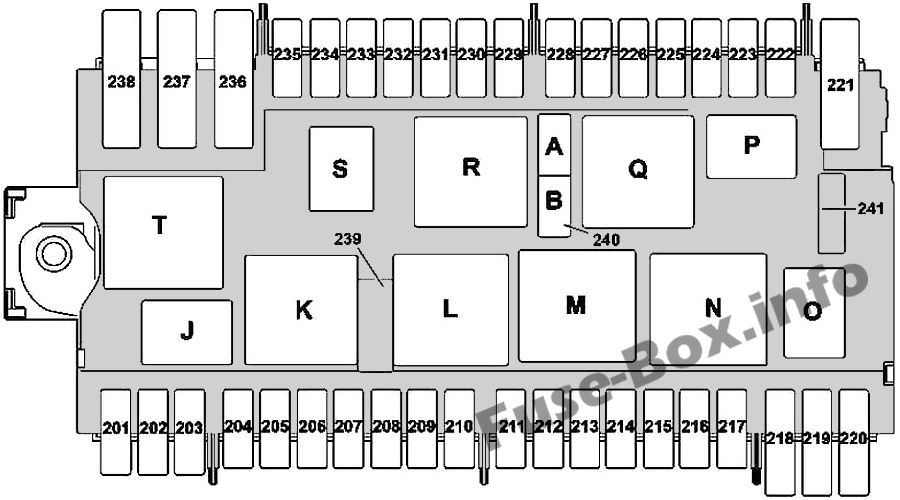
Blown fuses represent the most common cause for the active headlamps inoperative warning appearing suddenly. Always rule out this simple electrical interruption before attempting complex diagnostics on your vehicle.
Locate and Inspect Critical Fuses
Mercedes vehicles distribute lighting power across multiple fuse boxes located in the engine bay, cabin kick panel, or trunk area.
* Identify fuses labeled “Headlamp,” “Adaptive Lighting,” or “Front Lighting Module” using your owner’s manual.
* Remove suspected fuses carefully using a fuse puller or small pliers.
* Check visually for broken filaments, charring, or discoloration on the metal strip.
* Replace any damaged units with fuses matching the exact amperage rating specified on the cover.
Test Fuse Integrity with a Multimeter
Visual inspections can miss intermittent breaks inside a fuse that still look intact. Use a multimeter to confirm continuity if you suspect a fuse is faulty despite no visible damage. If a new fuse blows immediately upon installation, stop replacing it and investigate the wiring for a short circuit.
Inspect Wiring Harnesses and Connectors
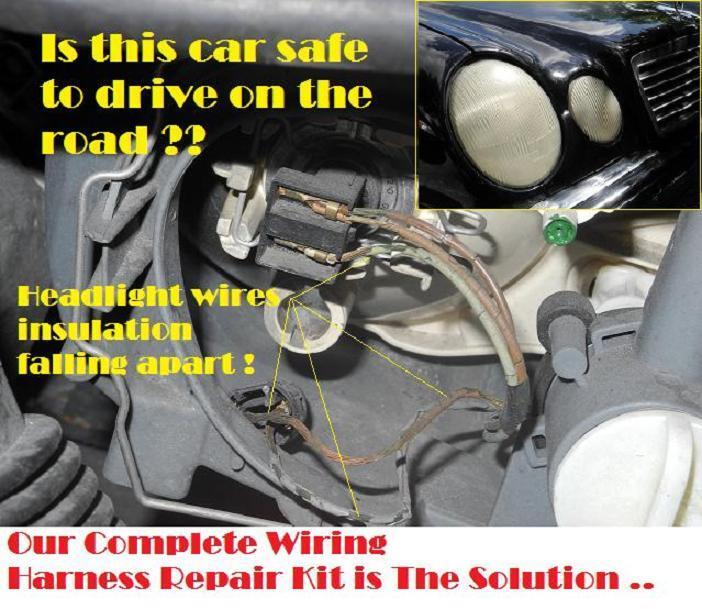
Damaged wiring or loose connections frequently trigger communication errors between the headlamp module and the vehicle CAN bus network. Physical inspection often reveals the root cause of intermittent lighting failures.
Examine Harness Condition
Open the hood and trace the wiring harness from the back of the headlamp assembly toward the firewall. Look closely for frayed wires, rodent damage, or heat degradation near engine components. Pinched wires around suspension parts can also sever connections leading to the active headlamps inoperative error.
Clean and Secure Electrical Connectors
Disconnect the main connector from the headlamp control module to inspect the terminals.
* Look for green or white corrosion indicating moisture intrusion.
* Check for bent pins or debris inside the housing.
* Clean contacts with electrical contact cleaner and a soft brush.
* Reconnect firmly until you hear a positive click to ensure a solid seat.
Verify Ground Connection Points
A poor ground connection can mimic total module failure by preventing proper voltage flow. Locate the headlight ground bolt on the chassis or radiator support, remove it, and clean the metal contact point with sandpaper. Reattach securely and apply dielectric grease to prevent future corrosion.
Clean Adaptive Sensors and Lenses
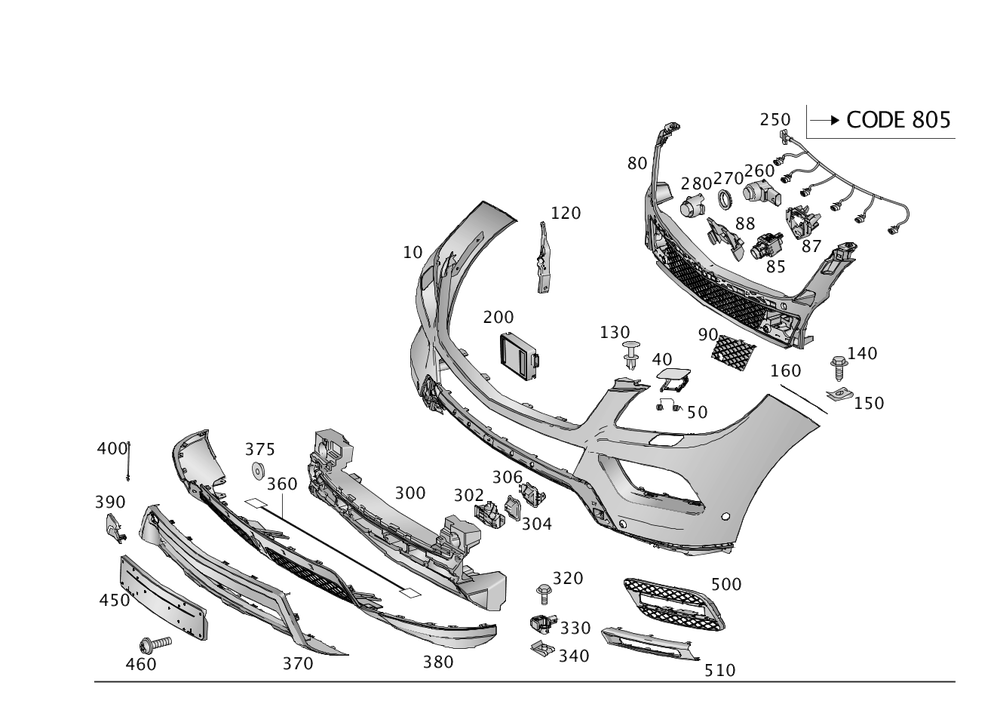
The adaptive lighting system relies on clear sensor data to adjust beam direction dynamically. Obstructed sensors force the system into a fail-safe mode displaying the active headlamps inoperative message.
Identify Sensor Locations
Sensors monitoring steering angle and road conditions are typically located near the steering column, under the center console, or integrated into the headlamp housing. External sensors near the front bumper detect ambient light and require a clear view to function correctly.
Remove Dirt and Grime Buildup
Wipe sensor lenses and transparent headlamp windows with a microfiber cloth and glass cleaner. Remove all mud, ice, snow, or road film that blocks the sensor view. Avoid using abrasive cleaners or high-pressure water directly on sensor windows to prevent damage.
Reactivate System After Cleaning
Drive the vehicle above 12 mph after cleaning to allow the system to recalibrate automatically. The warning often clears itself if sensor obstruction was the sole trigger for the fault code.
Diagnose Control Module Failures
Control modules regulate voltage and adaptive functions, making them a common failure point on vehicles with over 85,000 miles. Identifying a bad module requires observing specific symptom patterns.
Recognize Module Failure Symptoms
Notice if the warning persists despite having working bulbs or if operation becomes intermittent when wiggling wires. A key indicator is fault migration where swapping modules between left and right sides causes the failure to shift to the opposite headlight.
Understand Module Limitations
Headlamp control modules are side-specific and require coding to your vehicle VIN.
* Do not assume modules are plug-and-play without calibration.
* Used modules often need reprogramming to match your specific car configuration.
* Never swap modules without scanning first as misprogramming can flood the CAN bus with errors.
Use a Professional Scan Tool
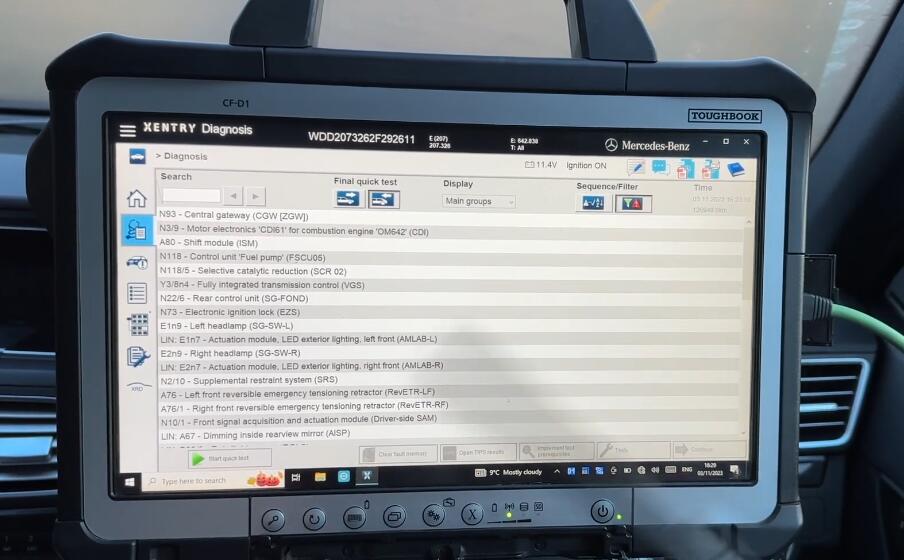
Generic OBD2 scanners often fail to access deep lighting codes required to diagnose active headlamps inoperative faults accurately. You need a Mercedes-specific diagnostic tool for effective troubleshooting.
Retrieve Specific Fault Codes
Connect a compatible tool like Xentry, Autel MaxiCOM, or Foxwell NT510+ to the OBD2 port. Access the Headlamp Control Module to read stored Diagnostic Trouble Codes (DTCs). Common codes include communication loss (U0121), motor circuit failures (B0071), or invalid steering angle data (U0423).
Analyze Live Data Streams
Monitor real-time parameters such as steering angle input, headlamp swivel position, and module voltage. If the module shows “No Communication” or “Signal Implausible,” suspect a wiring fault, blown internal fuse, or a dead control unit requiring replacement.
Reset and Recalibrate the Lighting System
Clearing stored faults and recalibrating the system is essential after repairing components to restore full adaptive functionality.
Perform Soft Reset via Instrument Cluster
Some models allow a manual reset without a scan tool by turning the ignition to ON and holding the Trip/Reset button. Navigate through the menu to “Lights,” select “Adaptive Light System,” and choose “Reset.” Wait 30 seconds for the system to reinitialize.
Execute Full Calibration with Scanner
Use a professional tool to select “Adaptive Headlight Calibration” for a complete system recovery. Follow the prompts to perform horizontal and vertical zero-point alignment. This step is mandatory after replacing modules, windshields, or repairing front-end collisions.
Replace Faulty Components Safely
Replace confirmed failed parts with OEM specifications to ensure long-term reliability and proper system integration.
Install New Control Modules
Purchase the correct OEM module for your specific side and disconnect the battery negative terminal before starting. Remove the headlamp assembly if necessary, unplug the old module, and install the new unit. Have the new module coded and calibrated using a professional scanner immediately.
Repair Damaged Wiring Harnesses
Splice and solder any broken wires using heat-shrink tubing for insulation rather than twist-on connectors. Secure the harness away from moving parts and consider replacing the entire section if multiple wires show compromise.
Test Adaptive Motors
Command motor movement via your scan tool to verify mechanical function. Listen for faint clicking or observe movement; if there is no response, the motor is likely seized or disconnected and requires replacement.
Prevent Future Headlamp Failures
Maintain system reliability through regular inspections and software updates to avoid recurring active headlamps inoperative warnings.
Schedule Regular System Inspections
Inspect connectors for moisture and verify fuse integrity every 12 months or 10,000 miles. Clean sensor lenses regularly and check for available software updates that address known bugs.
Maintain Battery Voltage
Keep your vehicle battery charged especially if the car sits unused for weeks. Low voltage can corrupt module memory and trigger false warnings in the adaptive lighting network.
Frequently Asked Questions About Active Headlamps Inoperative
Can I drive safely with the active headlamps inoperative warning?
You can drive with standard illumination, but adaptive features like swiveling and auto-leveling are disabled. This reduces visibility on curves and compromises night-driving safety until repaired.
Why does the warning appear even when headlights seem to work?
The system monitors adaptive motors and sensors separately from main illumination. A fault in the swivel mechanism or sensor data triggers the warning even if the primary LEDs or bulbs remain functional.
How much does it cost to fix active headlamps inoperative?
Costs vary from $20 for a fuse to over $1,000 for control module replacement and coding. Diagnosis with a professional scan tool is required to determine the exact cause and associated repair cost.
Will disconnecting the battery reset the active headlamp error?
Disconnecting the battery might temporarily clear the code, but the warning will return if the underlying mechanical or electrical fault remains unresolved. Proper diagnosis is necessary.
Can I use a generic OBD2 scanner to fix this issue?
Generic scanners often cannot access the specific headlamp control module codes required. You need a Mercedes-compatible tool like Xentry to read deep lighting faults and perform calibration.
Key Takeaways for Fixing Active Headlamps Inoperative
Fixing active headlamps inoperative issues starts with checking simple causes like blown fuses and dirty sensors before assuming major component failure. Failing control modules are a frequent culprit in higher-mileage vehicles, often confirmed by fault migration when swapped between sides.
Always use a professional scan tool to retrieve specific codes and calibrate new modules to your vehicle VIN. Ignoring this warning compromises your adaptive lighting safety features and may lead to complete system failure if left unaddressed.
Take action today by inspecting your fuses and cleaning your sensors, then consult a certified technician for module coding if the problem persists.