
You’re halfway through setting up for a market stall when your gazebo refuses to lock at the corners. Or maybe you’re standing in your driveway with a folded frame that just won’t cooperate. Knowing how to open a gazebo tent correctly eliminates that frustration entirely. Most pop-up models unfold in under two minutes without any tools, once you understand the scissor mechanism at the heart of the frame. This guide walks you through the exact sequence professionals use, from unpacking to full deployment, plus troubleshooting tips for when things go sideways.
Prepare Your Site and Unpack the Gazebo
The fastest setups start with smart preparation. Choose level ground, check for overhead obstructions, and confirm the surface can accept stakes or weights. Avoid windy conditions entirely; even a mild breeze can flip a half-open frame.
Once your spot is ready, unhook the base belt on the transport bag, peel back the Velcro strip, and lift the bag upward to free the collapsed tent. Lay the frame flat without disturbing its folded structure. Set the canopy aside for now if it isn’t already attached.
Open the Frame to One-Third Position
This is where most beginners make their first mistake. Never pull the legs apart; doing so can bend the locking pins. Instead, grip the central scissor joints (the X-shaped metal arms at the roof’s center) with both hands. For rectangular gazebos, grip the scissors on the short side first.
Stand over the frame, squeeze the scissors together slightly, and step backward while pulling upward. This motion naturally spreads the legs outward without strain. Stop once the frame is about one-third open. This semi-erected position prevents overextension and prepares the structure for canopy attachment.
Attach the Canopy Correctly
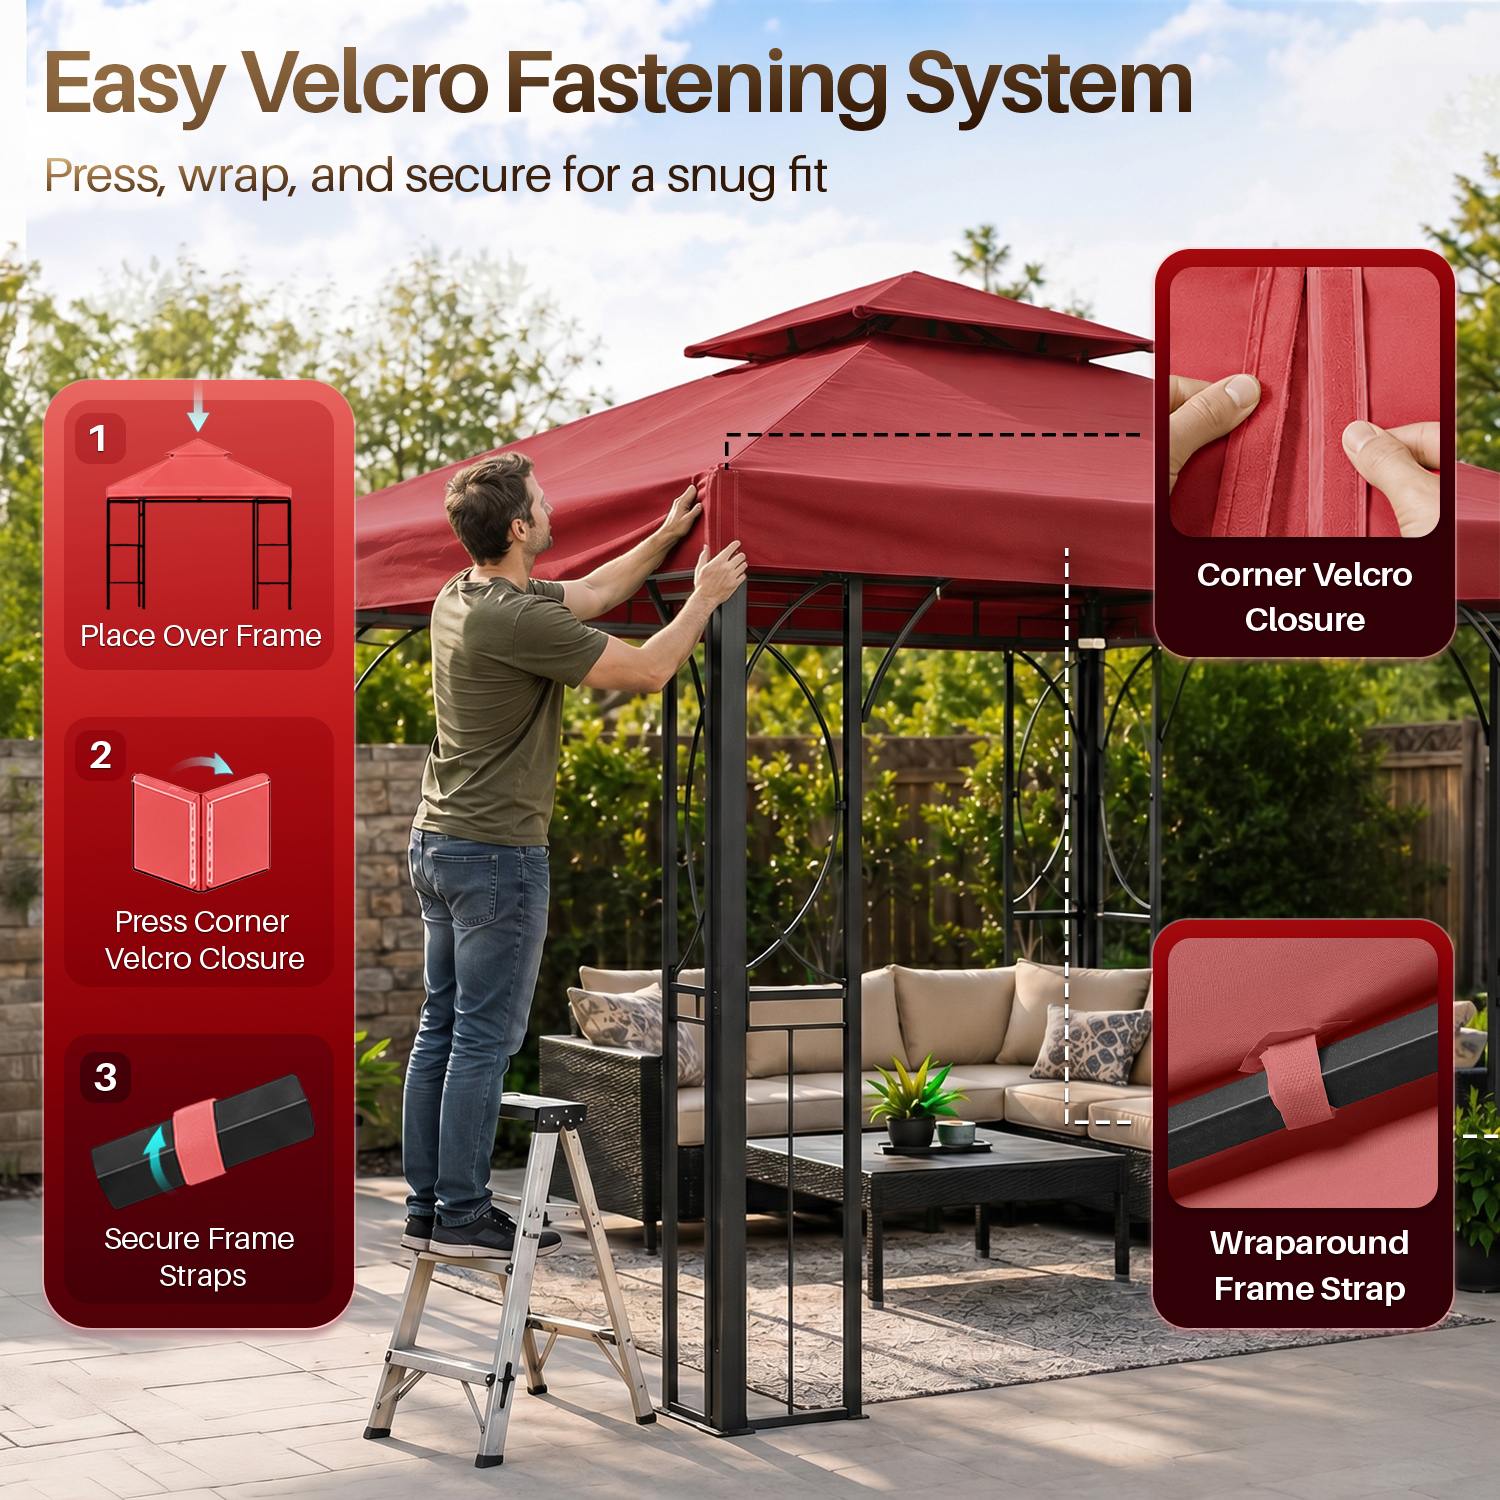
Some gazebos arrive with the canopy pre-fitted. If yours doesn’t, now is the ideal moment to install it.
Slide-On Method
Lay the canopy flat with Velcro corners facing down. Drape it over the semi-open frame, aligning each corner with the corresponding leg. Make sure the center peak of the fabric matches the highest point of the frame. If your model includes a protective sock, slide it over the peak pole first to prevent shifting.
Ecotent® Method
Raise the central gable slightly, cross the elastic loops in the middle of the canopy, and hook them over the slots on the plastic gable hood. Push the gable back down to lock the roof. Then feed the corner Velcro straps through the plastic connectors and fasten them around the upper leg section.
Confirm the circular fabric reinforcements sit exactly where the canopy meets the frame. Misalignment causes stress and tearing over time.
Fully Extend and Lock All Corners
With the canopy in place, continue pulling the truss joints apart until the gazebo reaches full width. Walk to each corner and push the sliding connector upward until it clicks. This metal or plastic latch locks the scissor arms and stabilizes the roof.
All four corners must be locked. An unlocked corner risks sudden collapse, especially in wind.
Raise the Roof with Spring Pins
Hold one leg firmly with your foot to stabilize it. Push up on the corner scissors until you hear a distinct click; this means the spring-loaded pin has engaged. Repeat at all four corners.
As each corner locks, the roof rises automatically into a taut, peaked position. If a pin doesn’t catch, slightly lift the leg and try again. On Mastertent models, use the Easy-Up foot mechanism: step onto the footplate and push upward to lock.
Adjust Leg Height in Opposite Pairs

Uneven legs create an unstable gazebo. Always adjust in pairs to maintain balance.
Lift one leg slightly and press the spring-loaded button on the inner shaft. While holding the button, push the leg downward with your foot until the pin snaps into the desired hole. Most models offer 3–5 height settings.
Work in opposite pairs: adjust the front-left and back-right legs first, then the other two. On Canopy Outdoor™ models, the leg clicks into place when the foot plate is pushed outward.
Tighten All Canopy Fasteners
A loose canopy flaps in wind and traps rainwater. Use the built-in clips to attach the valance to the lower frame rails. Then locate the side Velcro straps at valance height and pass them under the scissor arms before fastening upward. This pulls the fabric taut and prevents sagging.
For marquee-style setups, step underneath the canopy and attach the top Velcro straps directly to the frame. This step ensures proper water runoff and reduces wind resistance.
Anchor the Gazebo to the Ground
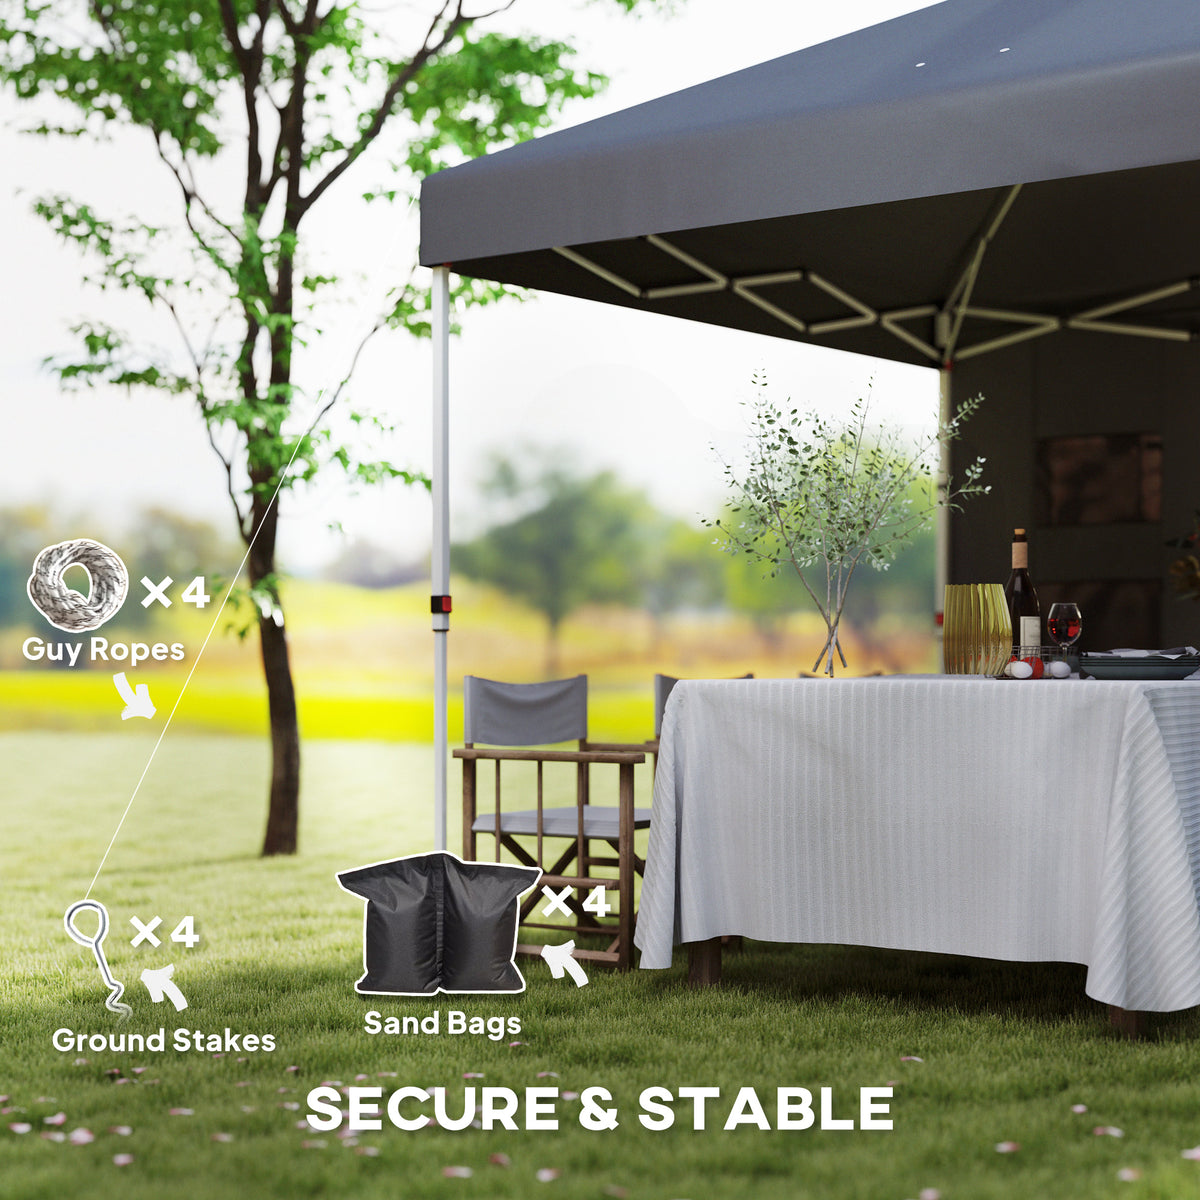
An unsecured gazebo is a hazard in even light wind. Choose one of two methods:
- Stakes and Ropes: Attach guy lines to the frame’s anchor points and drive stakes into the ground at a 45° angle.
- Weighted Bases: Slide cast iron weights over each footplate when setting up on concrete or pavers.
Always secure all four corners. Never skip this step, even for temporary setups.
Troubleshoot Common Setup Issues
Even experienced users hit snags. Here’s how to fix them quickly.
Frame Won’t Lock at Corners
- Ensure the frame is fully extended
- Check for debris in the slider track
- Slightly lift the leg to relieve pressure, then push the slider up
Canopy Sags or Flaps
- Confirm Velcro straps are fully closed
- Verify the center gable is fastened
- Check that side straps are routed under scissors
Legs Won’t Adjust
- Lift the leg slightly off the ground
- Press the button firmly while wiggling the shaft
- Apply silicone lubricant if the mechanism feels stiff
Close Efficiently for Storage
When it’s time to pack up, the process reverses but moves faster.
Remove all attachments first: sandbags, weights, stakes, ropes, side panels, banners, and flags. Unclip the canopy from the frame at each connection point.
Collapse the legs by locating the finger ring at the base of each leg. Pull firmly on the ring while pushing the leg inward. This releases the lock and folds the leg inward. On Ecotent® models, press the red button at each corner after lifting the scissors slightly.
Grip the central scissor joints and push inward; never push the legs. Guide the top down smoothly until the frame is compact. Place the storage bag over the collapsed tent, secure the Velcro strap, and store in a dry place. Never store a damp canopy; this causes mold and permanent stains.
Prevent Damage and Extend Lifespan
A well-maintained gazebo lasts years. Avoid these common mistakes:
- Pulling legs to open (damages pins)
- Opening fully before canopy attachment (risks frame warp)
- Storing while wet (causes mildew)
- Setting up in wind (can flip or tear)
Lubricate sliders and pins every few months with silicone spray. Check Velcro straps for wear and inspect fabric after each use for tears or UV damage.
Solo vs. Team Setup: What to Expect
One person can open a gazebo with practice, especially using the scissor method to avoid running between corners. Two people work faster and safer: one manages the frame while the other secures corners. Practice once before event day to build confidence.
Frequently Asked Questions About Opening a Gazebo Tent
How long does it take to open a gazebo tent?
Standard setup takes approximately 2 minutes with one or two people. With practice, many users achieve faster times. The quick takedown method can fold the entire structure in under 1 minute.
Can one person open a gazebo tent alone?
Yes. Solo setup is possible with practice, particularly when using the aluminium scissors method, which eliminates running from corner to corner. Mastertent models are specifically designed for solo operation with their Easy-Up foot mechanism.
Do I need tools to open a pop-up gazebo?
No tools are required. The entire assembly and disassembly process is tool-free, relying on scissor mechanisms, sliding connectors, spring-loaded pins, and Velcro straps.
What should I do if the slider won’t click into place?
Ensure the frame is fully extended first. Check for debris in the slider track that might block the latch. Slightly lift the leg to relieve pressure, then push the slider upward again until you hear the click.
Why does my canopy sag after setup?
Sagging usually means Velcro straps aren’t fully closed, the center gable isn’t fastened, or side straps aren’t routed under the scissors. Re-tighten all fasteners, especially the upward-closing straps at valance level.
Can I set up a gazebo in the wind?
Avoid windy conditions during setup. Even mild wind can flip a half-open frame or damage the canopy. Wait for calm conditions or secure the frame with weights and guy lines before extending.
Key Takeaways for Opening a Gazebo Tent Successfully
Mastering how to open a gazebo tent comes down to respecting the mechanics: always grip the central scissors, never the legs; stop at one-third extension before attaching the canopy; lock all four corners before raising the roof; and adjust legs in opposite pairs for stability. Practice the sequence once before your event, keep the frame lubricated, and always anchor the structure to the ground. With these habits, you’ll have a stable, weather-ready shelter in under two minutes, every single time.