
Loose trekking poles flapping against your back can ruin a hike and damage your gear instantly. Knowing exactly how to put trekking poles on Osprey backpack models prevents tears and keeps your balance steady on rough trails.
This guide reveals the secure handle-first technique and a universal bungee system for any Osprey pack. You will learn to attach poles safely to Sportlite, Raven, or 247 Series bags without specialized loops.
Use Front Loops Correctly for Quick Access
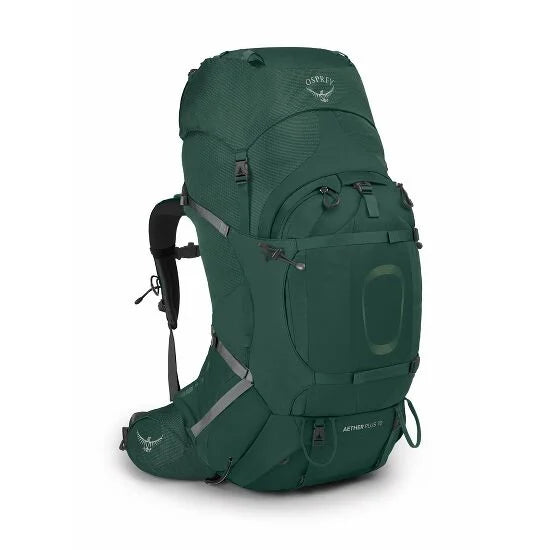
Many Osprey day packs feature front stretch pockets that double as pole anchors when used properly. These areas work best for short stops or models with built-in retention cords.
Insert Handle First to Prevent Damage
Always slide the handle end of the pole into the front pocket or loop instead of the metal tip. The bottom fabric of your pack lacks reinforcement against sharp carbide spikes. A downward-facing tip can easily pierce the material during movement or when setting the pack down. This single error risks damaging your sleeping bag or hydration bladder inside.
Secure With Built-in Stretch Cords
If your Osprey pack has a front pocket with a stretch cord, use it to lock the pole in place. Follow these steps for a secure hold:
* Open the cord lock located at the top of the pocket.
* Insert the pole handle deep into the pocket space.
* Pull the stretch cord tightly around the pole shaft.
* Retighten the lock to grip the shaft firmly.
This creates friction that minimizes bounce while keeping the tip elevated. Ensure the pole does not drag on the ground as you walk.
Avoid Side Pocket Confusion
Do not confuse narrow side water bottle sleeves with dedicated pole storage. These sleeves are rarely reinforced for sharp tips and may tear under stress. If you must use them, insert the handle first and only if the sleeve is deep enough. Otherwise, rely on shoulder strap or hip belt anchors for better security.
Attach Poles to Shoulder and Hip Loops

When front pockets are unavailable, Osprey’s adjustable straps offer superior anchor points. This method provides a stable carry for long distances.
Utilize Shoulder Strap Daisy Chains
Most Osprey packs include daisy chains or buckle loops on the upper shoulder straps. These serve as ideal top anchors for your pole system. Look for stitching-reinforced loops near the top of each strap. Thread a bungee cord or elastic loop through one side and use a cord lock to secure it. This becomes the upper hold point for the pole handle.
Anchor at Hip Belt Connection
Check near where the hip belt meets the pack body for small webbing loops. These serve as perfect lower attachment points for the pole shaft. Confirm the loop is load-bearing and not just decorative thread. Attach a second bungee cord here to complete the vertical channel. Ensure both top and bottom cords align vertically for clean pole alignment.
Prevent Swinging With Tension
Loose poles swing like pendulums and throw off your balance on uneven terrain. To stop this movement, run the pole tip through the bottom bungee first. Lift the shaft and thread the handle through the top bungee. Pull both cords taut and lock them simultaneously. Adjust until the pole presses firmly against the pack side to prevent lateral movement.
Install DIY Bungee Pole System

Osprey models without dedicated holders benefit from a universal DIY bungee system. This setup offers superior stability and instant access for any hiking scenario.
Gather Required Materials
You only need two simple components to build this system. No sewing or permanent modifications are required unless you lack a lower loop.
* Two short bungee cords (6–8 inches) with cord locks.
* Access to existing loops on your pack shoulder or hip areas.
These materials cost very little and add negligible weight to your load.
Install Top and Bottom Cords
Follow these steps to create your attachment channel. Thread one bungee through a daisy chain on the upper shoulder strap and secure the lock loosely. Thread the second bungee through a lower loop near the hip belt junction. Pull both cords to form a straight line along the pack side. If your pack lacks a lower loop, attach a small webbing loop using a lark’s head knot.
Thread and Lock Poles in Seconds
Deploying your poles takes seconds with this tension system. Slide the tip into the bottom bungee loop first. Raise the handle and feed it into the top bungee loop. Tighten both locks simultaneously to lock the pole in place. Repeat on the opposite side for dual poles. This system works on the Osprey Sportlite 25, Raven 14, and 247 Series.
Why This Beats Compression Straps
Standard side compression straps often fail to hold poles securely during technical climbs. The bungee method provides faster deployment in under ten seconds. It maintains consistent tension without risking strap wear or buckle failure. You also avoid interference with load lifters or torso adjustments. This approach is quieter and more reliable on rugged terrain.
Follow Critical Safety Rules
Attaching poles incorrectly leads to gear damage or trail accidents. These rules protect your pack and ensure a safe hiking experience.
Never Point Tip Downward
Reversing the pole so the tip faces the ground is a dangerous error. Even a slight jolt can drive the carbide spike through the pack base. Always confirm the handle enters first and keep the tip elevated. Double-check orientation before tightening any cords. This habit prevents costly tears and keeps your gear dry in rain.
Prevent Snagging When Setting Down
Protruding poles catch on roots and rocks when you set your pack down. Slightly loosen the cord locks before placing the pack on uneven ground. Let the poles shift or lift slightly to avoid leverage against the terrain. Re-tighten before shouldering the pack again. This simple step avoids sudden jerks that could rip anchor points.
Ensure Baskets Are Attached
If using a front loop-only method, the pole must have a basket attached. Without a basket, the shaft is too narrow to stay put in most loops. The pole will sag, bounce, or slip out entirely during your hike. If your poles lack baskets, skip loop-only methods and use the bungee tension system instead.
Optimize Fit After Attachment
Adding external poles changes your pack weight distribution significantly. A perfect fit before loading may become uncomfortable once poles are attached.
Recheck Torso Length
Put the pack on and fasten the hip belt after securing your poles. Verify the shoulder straps still align correctly with your shoulders. Adjust the load lifter straps if the pack feels pulled backward. Poles add rear weight which can lift the top of the pack away from your back.
Engage Hip Belt Fully
Osprey packs transfer most weight to the hips for maximum comfort. Cinch the hip belt snugly across your pelvis with poles attached. Ensure the stabilizer straps are tight to prevent shifting. Avoid relying on your shoulders to carry the extra pole weight. This maintains balance and reduces fatigue on long climbs.
Test Stability on Incline
Walk up and down a short slope before hitting technical trail sections. Check for excessive sway or bounce in the attached poles. Tighten cords if needed to eliminate movement. A well-secured pole should feel like part of the pack rather than an afterthought.
Maintain Your Attachment System
Regular maintenance keeps your pole carry safe and functional for years. Even the best setup degrades without proper care.
Inspect Bungee Cords Monthly
UV exposure and repeated stretching weaken elastic over time. Look for fraying, cracking, or loss of stretch in your cords. Replace cords every one to two years or sooner if damaged. Carry a spare bungee on multi-day trips to avoid loose poles on the trail.
Check Anchor Loop Integrity
The daisy chains and webbing loops take constant stress during hikes. Pull gently on each loop to test for looseness or wear. Look for worn stitching or stretched fabric around anchor points. Never overload a single point and always distribute weight evenly between sides.
Clean and Dry After Use
Dirt and moisture accelerate wear on cords and fabric. Wipe down bungee cords and locks after muddy or wet hikes. Dry the pack thoroughly before storage to prevent mold or rot. Avoid leaving poles attached during transport or in direct sun for long periods.
Frequently Asked Questions About Att Trekking Poles
Can I store trekking poles inside my Osprey pack?
Most Osprey packs do not have internal sleeves designed for full-length poles. Storing them inside may damage internal gear or puncture the lining. External attachment using loops or bungees is the recommended method for safety.
What if my Osprey model has no visible loops?
You can use the side compression straps if available, though they offer less stability. Alternatively, attach a small aftermarket webbing loop near the hip belt using a knot. The DIY bungee system works with almost any existing strap or buckle.
Does attaching poles void my Osprey warranty?
Using built-in loops and daisy chains as intended does not void your warranty. However, sewing new loops or modifying the pack structure yourself may affect coverage. Always check your specific model guidelines before making permanent changes.
How do I stop my poles from scratching the pack fabric?
Ensure the pole shafts are clean and dry before attaching them. Use the tension method to keep poles pressed firmly against the pack to reduce rubbing. You can also wrap the contact area with a small piece of protective tape.
Is the handle-first method necessary for all pole types?
Yes, inserting the handle first is critical for all trekking poles with sharp tips. This orientation prevents the carbide or steel tip from puncturing the pack floor. It is the safest practice regardless of the attachment method used.
Key Takeaways for Securing Trekking Poles on Osprey Packs
Mastering how to put trekking poles on Osprey backpack systems ensures safety and gear longevity. Always insert the handle end first to prevent puncturing your pack floor with sharp tips. Use the dual-bungee tension method for the most secure hold on any terrain.
Regularly inspect your cords and loops to maintain a reliable setup. With these techniques, your poles will stay secure and your pack will remain damage-free. Start your next hike with confidence by applying these proven attachment methods today.