
A torn tent doesn’t mean your next adventure is canceled. Whether it’s a small burn hole from a campfire spark or a large rip along the rainfly, how to repair a tent is a skill every outdoor enthusiast should master. With the right tools and techniques, most damage can be fixed quickly, often in under 10 minutes, restoring waterproof integrity and structural strength. This guide delivers proven, field-tested methods using reliable products like Tenacious Tape and Seam Grip so you can patch up fast and get back in the wild.
Assess the Damage Before Any Repair
Before applying any patch, inspect the area closely. Many apparent holes, especially in mesh, are just bunched fibers rather than actual tears.
Spot Real Tears vs. Misaligned Fibers
- Place your hand behind the damaged section.
- Rub the area vigorously in all directions.
- If the “hole” closes or disappears, the fabric is just misaligned. No repair is needed.
- True holes won’t close and may show frayed edges.
Remove Old Tape Carefully
- Gently peel off duct tape or old adhesive patches.
- Work from the inside if the original repair was internal.
- Avoid stretching or enlarging the tear during removal.
Identify Common Tear Patterns
- Most rips form at 90-degree angles due to fabric weave stress.
- These “elbow” tears often appear near poles or high-tension zones.
- Note the direction of the tear to help align them during repair.
Clean and Prep the Surface for Maximum Adhesion
A clean surface ensures strong adhesion. Dirt, oils, or moisture will cause patches to fail.
Wash with Soap and Water
- Use mild soap and a damp cloth to clean around the hole.
- Wipe an area at least ¾ inch beyond the damage.
- Rinse with clean water and let dry completely.
Use Rubbing Alcohol for Residue
- Dampen a clean pad with rubbing alcohol.
- Wipe the same ¾-inch zone to remove oils and grime.
- Alcohol dries fast and improves bond strength.
Dry and Handle with Clean Hands
- Never touch the repair zone after cleaning.
- Wash and dry hands before handling patches.
- Oils from skin can weaken adhesive performance.
Choose the Right Repair Product for the Damage
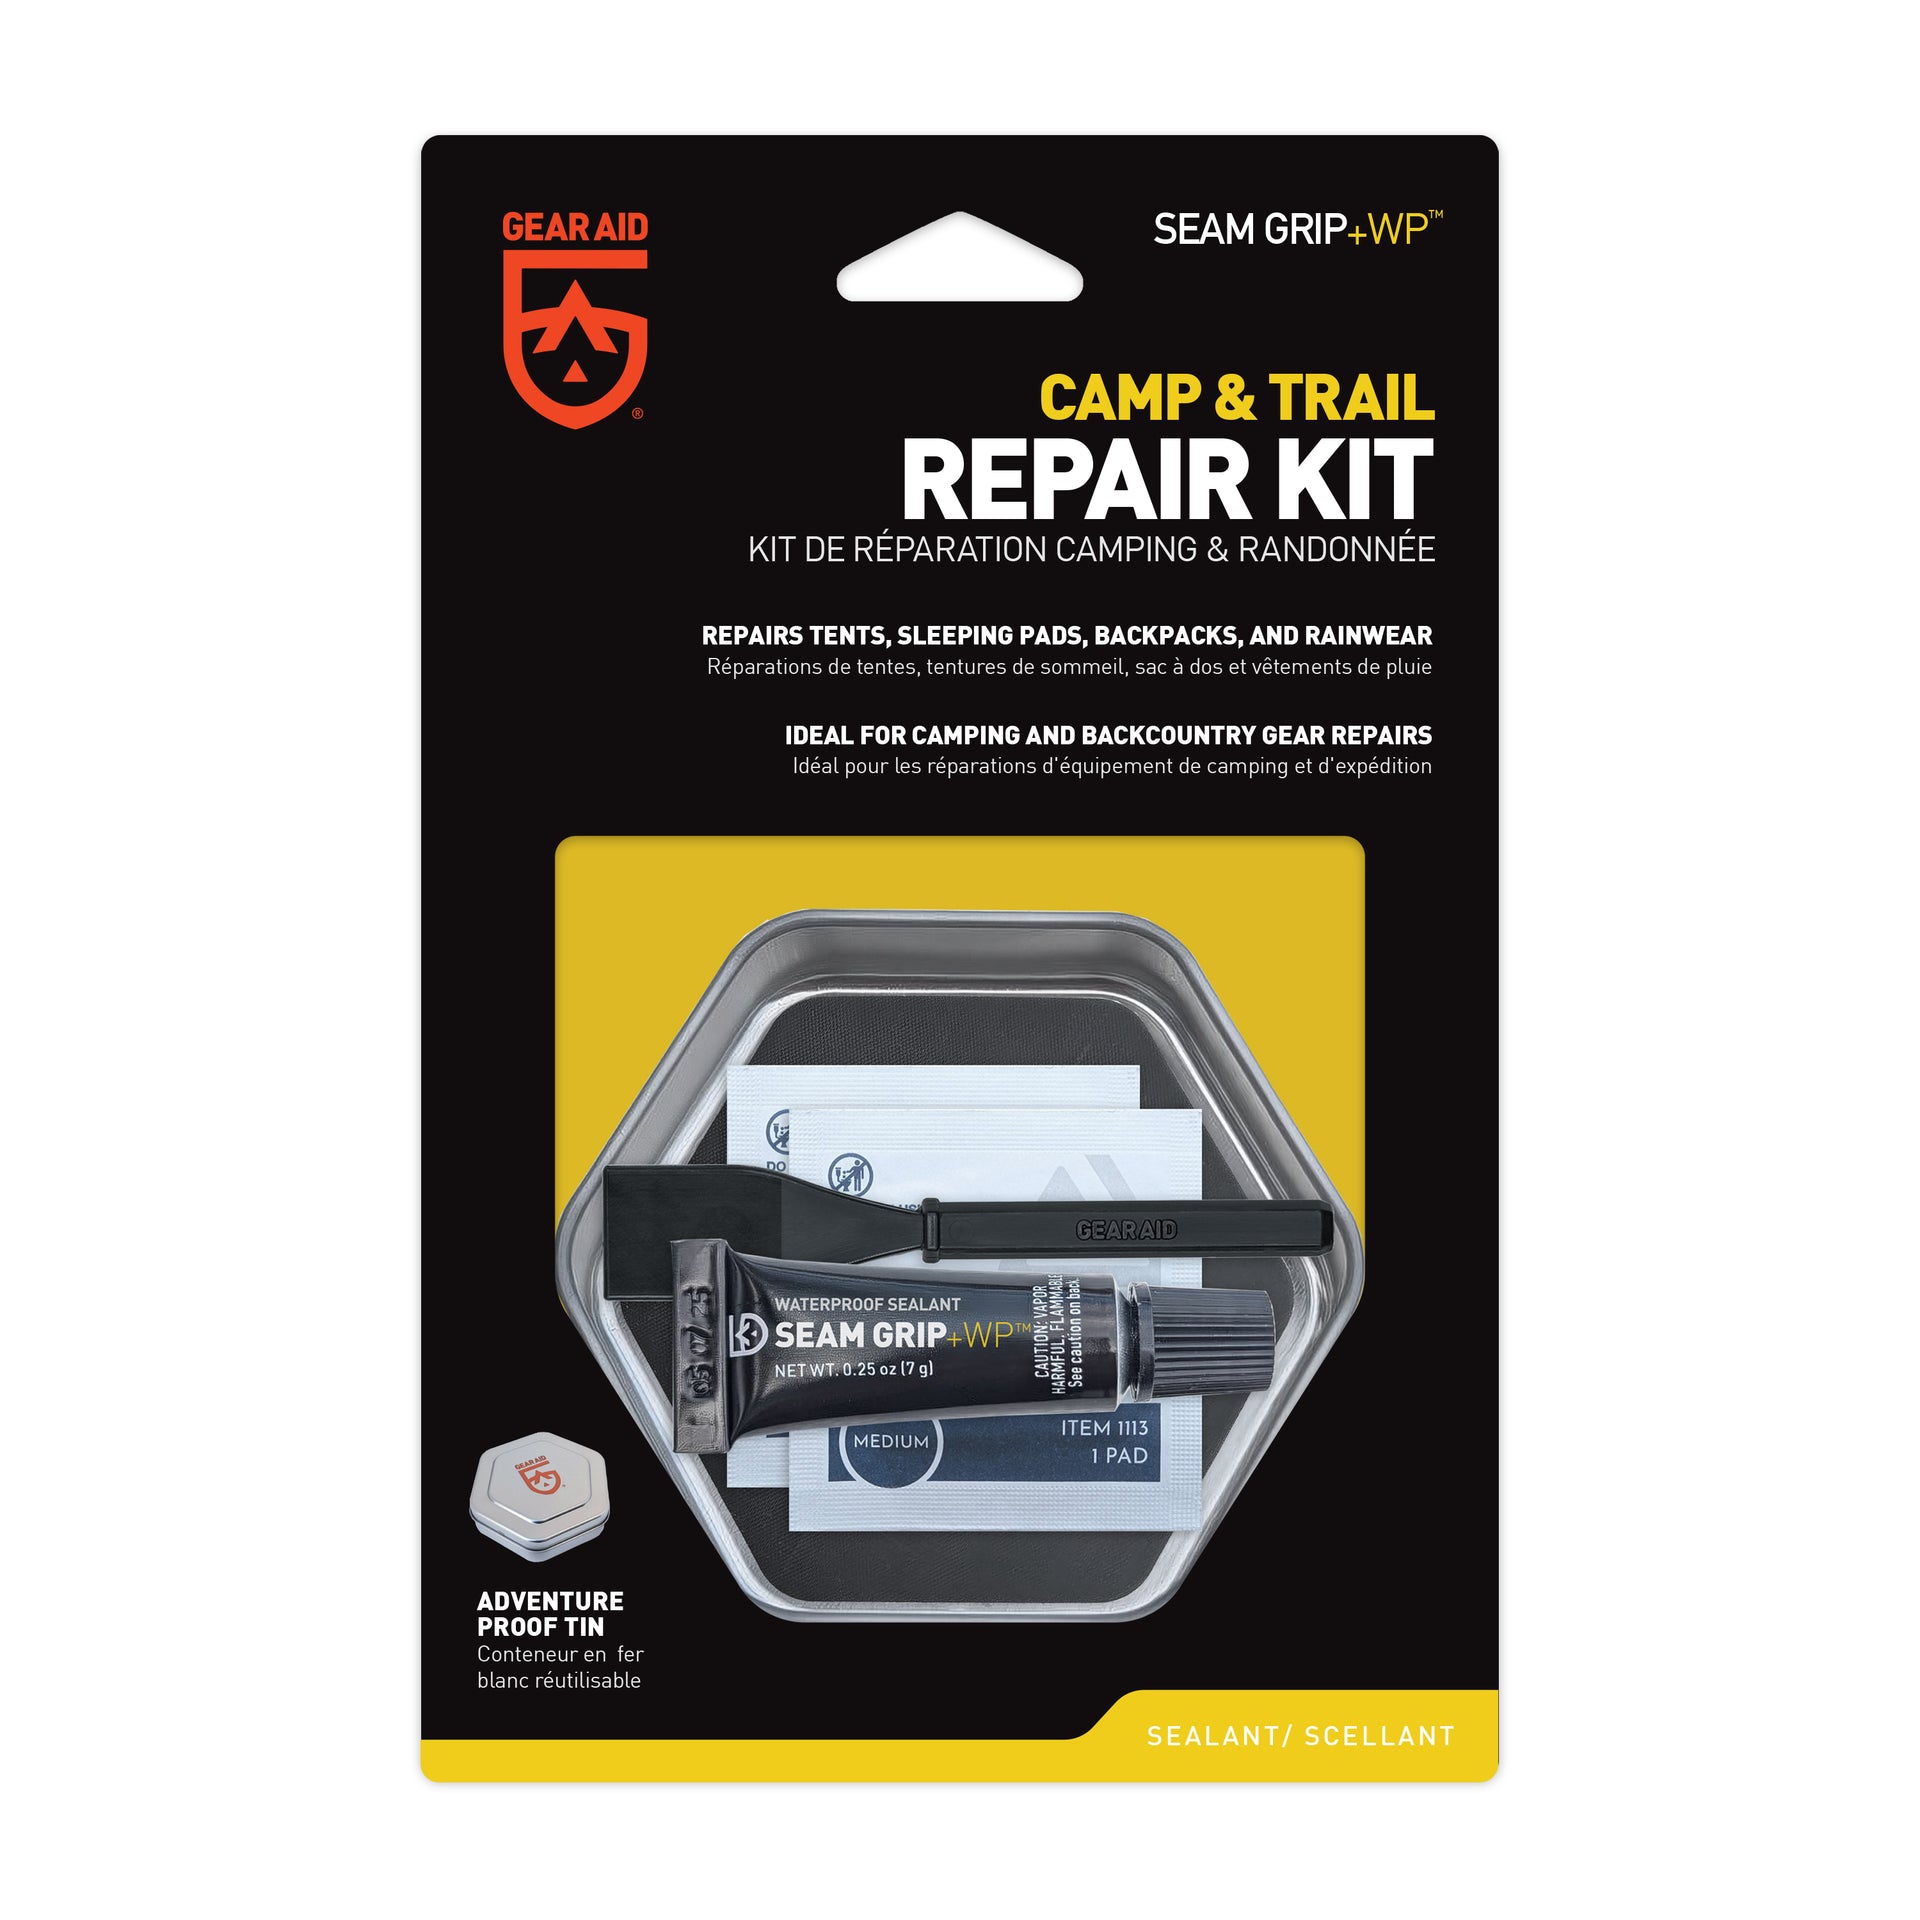
Not all fixes require the same solution. Match the product to the damage type.
Tenacious Tape for Large Tears
- Best for rips in fabric, rainfly, or mesh over 1 inch.
- Fully waterproof, flexible, and durable.
- Available in rolls or pre-cut shapes for custom patches.
- Stronger than duct tape and won’t yellow or crack.
Seam Grip for Small Holes
- Clear gel that dries into a rubber-like seal.
- Perfect for burn holes, pinpricks, or leaking seams.
- Apply and let dry 2–4 hours.
- Not ideal for large rips. Use tape instead.
Tear-Aid for Emergency Patches
- Clear, flexible patches often found in air mattress kits.
- Works well on nylon and polyester tents.
- A solid alternative when Tenacious Tape isn’t available.
Mesh-Specific Patches
- Tenacious Tape offers pre-cut circular patches for mesh.
- The adhesive border ensures quick, clean application.
- Best for holes under 3 inches in diameter.
Patch Fabric and Rainfly Tears Step by Step
Most tent body and rainfly damage occurs in the floor or sidewalls. Use these methods for strong, waterproof fixes.
Apply Tenacious Tape from the Outside
- Cut a patch at least ½ inch larger than the hole on all sides.
- Round the corners to prevent peeling.
- Center the patch over the tear on the outside of the tent.
- Press firmly with both hands to avoid air bubbles.
- Use a credit card to rub the patch smooth, especially the edges.
Pro Tip: For large rips, reinforce with a second patch on the inside. This “sandwich repair” doubles strength and waterproofing.
Use Backside Application for an Invisible Finish
- Flip the fabric so the backside faces you.
- Align the tear edges and hold them in place with temporary tape.
- Apply the patch to the backside (inside of tent).
- Press firmly and seal edges with a credit card.
- Remove temporary tape once bonded.
Warning: You only get one shot at placement. Misalignment causes bubbles and weak spots.
Seal with Seam Grip for Small Damage Only
- Clean and dry the area thoroughly.
- Squeeze a small blob of Seam Grip over the hole.
- Smooth it evenly with a finger or stick.
- Let dry 2–4 hours before packing or using.
Repair Holes in Mesh Sections
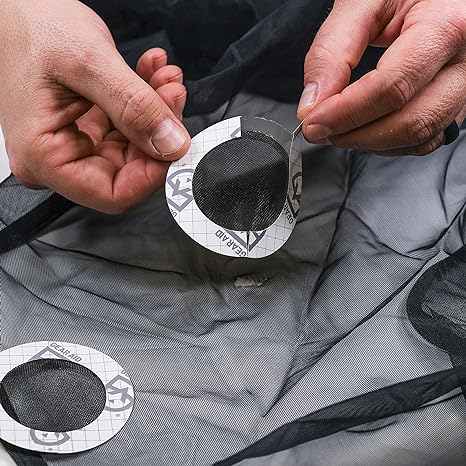
Mesh repairs are common, especially from zippers or sharp gear. The method depends on hole size.
Confirm the Hole Is Real
- Perform the hand-rub test described above.
- If fibers realign, no patch is needed.
- Only repair if the hole stays visible after rubbing.
Patch Small Holes Under 3 Inches
- Use a pre-cut Tenacious Tape Mesh Repair Patch.
- These are circular with an adhesive border.
- Press directly over the hole with no cutting required.
- Works on both sides, but best applied from the outside.
Repair Large Mesh Tears
- Cut a piece of standard Tenacious Tape slightly larger than the hole.
- Apply on the outside, smoothing with a credit card.
- Flip and apply a second patch on the inside.
- This sandwich method keeps bugs and rain out, even if it looks messy.
Reality Check: Large mesh repairs won’t look perfect, but they’re fully functional. Focus on sealing, not appearance.
Prevent Future Tent Damage
Smart habits extend your tent’s life and reduce repair frequency.
Use a Tent Footprint
- A groundsheet protects the floor from abrasion and moisture.
- Prevents small punctures from rocks, sticks, or rough terrain.
- Always size it correctly. Smaller than the tent base avoids water pooling.
Avoid Campfire Hazards
- Keep tents at least 15 feet from open flames.
- Sparks can melt fabric and create burn holes.
- Never use candles or stoves inside a tent.
Handle Gear with Care
- Keep sharp objects like knives and trekking poles away from walls.
- Zip zippers slowly. Jammed zippers often cause tears.
- Store tent loosely. Tight packing stresses seams over time.
Pack a Field-Ready Repair Kit

Be ready for emergencies with a lightweight, compact repair kit.
Essential Items to Pack
- Tenacious Tape roll or pre-cut patches for fabric and mesh
- Seam Grip tube for small holes and seam leaks
- Rubbing alcohol wipes for quick cleaning
- Small scissors or multitool for cutting tape
- Credit card or smoothing tool for sealing patches
Pro Tip: Store the kit in your backpack so you don’t wait until you’re home to fix a tear.
Know When Replacement Beats Repair
Some damage can’t be safely repaired.
Replace the Tent If:
- The tear runs through a seam or pole sleeve.
- Multiple large rips compromise structural integrity.
- The fabric is thin, brittle, or extensively UV-damaged.
- Repairs keep failing despite proper technique.
Even the best patch can’t save a worn-out tent. When in doubt, invest in a new shelter.
Quick Repair Reference Table
| Damage Type | Product | Method | Drying Time |
|---|---|---|---|
| Large rip in rainfly | Tenacious Tape | Sandwich patch (both sides) | Immediate |
| Small burn hole | Seam Grip | Gel application | 2–4 hours |
| Leaking seam | Seam Grip | Smooth over seam line | 2–4 hours |
| Mesh hole (under 3″) | Mesh Repair Patch | Direct application | Immediate |
| Mesh hole (large) | Tenacious Tape | Sandwich method | Immediate |
| 90-degree elbow tear | Tenacious Tape | Backside application | Immediate |
Frequently Asked Questions About Tent Repair
What is the fastest way to repair a tent in the field?
The fastest method is cleaning the area with rubbing alcohol, cutting a rounded Tenacious Tape patch at least ½ inch larger than the hole, pressing it firmly over the tear from the outside, and sealing the edges with a credit card. This takes about 5 minutes and provides immediate waterproof adhesion.
Can I use duct tape to repair a tent?
Duct tape works as a temporary emergency fix but isn’t ideal for long-term repairs. Tenacious Tape is stronger, fully waterproof, flexible, and won’t yellow or crack over time like duct tape does.
How long does Seam Grip take to dry?
Seam Grip needs 2–4 hours to dry completely, depending on conditions. Don’t pack or use the tent until it’s fully cured to avoid compromising the seal.
How do I know if a hole in mesh is real?
Place your hand behind the mesh and rub vigorously in all directions. If the fibers realign and disappear, it’s just bunched fabric with no repair needed. True holes will remain visible with frayed edges.
What size hole requires a sandwich patch on both sides?
Any tear over 1 inch, including 90-degree elbow tears and large mesh damage, benefits from a sandwich patch on both inside and outside for maximum strength and waterproofing.
When should I replace my tent instead of repairing it?
Replace your tent if the tear runs through a seam or pole sleeve, if multiple large rips compromise the structure, if the fabric is brittle or UV-worn, or if patches keep failing despite correct technique.
Key Takeaways for Repairing Your Tent
Knowing how to repair a tent saves money, reduces waste, and keeps you safe in the backcountry. With Tenacious Tape and Seam Grip, most fixes take minutes and last for years. The three essential steps are cleaning the area thoroughly, aligning the tear and applying the right product, and sealing it well with a credit card or smoothing tool.
Pack a small repair kit before every trip so you’re never caught off guard. Inspect your tent after each use, address small damage right away, and store it loosely to extend its lifespan. With these habits, your tent stays ready for every adventure, no matter how rugged the trail.