
Wind flapping your camper walls, rain dripping through a tiny hole, or a tear spreading along a seam, these problems catch every tent trailer owner off guard. The good news is that learning how to repair a tent trailer canvas is simpler than most people think. With the right materials and a few hours of work, you can fix pinholes, tears, and damaged screens for a fraction of replacement costs.
This guide covers material identification, step-by-step repair methods, and long-term maintenance tips. Whether your camper uses traditional canvas or modern vinyl, you will find practical solutions that hold up to weather and time.
Identify Your Trailer’s Material First
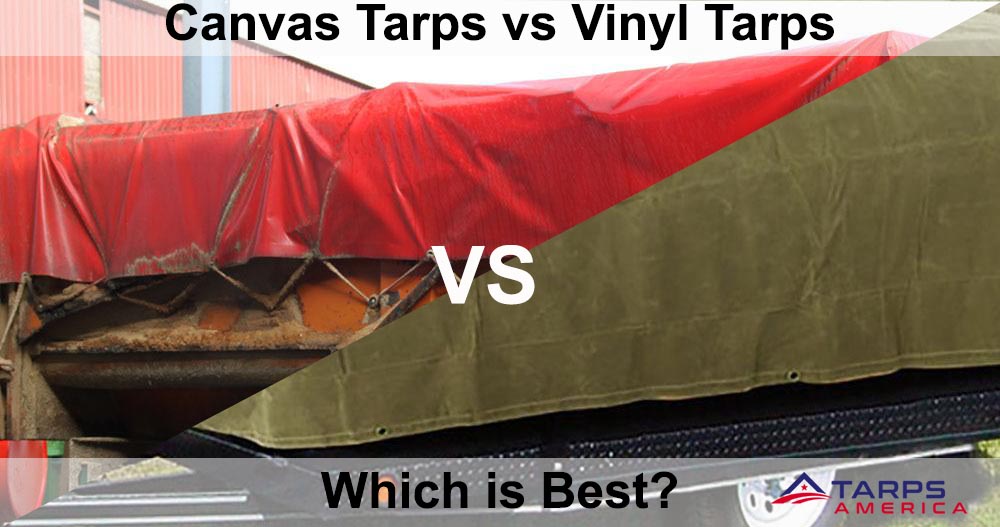
Before buying adhesives or patches, you need to know what you are repairing. Many pop-up campers today use vinyl rather than true canvas, and the two materials require different repair approaches.
Canvas vs. Vinyl: How to Tell the Difference
- Canvas: Soft, fabric-like texture that drapes slightly. Common on older models and bunk end windows.
- Vinyl: Smooth, slick exterior with a plastic-like feel. Standard on most modern trailers, including the Jayco Select 12 HW.
- Why it matters: Vinyl needs flexible adhesives and dual-layer patches. Canvas responds well to heat-activated patches and stitching.
Quick Test: Press the surface. If it feels stiff with a rubbery finish, it is vinyl. If it drapes like heavy fabric, you likely have canvas.
Fix Small Holes and Pinholes in Canvas
Tiny punctures from debris or wear can quickly grow into bigger problems. The fix takes just minutes with the right adhesive.
Using Loctite Vinyl, Fabric & Plastic Repair
- Clean the area with mild soap and water, then dry completely.
- Apply a small dab of adhesive on both sides of the hole.
- Smooth with your fingertip or a toothpick.
- Let it dry fully before folding or using the camper.
Pro Tip: This method works well for thinning areas around zippers, vents, and seams where fabric is weakening but not yet torn.
Patch Large Tears in Canvas
For rips over one inch, you need a patch that provides structural strength. Two reliable methods work for most situations.
Iron-On Patches (Best Clean Look)
- Cut a patch one to two inches larger than the tear on all sides.
- Place one patch on each side of the canvas for reinforcement.
- Set your iron to low-to-medium heat.
- Press for 10 to 15 seconds per spot, overlapping coverage.
Avoid: High heat settings. Too much temperature can melt fibers or weaken the surrounding fabric.
Tear-Aid Type A (Quick Emergency Fix)
- Self-adhering patch that sticks directly over damage.
- Waterproof and durable.
- Slightly visible but fast to apply.
- Ideal for lower sidewalls or non-aesthetic areas.
Repair Vinyl Pinholes and Small Damage

Vinyl’s layered construction means repairs must bond properly to avoid peeling or cracking within months.
Method 1: Loctite Adhesive
- Apply a drop on both sides of the pinhole.
- Smooth with a fingertip or toothpick.
- Dries flexible and waterproof.
Method 2: Interior Tape + Super Glue (More Durable)
- Clean the inside surface around the pinhole.
- Cut a small piece of Gorilla Clear Waterproof Tape.
- Stick it over the hole from the inside.
- Add a drop of thin liquid super glue (not gel) to bond the tape to the vinyl.
- Let it cure for 24 hours.
Why This Works: Interior application protects the repair from UV rays and weather, extending the repair’s lifespan significantly.
Fix Medium Tears in Vinyl
For tears between one and four inches long, a dual-layer patch system provides the strongest, most weather-resistant result.
Exterior: Self-Adhering Nylon Patch
- Choose a color-matched patch (blue, white, beige, etc.).
- Clean the surface with isopropyl alcohol first.
- Apply firmly, smoothing out air bubbles.
Interior: Fabric Heat-Adhering Patch
- Reinforces the inner fabric layer.
- Apply with an iron on medium heat.
- Prevents delamination from the inside out.
Result: A strong repair with a clean exterior appearance that holds up to rain and wind.
Make Small Vinyl Tears Nearly Invisible
For cosmetic fixes on visible panels, transparency matters.
Using Gorilla Clear Waterproof Tape
- Nearly transparent and UV-resistant.
- Cuts easily to size.
- Apply over a clean, dry surface.
Limitation: Not ideal for high-stress areas like corners or slide-outs where the tape may lift over time.
Warning: Avoid Tear-Aid Type B for vinyl. Many users report poor adhesion compared to modern clear tapes.
Repair Damaged Screens
Torn screens compromise ventilation and let bugs into your sleeping area. Choose your fix based on tear size.
Minor Holes: Screen Repair Tape
- Use Tuff-Weave or similar high-strength screen tape.
- Stretch over the hole and smooth out bubbles.
- Works instantly with no drying time.
Large Rips: Sew in Scrap Screen
- Cut a patch from leftover screen material slightly larger than the tear.
- Position the patch over the damage.
- Use nylon thread and a Speedy Stitcher awl to hand-stitch around the edges.
- Trim excess and seal edges with clear adhesive.
Pro Tip: Hand-stitching produces the most durable screen repair, ideal for bunk end windows or roof vents.
Hand-Stitch Rips for Maximum Strength
Stitching restores structural integrity better than adhesive alone, especially for tears over several inches.
Prepare the Repair Area
- Lower the camper roof slightly to slacken the canvas.
- Clean and dry the area thoroughly.
- Trim frayed edges with scissors.
- Use a seam ripper to remove any broken stitches.
Safety Note: The Speedy Stitcher awl is extremely sharp. Handle with care and keep it away from children.
Set Up the Speedy Stitcher
- The tool comes pre-threaded and requires no bobbin.
- Leave 6 to 8 inches of thread as the bottom loop.
- Use nylon or marine-grade polyester thread, never cotton, which rots quickly.
Execute the Stitch
- Push the awl through the canvas from front to back.
- Pull the thread through, creating a loop.
- Hold the loop with your thumb while tightening.
- Repeat: push, pull, tighten along the entire tear.
Key Technique: Keep stitches about ¼ inch from raw edges to prevent future fraying.
Finish and Reinforce
- Tie a square knot to secure your final stitch.
- Trim excess thread.
- Apply canvas repair tape over the seam for added strength.
Don’t Cut Thread Above the Needle: You will have to rethread the entire awl if you do.
Machine Stitching for Advanced Users
A sewing machine with a walking foot feeds thick canvas layers evenly and produces professional results.
- Use a walking foot to prevent skipped stitches and puckering.
- Backstitch at the start and end of every seam.
- Apply seam sealer after stitching for full waterproofing.
- Test on scrap material first to confirm tension and stitch quality.
Reinforce Stitches and Seal Seams
Even strong stitching can leak without proper sealing.
Apply Seam Sealer
- Use vinyl-specific or tent fabric seam sealer.
- Brush or spray over the stitched area.
- Let dry for 12 to 24 hours before exposure to moisture.
Use Canvas Repair Tape
- Available in 40 colors, including eight beige shades.
- Apply over seams for extra durability.
- Helps hide stitching and prevents fraying.
Tip: Order samples if color matching is critical for visible areas.
Avoid Common Repair Mistakes
Small errors can undo hours of work. Steer clear of these frequent pitfalls.
Wrong Materials
- Duct tape peels in sunlight and leaves sticky residue.
- Cotton thread absorbs moisture and rots quickly.
- Gel super glue is too thick and won’t bond vinyl properly.
Poor Technique
- Skipping seam sealer leads to leaks.
- Stitching too tight warps fabric over time.
- Not cleaning the surface reduces adhesion.
- Overheating patches melts vinyl or weakens adhesive.
Golden Rule: Always clean the repair area with mild soap and water, then dry completely before applying anything.
Maintain Your Canvas for Long-Term Durability
A one-time fix is not enough. Prevent future damage with regular care.
Clean the Exterior Annually
- Use mild soap and water.
- Scrub gently with a soft brush.
- Rinse thoroughly to remove all soap residue.
Reapply Water Repellent
- Every year, or after heavy use, apply vinyl-specific water repellent or tent fabric protector.
- Spray or wipe evenly across all surfaces.
- Let dry fully before folding or storing the camper.
Pro Tip: Test the beading effect after application. Water should roll off, not soak in.
Inspect Key Stress Areas
Check these spots every season for early signs of damage:
- Bunk ends (most prone to tears)
- All four corners (need reinforcement)
- Slide-out areas (wear from friction)
- Seams and zippers (vulnerable to leaks)
Choose Optimal Repair Conditions
Timing and weather affect how well repairs bond.
- Work on a dry, warm day between 60 and 80°F.
- Avoid high humidity or rain forecasts within 24 hours.
- Use low-to-medium iron settings when heat-activating patches.
- Place a cloth between the iron and patch to prevent scorching.
Know When to Call a Professional
Some damage goes beyond a DIY fix. Consider professional help if:
- The tear spans a seam or corner.
- Vinyl is delaminating (layers separating).
- You are unsure about material type.
- Aesthetics are critical for resale value.
Cost-Saving Note: A Speedy Stitcher awl costs just $20 to $30 and pays for itself after a single repair.
Frequently Asked Questions About Tent Trailer Canvas Repair
What is the best adhesive for tent trailer canvas?
Loctite Vinyl, Fabric & Plastic Repair works for both canvas and vinyl. Apply a small dab on both sides of small holes or pinholes for a flexible, waterproof seal.
Can I use duct tape to repair a tent trailer canvas?
Duct tape is not recommended for long-term repairs. It peels in sunlight, leaves residue, and fails quickly when exposed to weather. Use proper repair tapes like Gorilla Clear Waterproof Tape or Tear-Aid Type A instead.
How do I tell if my camper has canvas or vinyl?
Press the surface with your finger. Vinyl feels stiff with a rubbery, plastic-like finish. Canvas feels softer and drapes like heavy fabric. Most modern pop-up campers use vinyl on exterior walls.
What thread should I use for stitching canvas repairs?
Use nylon thread or marine-grade polyester thread. Avoid cotton thread at all costs, as it absorbs moisture and rots quickly when exposed to outdoor conditions.
How long do canvas repairs typically last?
Properly executed repairs using the right materials can last 10+ years with annual maintenance. Interior patch applications and dual-layer systems tend to outlast exterior-only fixes.
Can I repair delaminating vinyl myself?
Delamination (where layers separate) is difficult to repair permanently without professional equipment. For small areas, an interior fabric heat-adhering patch can slow further separation. Larger areas typically require professional replacement.
Key Takeaways for Repairing Your Tent Trailer Canvas
Learning how to repair a tent trailer canvas comes down to three essentials: identify your material, match the repair method to the damage type, and seal everything properly for waterproofing. Start with a quick inspection of your camper’s stress points, especially bunk ends, corners, and seams. Gather a basic repair kit including Loctite adhesive, clear Gorilla tape, nylon thread, and a Speedy Stitcher awl, and you can handle most common damage without professional help.
Next Step: Before your next camping trip, spend an hour inspecting your trailer for small holes or thinning areas. Catching damage early turns a potential major repair into a 15-minute fix with supplies you likely already have.