If you’ve ever felt a deep ache or sharp twinge in the back of your thigh after a long hike, you’re not alone. Hamstring pain after hiking is one of the most common lower-body complaints among outdoor enthusiasts. Whether it’s a dull stiffness near your sit bone or a shooting discomfort behind the knee, this type of pain often stems from muscle overload, poor flexibility, or sudden increases in trail intensity. The hamstrings—made up of the semitendinosus, semimembranosus, and biceps femoris—are especially vulnerable during downhill descents and uphill climbs due to eccentric loading, where the muscle lengthens under tension.
This guide breaks down exactly why hiking strains your hamstrings, how to tell if it’s just soreness or something more serious, and what you can do immediately for relief. More importantly, you’ll learn proven strategies to prevent recurrence—so you can keep exploring trails without fear of being sidelined. From targeted stretches and strength drills to smart warm-ups and gear tips, this article gives you everything you need to heal faster and hike stronger.
Decode Your Hamstring Pain
Not all hamstring pain is the same. Knowing the type and location helps determine whether it’s simple soreness or a strain needing medical care.
Identify the Pain Location
Where you feel the pain tells a lot about its cause:
- Buttock/sit bone (proximal): Likely proximal hamstring tendinopathy—common with long hikes, hill climbing, or prolonged sitting. Pain worsens when sitting on hard surfaces.
- Mid-thigh: Often a muscle strain, especially after sudden sprints or missteps on uneven terrain.
- Behind the knee (distal): May indicate tight hamstrings or tendon irritation where muscles attach to the lower leg.
Radiating pain down the leg can mimic sciatica but may actually stem from referred muscle tension or nerve irritation due to tight glutes or piriformis.
Grade Your Injury Severity
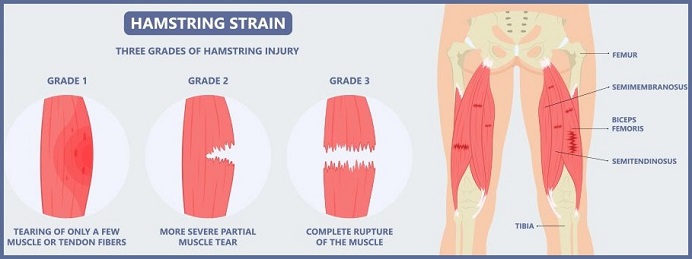
Hamstring injuries fall into three levels of severity:
| Grade | Symptoms | Recovery Time |
|---|---|---|
| 1 (Mild) | Mild tightness, slight discomfort when stretching | 3–7 days |
| 2 (Moderate) | Sharp pain, swelling, bruising, limp | 3–8 weeks |
| 3 (Severe) | “Pop” sound, major swelling, can’t walk | 3–6 months + surgery possible |
If you heard a pop or can’t bear weight, see a doctor immediately. Grade 3 tears often require imaging and possibly surgical repair.
Recognize Tendinopathy vs. Strain
- Acute strain: Sudden onset during activity, localized tenderness, swelling.
- Tendinopathy (chronic): Gradual deep ache at the sit bone, worse after hiking and when sitting. Improves with movement initially but returns with overuse.
Chronic tendinopathy heals slowly due to poor blood flow to the tendon and needs structured rehab—not just rest.
Immediate Relief Strategies
Act fast to reduce inflammation and speed healing—especially in the first 48 hours.
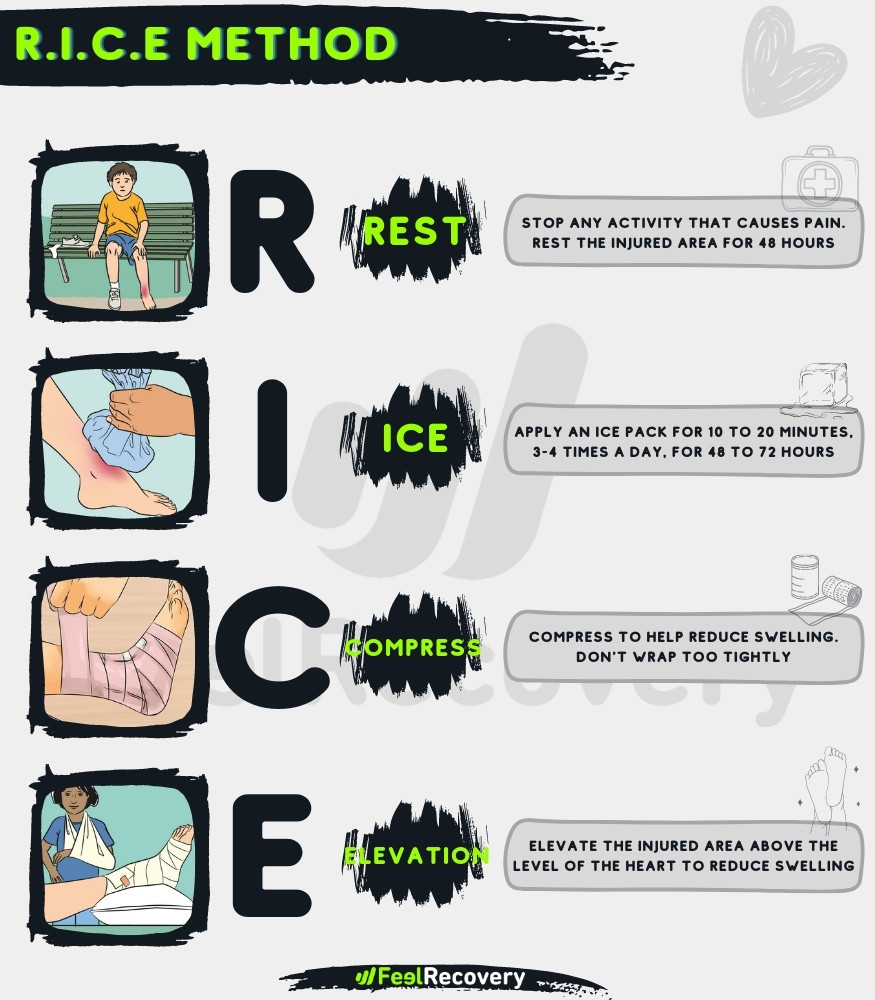
Apply RICE Protocol
For new or mild-to-moderate hamstring pain, follow RICE:
- Rest: Stop hiking. Avoid stairs, lunges, or running. Use crutches if walking causes pain.
- Ice: Apply cold pack for 15–20 minutes every 2–3 hours for the first 2–3 days.
- Compression: Wear a thigh sleeve or wrap to limit swelling.
- Elevation: Lie down with leg raised above heart level to drain fluid.
⚠️ Avoid heat in the first 72 hours—heat increases blood flow and can worsen swelling.
Try MEAT for Early Mobility
Once acute pain fades (usually after 3 days), switch to MEAT—Movement, Exercise, Analgesia, Therapy:
- Gentle heel slides or seated knee bends maintain joint mobility.
- Light walking (pain-free) boosts circulation.
- Use acetaminophen or NSAIDs like ibuprofen for pain relief, but only short-term.
🔁 Transition tip: Move from RICE to MEAT as pain decreases—don’t stay immobile too long.
Use Targeted Pain Relief Tools
- Foam rolling: Avoid direct pressure on painful areas. Roll quads, glutes, and calves instead.
- Massage gun: Use on low setting around—but not directly on—the injury site.
- Topical analgesics: Creams with menthol or arnica may offer temporary relief.
Diagnose the Root Cause
Pain after hiking isn’t just “normal soreness” if it keeps coming back. Find the real reason.
Rule Out Muscle Imbalances
Weak glutes or dominant quads force hamstrings to overwork. Signs include:
- One leg consistently sorer than the other
- Knee or hip pain during hikes
- Difficulty standing up from a squat without leaning forward
A simple test: Do a single-leg bridge. If your hips drop or your lower back arches, glute weakness is likely contributing.
Assess Flexibility and Posture
Tight hamstrings limit hip mobility, increasing strain. Try the seated forward reach:
- Sit with legs straight, feet against a wall.
- Reach forward: If you can’t touch your toes, tightness may be a factor.
Also check your hiking posture: Leaning forward shifts load to hamstrings. Stand tall, engage core, and use trekking poles to offload.
Consider Prolonged Sitting Effects
Sitting compresses the proximal hamstring tendon at the sit bone. If your pain flares after driving home from a trailhead or sitting post-hike, proximal hamstring tendinopathy is likely.
💡 Pro tip: Sit on a cushion or lean slightly forward to reduce pressure on the tendon.
Begin Rehab When Pain Allows
Start gentle exercises as soon as pain permits—this prevents stiffness and builds resilience.
Start With Isometric Holds
These activate the muscle without movement—ideal for early recovery:
Hamstring Set (Glute Squeeze)
- Lie on back, knee bent, foot flat.
- Press heel into floor and gently squeeze back of thigh and glutes.
- Hold 5 seconds, repeat 10 times.
Do this 2–3 times daily to maintain neuromuscular connection.
Progress to Eccentric Loading
Eccentric contractions (lengthening under load) rebuild tendon strength:
Nordic Hamstring Curl (Beginner Version)
- Kneel on a soft surface, anchor feet under a couch or with a partner.
- Slowly lower your torso forward, keeping hips stable.
- Use hands to catch yourself at the bottom.
- Push back up using arms.
- 3 sets of 5 reps, every other day.
⏱️ Build slowly—this exercise is highly effective for injury prevention but challenging.
Add Range-of-Motion Drills
Restore smooth movement with:
- Heel Slides: Lie on back, slowly slide heel toward buttocks.
- Supine Knee-to-Chest: Pull one knee at a time toward chest, keeping low back flat.
- Standing Leg Swings: Forward/backward swings, 10 per leg.
Do these daily for 5–10 minutes.
Prevent Recurrence With Smart Training
Most hamstring pain comes back because hikers return too soon or skip strength work.
Warm Up Before Every Hike
Skip static stretching before hiking. Instead, do a 5–10 minute dynamic warm-up:
- Walking lunges: 10 per leg
- Leg swings (front/back and side-to-side): 10 per leg
- Bodyweight squats: 15 reps
- High knees: 30 seconds
This primes hamstrings for eccentric work and improves blood flow.
Strengthen the Posterior Chain
Build trail-ready hamstrings with these key moves (2–3x weekly):
| Exercise | Focus | Reps/Duration |
|---|---|---|
| Split Stance Romanian Deadlift | Hamstring & glute control | 3×8 per leg |
| Single-Leg Deadlift | Balance + eccentric strength | 3×6 per leg |
| Good Mornings | Spinal stability + hamstring stretch | 3×10 |
| Slider Hamstring Curls | Isolated hamstring loading | 3×10 |
✅ Perform with slow, controlled motion—especially during the lowering phase.
Fix Left-Right Imbalances
Most people have one stronger side. Prevent overuse with unilateral training:
- Do all single-leg exercises starting with the weaker side.
- Match reps on the strong side—don’t do more just because you can.
- Include hip hikes, arch balance drills, and Cossack squats to improve pelvic control.
Even small imbalances lead to big problems over miles.
Optimize Hiking Technique and Gear
Your form and equipment play a bigger role than you think.
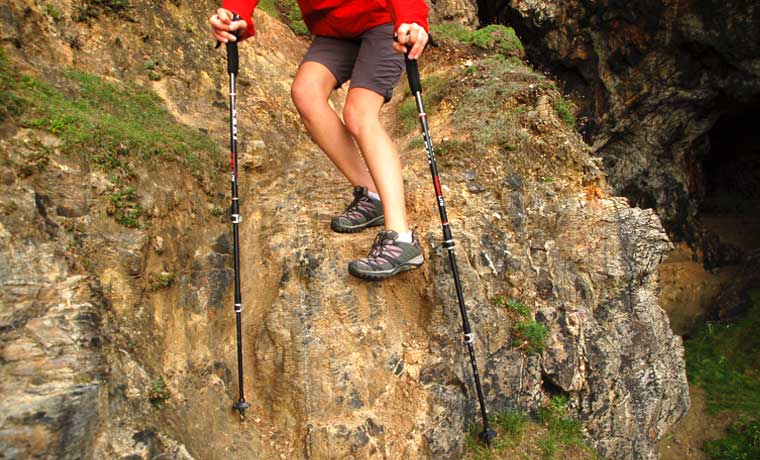
Use Trekking Poles to Reduce Load
Poles cut hamstring strain by up to 25% during downhill hiking. They allow arm drive to absorb impact and reduce braking force from the legs.
🏔️ Technique: Plant pole opposite foot, keep elbows bent, engage core.
Wear Proper Footwear
Shoes with good heel cushioning and grip reduce sudden slips and micro-tears in muscle fibers. Replace hiking boots every 500–800 km.
Follow the 10% Rule
Avoid sudden jumps in trail difficulty:
- Increase weekly hiking time, distance, or elevation by no more than 10% per week.
- Example: If you hiked 10 km this week, add ≤1 km next week.
This lets muscles adapt gradually.
Perform Post-Hike Recovery Routines
Cool down properly to reduce next-day soreness and support long-term resilience.
Do These 5 Stretches After Every Hike
Spend 5–10 minutes stretching while muscles are still warm:
1. Hip Flexor to Hamstring Flow
- In a staggered stance, reach opposite arm overhead.
- Push hips forward, then hinge back to stretch front hamstring.
- 10 reps per side.
2. Standing Quad Stretch
- Pull ankle to glutes, chest up, hips forward.
- Hold 10 seconds, repeat 10 times per leg.
3. Seated Spinal Twist
- Sit with feet together, twist torso.
- Hold 5–10 seconds per side.
4. Butterfly Stretch
- Sit, soles of feet together, hold shins.
- Sit tall, gently press knees down.
- Hold 10 seconds, repeat 10x.
🎒 Modify: Sit on your backpack to reduce low back strain.
5. Dynamic Hip Flexor + Hamstring Combo
- From staggered stance, push hips forward (hip flexor stretch), then hinge at hips (hamstring stretch).
- Move slowly, 5 seconds each way, 10 reps per side.
Hydrate and Refuel
Replenish electrolytes and protein within 60 minutes post-hike:
- 20–30g protein (e.g., shake, Greek yogurt, chicken)
- Water + sodium/potassium (e.g., coconut water or sports drink)
This speeds muscle repair and reduces DOMS.
Know When to See a Doctor
Most hamstring pain resolves with rest and rehab—but some cases need expert care.
Seek Medical Help If:
- Pain lasts more than 1 week despite rest
- You felt a “pop” during activity
- There’s visible bruising or a lump in the thigh
- You can’t walk without a limp
- Pain becomes constant, even at rest
Diagnostic Tools Your Doctor May Use
- MRI: Best for identifying tear grade and location (muscle vs. tendon).
- Ultrasound: Real-time imaging to assess tendon movement and inflammation.
- X-ray: Rules out avulsion fracture (bone pulled off by tendon).
If diagnosed with proximal hamstring tendinopathy, treatments may include:
- Heavy Slow Resistance (HSR) training – proven to rebuild tendon strength
- Shockwave therapy (ESWT) – for stubborn cases
- PRP injections – platelet-rich plasma to stimulate healing
🩺 Early diagnosis = faster recovery. Don’t ignore persistent buttock pain.
Recovery Timeline and Return to Hiking
Healing takes time—especially for tendons. Rushing back leads to reinjury.
Expected Recovery Durations
| Injury Type | Recovery Time | Return to Hiking? |
|---|---|---|
| Grade 1 Strain | 3–7 days | Yes, on flat terrain |
| Grade 2 Strain | 3–8 weeks | Gradual, with clearance |
| Grade 3 Tear | 3–6 months | Only after rehab + doctor approval |
| Tendinopathy | 3–12 months | Phased return, avoid hills initially |
Safe Return-to-Hike Plan
Follow this progression:
- Week 1: Walk on flat ground, pain-free.
- Week 2: Add 15-min hike on gentle trail.
- Week 3: Increase to 30 min, include slight inclines.
- Week 4+: Gradually add elevation and distance (≤10% increase weekly).
✅ Clearance rule: Only return when you can do 3x single-leg bridges and heel raises without pain.
Final Prevention Checklist
Stay trail-ready with this routine:
✅ Weekly:
– 2 strength sessions (deadlifts, Nordic curls, single-leg work)
– Daily stretching or yoga
✅ Pre-Hike:
– 10-minute dynamic warm-up
– Check footwear and pack weight
✅ During Hike:
– Use trekking poles on descents
– Maintain upright posture
– Take breaks every 45–60 min
✅ Post-Hike:
– 5–10 min cooldown stretch
– Refuel with protein + carbs
– Foam roll quads and glutes (not directly on hamstrings)
✅ Long-Term:
– Follow the 10% rule
– Address imbalances early
– Listen to your body—sharply stop if pain spikes
Hamstring pain after hiking doesn’t have to be inevitable. With the right preparation, recovery habits, and strength training, you can hike longer, steeper trails—pain-free. The key is treating your hamstrings not just as muscles to stretch, but as critical stabilizers that need strength, balance, and resilience. Start small, stay consistent, and enjoy every step of the journey.